
Plums are a delicious summer fruit that come in various colors, flavors, and sizes. One thing they all have in common is that they spoil fairly quickly, so the window to enjoy them fresh is quite short. The good news is that plums can be made into delicious jam and other preserves. In this blog article, we share a plum jam recipe and explore other ways to preserve plums: canning, dehydrating, and freezing.
Plum varieties
First, let’s discuss plum varieties a bit, as the variety can determine how you use them. There are the big, fleshy plums you typically find in stores, but we do not grow those in our cold climate. These plums are best for eating fresh, and they would also make a delicious jam or canned plum.
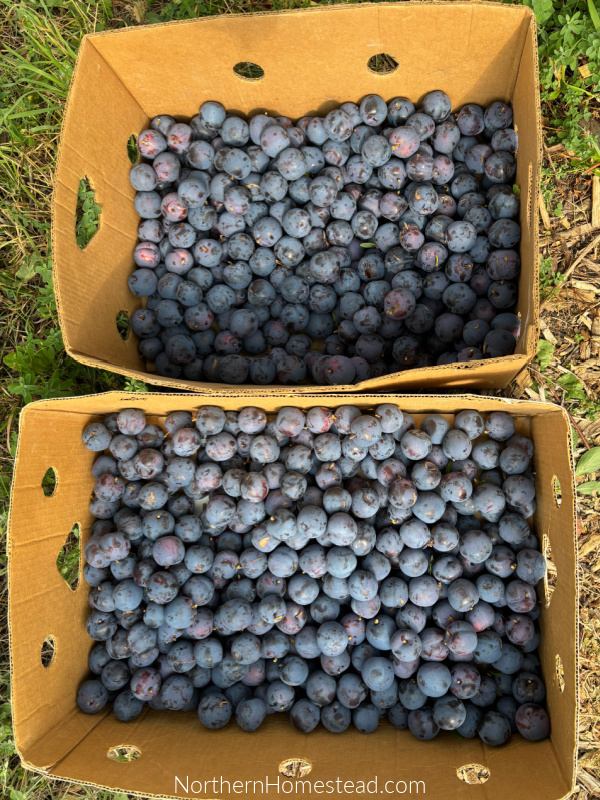
The plums we grow are typically smaller in size, and they vary in flavor—some have a tart skin, while others are sweet throughout. The plums with tart skins are best for making jam and chutney, as their skin can be too overpowering in other dishes. The sour skin is edible and rich in beneficial antioxidants like anthocyanins; its tartness contrasts with the sweet flesh of the plum.
To reduce the sour taste in preserves—especially if your plums are too tart—you can remove the skin by blanching the fruit in boiling water for a short time, then cooling it in an ice bath to make peeling easier.
Plum Jam Recipe
Growing up, plum jam was a staple in our house. Big slices of homemade bread spread with homemade plum jam were my usual breakfast before school. Being able to make it again from our plum trees here in a colder climate is quite special to me.
The Mount Royal plum is quite similar to the plums I grew up with, so I made a jam that resembles my childhood memories. Although I’m sure the method was different back then, we would simply cook plums and sugar until it thickened to our liking.
Speaking of thickening up, I’ve never been a fan of pectin jam. I would rather have a somewhat runnier jam than use pectin. However, if you like pectin, sweet plum jam can easily be made with it. Use no-sugar pectin and follow the instructions.

If you’re using sour skin plums, the skin contains enough natural pectin to thicken the jam. In that case, I recommend blending the jam before filling it into jars, as having pieces of bitter skin in the jam is not very pleasant. Blended together, it has a delicious bittersweet flavor.
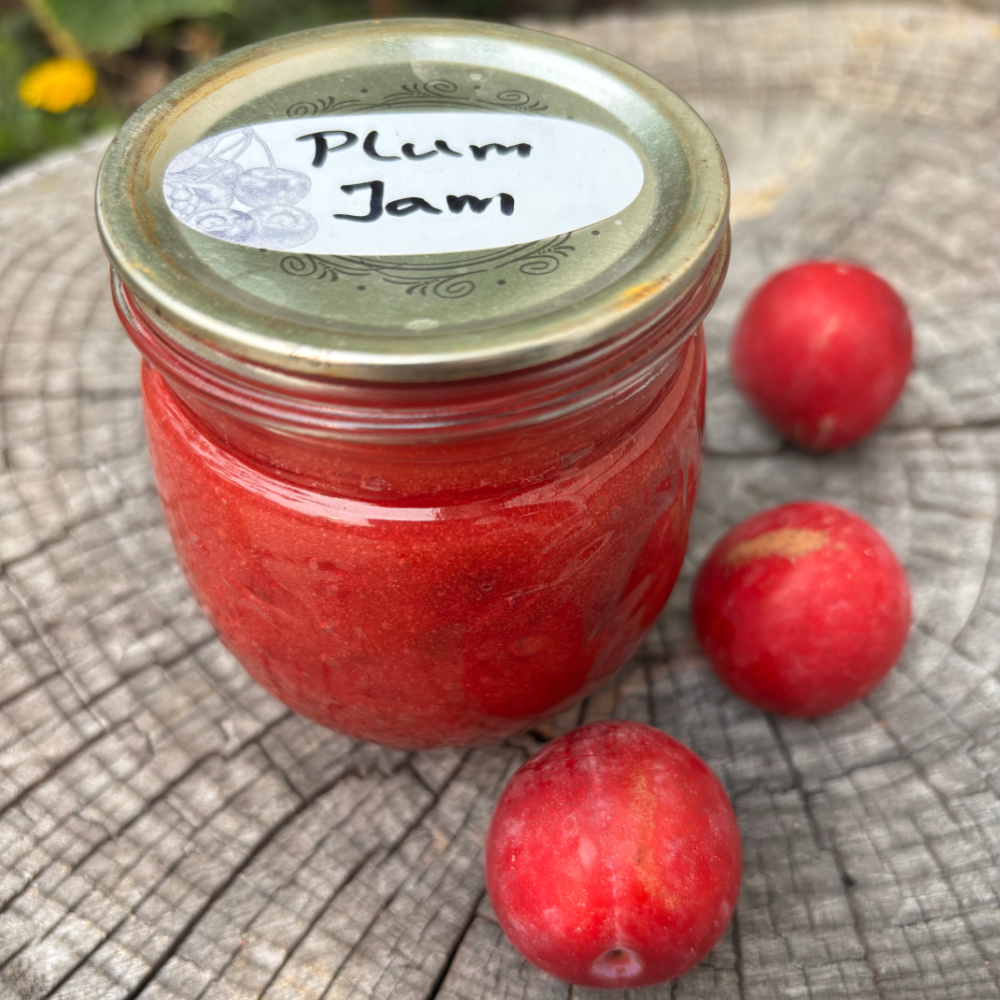
In the plum jam recipe provided below, I used Pembina, left the skin on, and blended it, which resulted in a deliciously bittersweet flavor. The unblended jam was made from Mount Royal plums. As you can see in the pictures above, the color and texture are very different.
- 800 (6 cups) grams plums
- 400 - 800 grams (2-4 cups) sugar
- 2 Tablespoons lemon juice
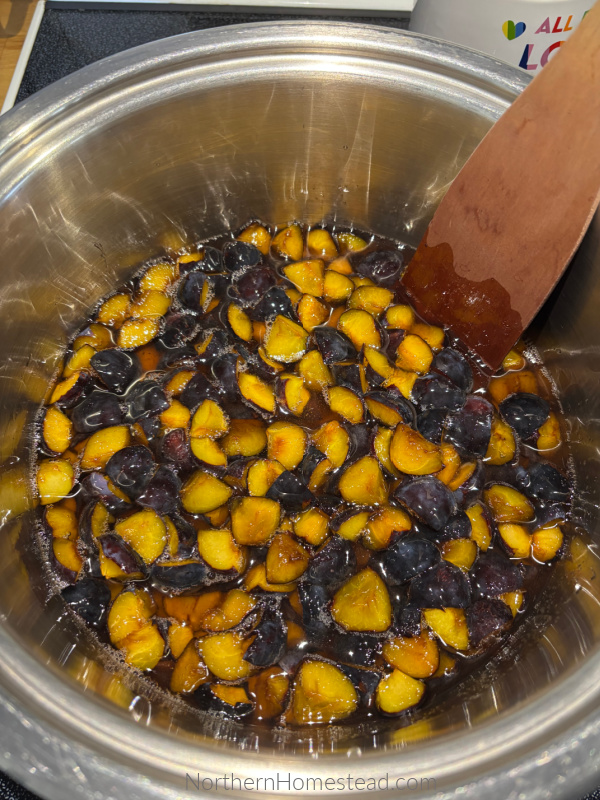
- Cut up the plums into halves if blended or into quarters if you want to keep the pieces whole
- In a saucepan, combine the plums, sugar, and lemon juice. Mix well, and let sit for a couple of hours or overnight, to allow all the juices to come out
- Cook over medium heat
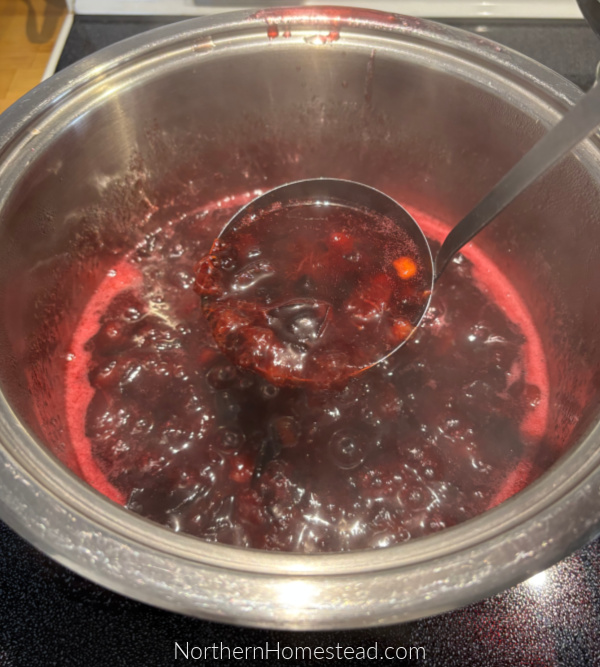
- If needed, take the foam off; it is optional, since the foam will reduce some over the cooking time
- Keep cooking and stirring until the mixture thickens to your liking, 10- 20 minutes
- To blend the jam, transfer it to a blender or use a hand blender and blend to your liking.
- Ladle the jam into clean jars
- Cover with lids and screw on bands finger tight
- Process in a water bath or steam canner for 15 minutes
Dehydrated plums
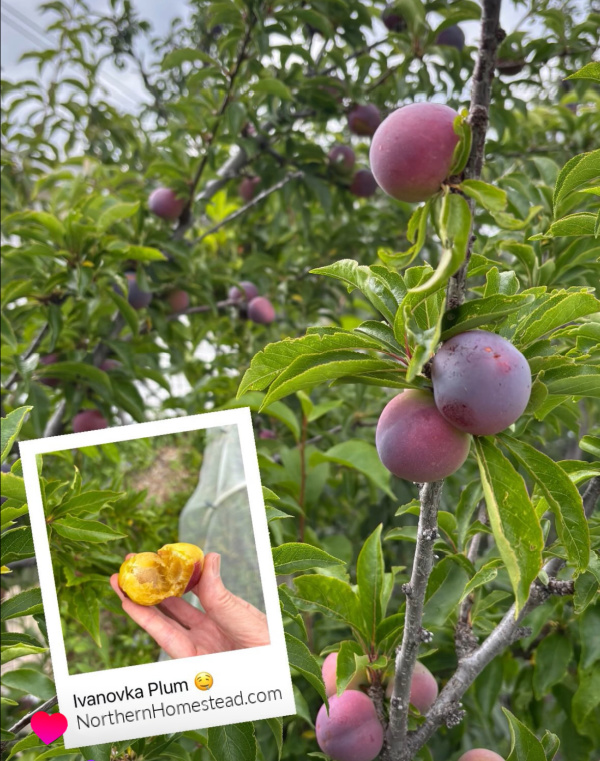
We grow an Ivanovka plum tree in our garden, solely because of the name. Ivanovka is where I grew up, and plums were my dad’s specialty. So when I learned about a hardy plum variety named Ivanovka, I knew I had to have it. Fortunately, it’s also delicious.
The plums my dad grew weren’t Ivanovka; they were much bigger and very sweet. One way we preserved them was by dehydrating them. We would wash, pit, and halve bowls of plums to get them ready for drying. Growing up in Central Asia, we didn’t have electric dehydrators; we didn’t need them. We used a flat roof, and since I was the youngest in the family, I was sent up to the roof to spread out the plums one by one, skin side down. I spent many hours doing just that.
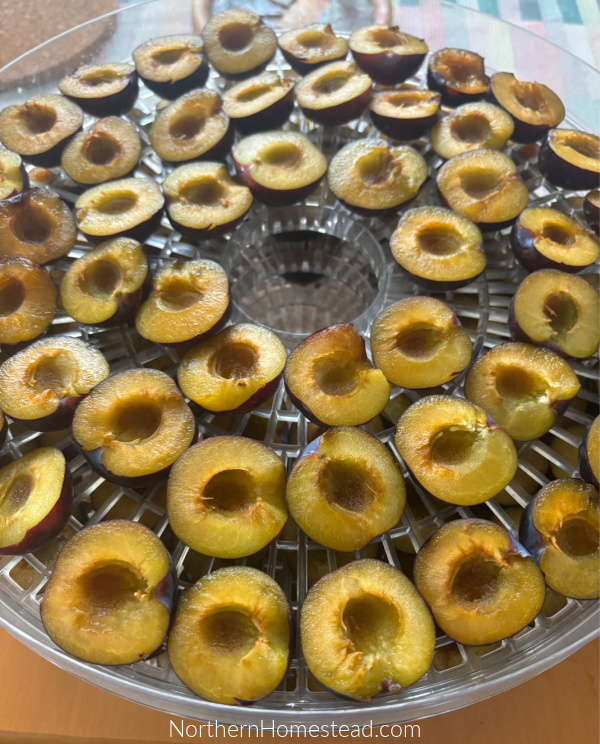
Currently, I use an electric dehydrator. For larger portions in a sunny climate, building a DIY solar dehydrator is an excellent option.
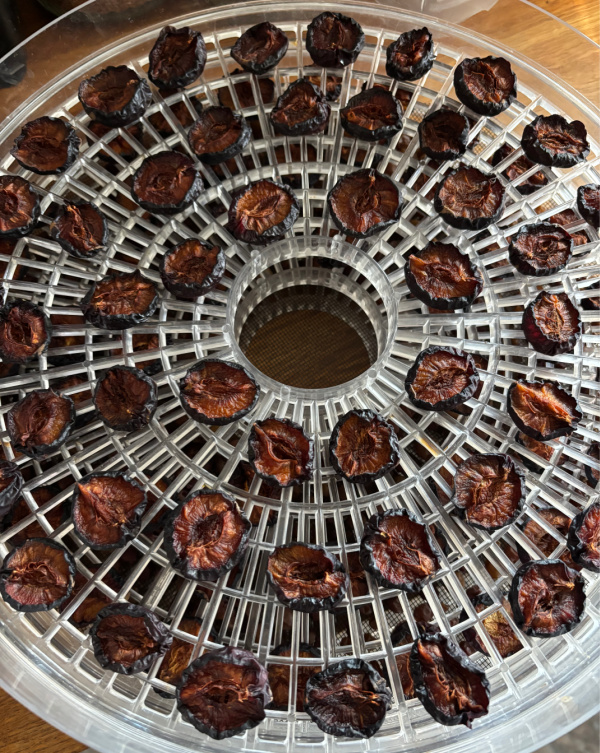
Layer the plums, skin side down, and let them dehydrate. I prefer not to dehydrate my plums for shelf storage; instead, I freeze them to preserve their texture, as this prevents them from becoming too chewy. However, plums can be dehydrated thoroughly to be shelf-stable. When storing them, use a fabric bag to allow for some airflow.
For dehydrating, use plums with a sweet skin. Bitter plums do not make very delicious dried plums.
Plums in syrup
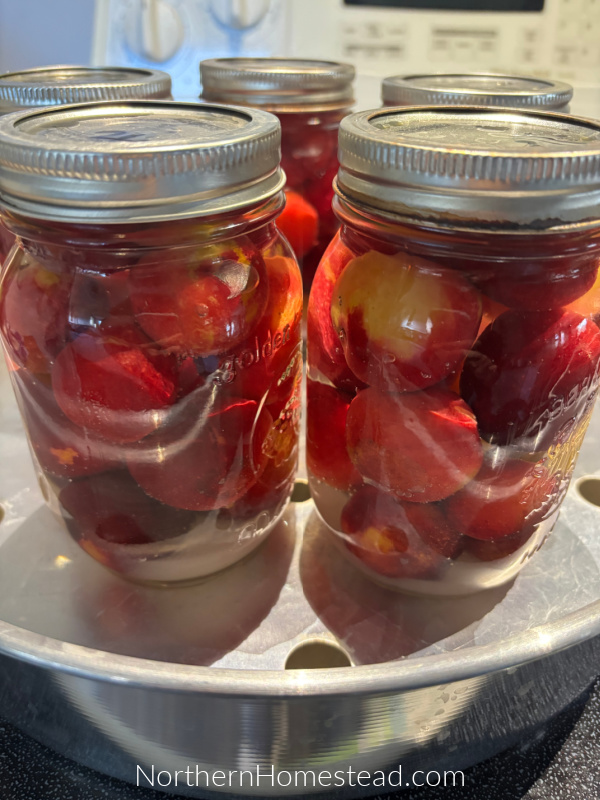
To prepare plums in syrup, choose ripe and flavorful plums. You can either pit them or leave them whole. This method works particularly well for non-freestone plums. If you decide to use whole plums, be sure to prick each one to prevent them from bursting during processing.
Fill the jars with plums, whole or halves, and top with light or medium syrup, leaving 1/2 inch headspace.
Light syrup: 2 1/4 cups sugar. to 5 1/4 cups of water.
Medium syrup: 3 1/4 cups sugar to 5 cups of water.
Remove air bubbles and adjust headspace if needed. Wipe rims, center lid on jar, screw band down fingertight.
Process in a waterbath or steam canner, pints (500ml) for 20 minutes, quarts (1 L) for 25 minutes.
Freezing Plums
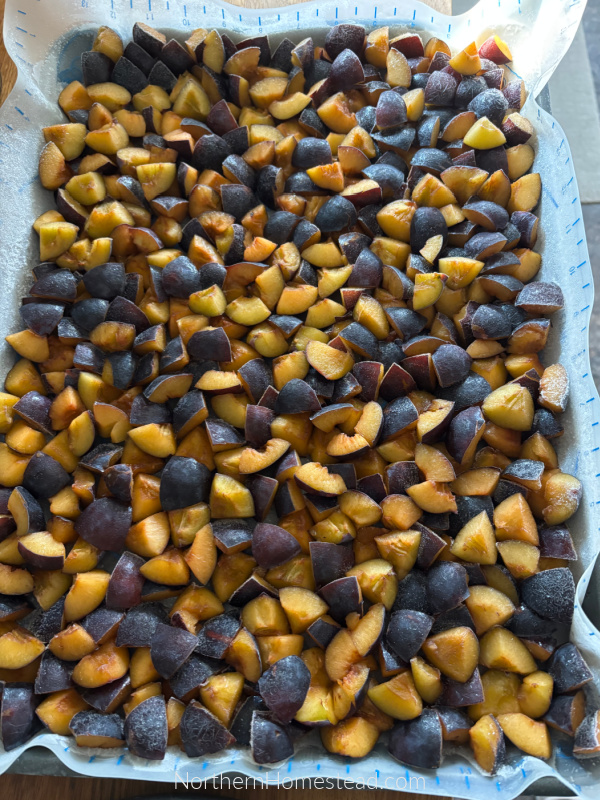
Plums freeze quite well and can be used in various recipes, such as Streuselkuchen, a classic German yeast cake, or any other dish where fresh plums are desired.
To freeze plums, start by washing them and removing the pits. Then, cut the fruit into halves or quarters. Arrange the pieces in a single layer on a baking sheet and freeze. Once frozen, transfer the plums into a freezer bag or container. Be sure to label it and store it in the freezer, where they will last for several months.
What is your favorite method for preserving plums? Please share your thoughts in the comments below.
We invite you to subscribe to Northern Homestead and follow us on Instagram, Facebook, or Pinterest for more great recipes.

Leave a Reply