
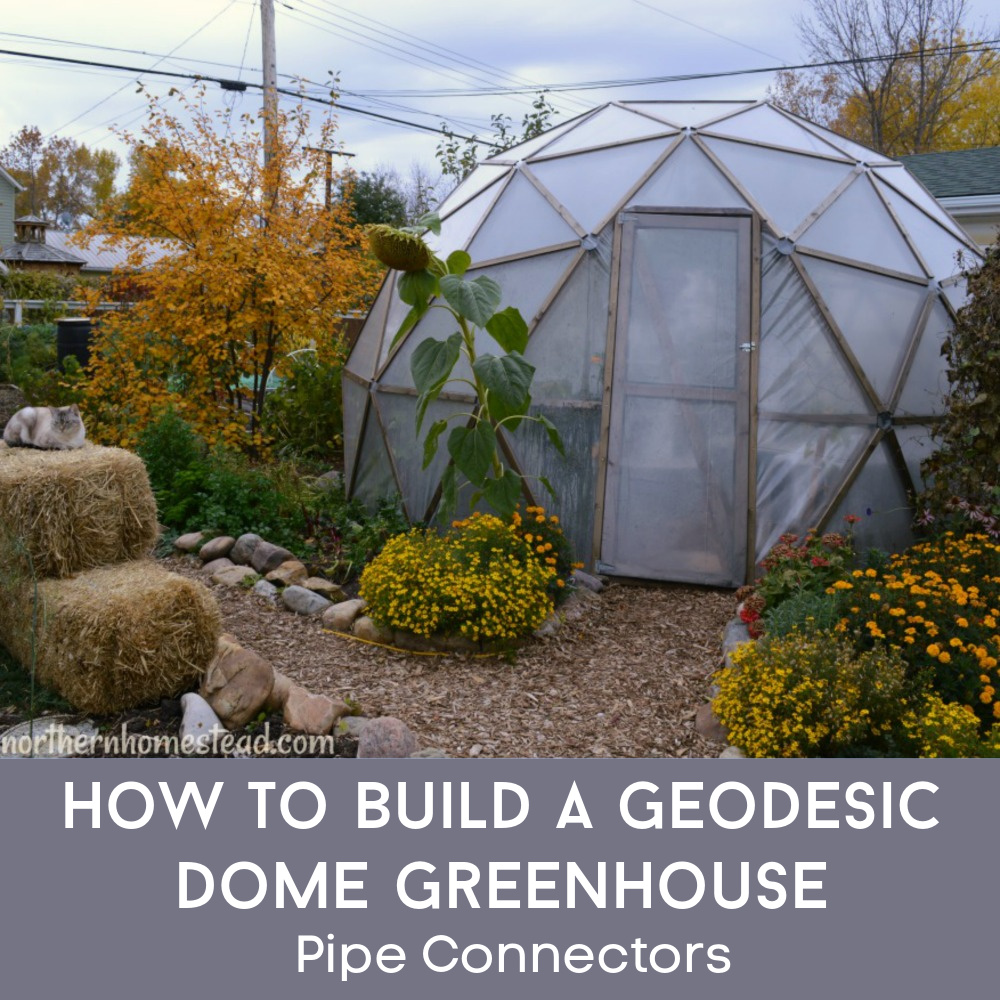
We built our second geodesic dome slightly different from our first one several years ago. In this article, we share how to build a geodesic dome greenhouse using pipe connectors. It is our version 2; you can read all about version 1 in How to Build a GeoDome Greenhouse.
Why did we use pipe connectors?
A couple of reasons besides me looking for a new challenge were here at play. Firstly, the cone joint used in the first dome was unsuitable for heavy snow loads, and some users have had their geodesic domes collapsed under the snow load. We still think that it is a great way to build a GeoDome, but maybe not in areas with heavy snow. Secondly, this version does not require complicated joint cuts. I wanted to find a simpler way to build a geodesic dome greenhouse since I could see how many of our readers who tried to replicate our first dome struggled with the plans.
Is this Geodesic Dome Greenhouse version 2 any better
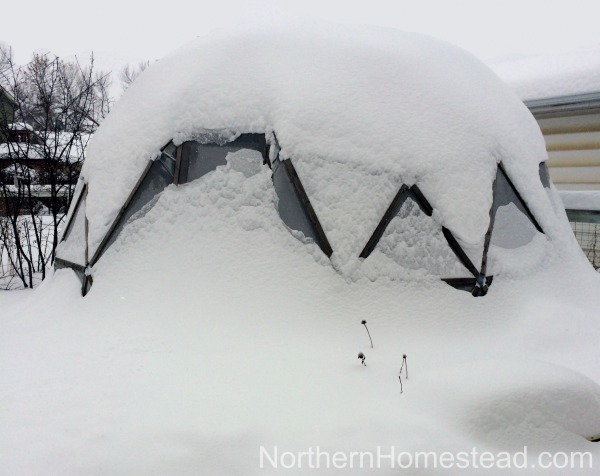
Version 1 has the advantage of being all wood and having a nice appearance. One disadvantage is that you will need a radial arm saw and some advanced woodworking skills, the other is the relatively weak cone joint that poses a point of failure. At the time of designing the first dome, I was not aware of the different stresses the joint is being subjected to, but with the newly acquired knowledge, I’d only recommend it in areas with a maximum snow load of 5″ at a time. Of course, it’s always possible to reduce the danger of collapsing the dome by clearing off the snow.
Version 2, using pipe connectors, has the advantage that it is an easier woodworking project with a much higher strength of the joint; this version of piped hubs is stronger, which is the critical piece in the whole structure, and its distinct appearance may be appealing for some people.
Material needed vor a DIY Dome Greenhouse
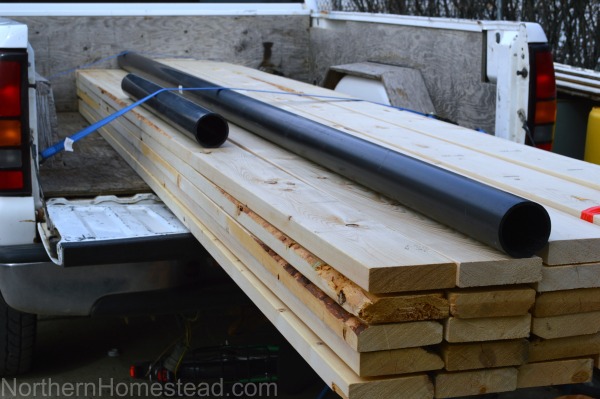
– 2×4 Lumber. We used untreated spruce lumber and stained it before assembling it. You could also use Douglas Fir for its structural strength.
– 3″ ABS pipe
– 1/4×1-1/2″(or 2″ long) Structural Screws
– Wood treatment.
– Covering. You can use greenhouse film, shrink film, or polycarbonate panels.
Tools used
– measuring tape
– square
– pencil
– level
– utility knife
– safety glasses
– hearing protection
– drill/driver
– compound miter saw
Geodesic Dome Greenhouse plans
We use the Acidome calculator, read more on how to use it in our first post. We encourage you to read the post and all the comments; chances are your questions have already been answered there.
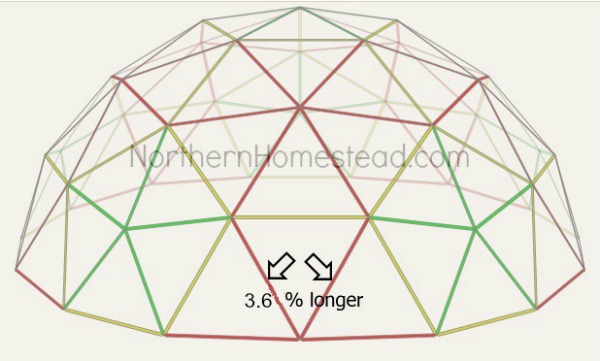
This time, our dome’s size is 15 feet (4.57 meters) in diameter at the bottom, and its frequency is 3V. The base of the dome is by default not perfectly aligned or level, you could either check off the box “Align the base” in the calculator or as shown in the picture below cut those red struts in that position in the first row 3.6% longer.
Making the pipe connectors
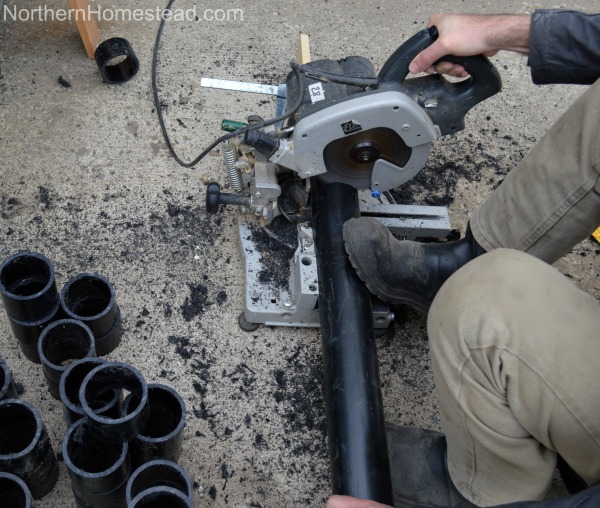
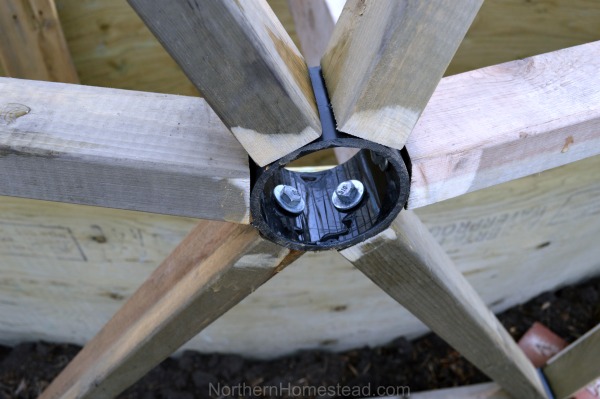
The hubs were made from 3″ black ABS pipes, which are usually used for drainage and venting. I cut the pipe into 3.5″ long pieces, which equal the depth of the struts. You would cut your hubs according to the depth of your struts.
On the Acidome calculator near the end of the page, you will find the diagram of the piped hubs(vertices). The lines crossing the circle indicate the location of the drilled hole in the hub. I spaced and drilled the holes on my hubs according to the drawing, but for convenience, you could space the holes on hub #1 equally at 60° as it’s shown for hub #2. I used a press drill to the holes and a knife to deburr the edges so it would not damage the greenhouse plastic.
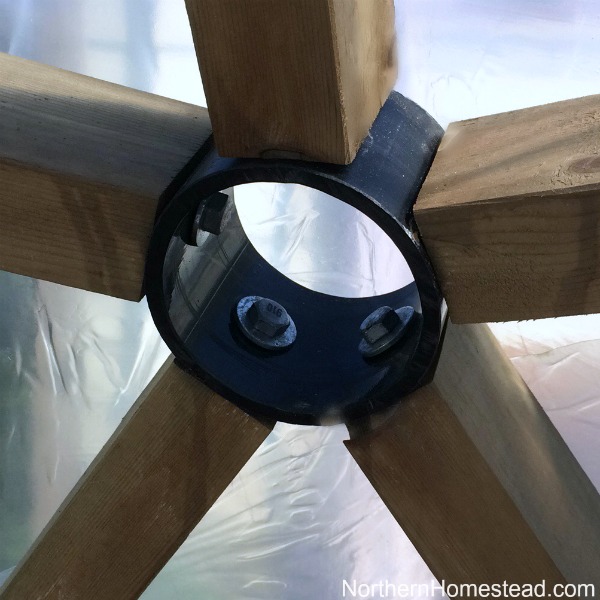
In the picture below you see me using lag bolts to attach the struts to the hubs, however, I’d recommend using structural screws, that you don’t need to have predrilled pilot holes. Because most of the struts are subjected to a compressive force, the screw’s main function is to hold it in place. Only the struts in the foundation ring and each ring in the next tier are subjected to a tensile force and because of that, you should be using longer screws.
The struts for the pipe connectors 3V geodesic dome
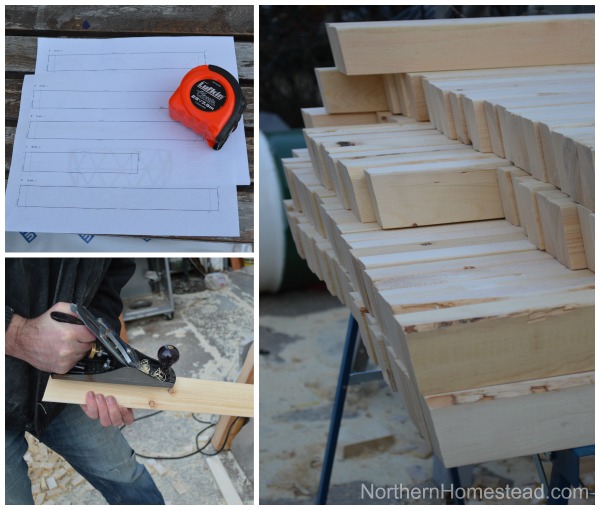
The side view of the struts shows the angled miter cut. The values for the angle for the different struts can be found on the Acidome calculator page. I also chamfered any sharp edges of the struts with a plane.
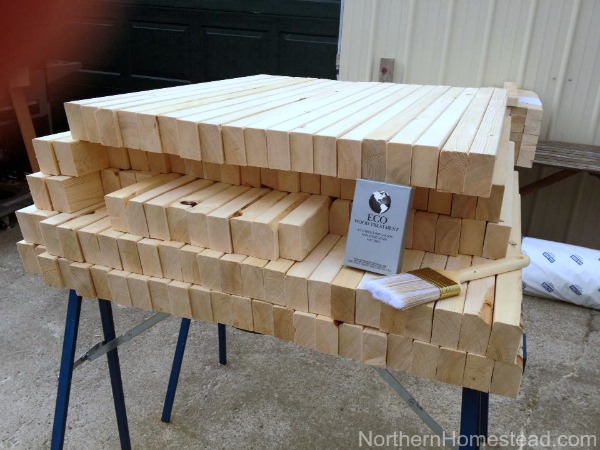
Instead of purchasing treated lumber with questionable chemicals, we choose to treat the lumber ourselves with an Eco wood treatment. UPDATE: A few years into using the dome we have noticed that the Eco wood treatment did not hold up to protect the wood from rotting. We do not have a real alternative yet but will update if we find something. Choosing lumber that is naturally rot-resistant is always the best way to go.
Assembling the geodesic dome greenhouse
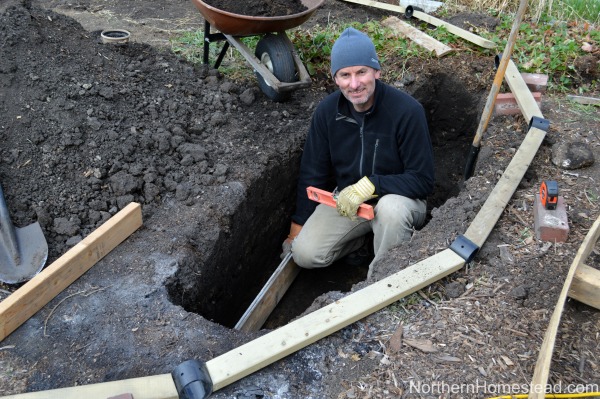
First, I assembled the foundation ring, but before continuing with the dome greenhouse, I dug out and built the water tank. Read more about the water tank here.
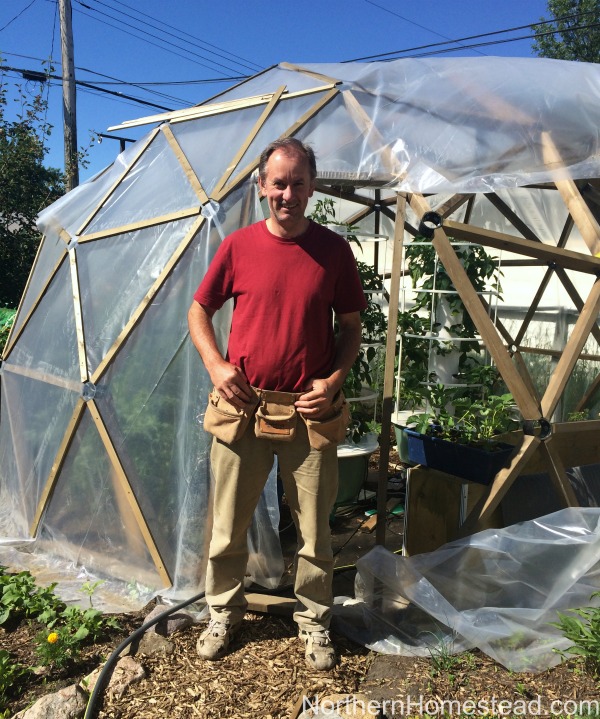
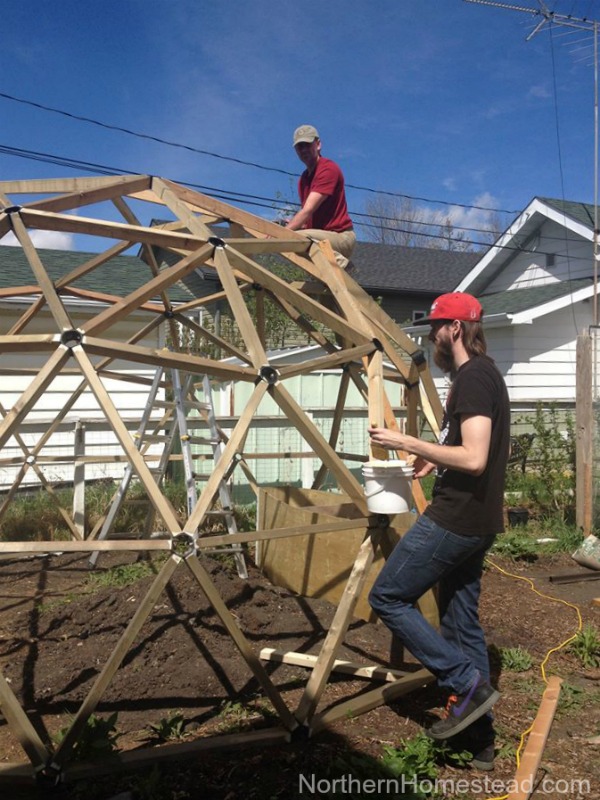
After completing the water tank, I continued connecting the struts to the foundation ring, creating triangles; I connected the tops of those triangles, which completed the second perimeter. Once all the parts are prepared, assembling them is just fun. With some help from our son, we had it done in about half a day.
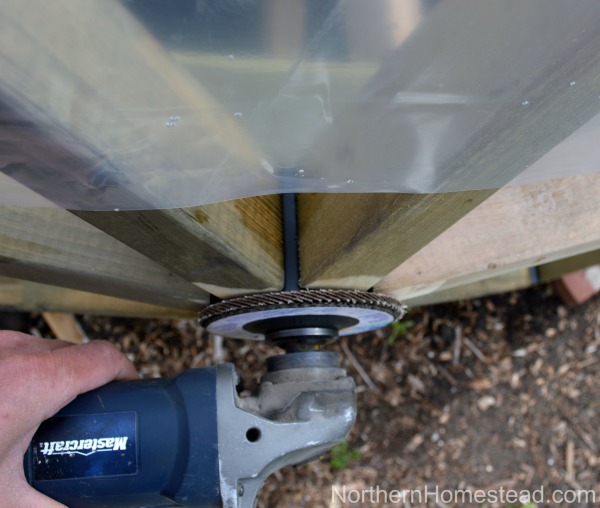
We sanded all the extending edges over the hub with an angle grinder and a sanding disc. This is important so the greenhouse plastic would not get damaged.
Do not forget to touch up any exposed wood with the wood treatment.
Covering the geodesic dome greenhouse
This time, we chose to cover the dome with shrink plastic. It was a bit more pricey, but I thought having an all-in-one cover would be really nice. Unfortunately, the shrinking process makes the plastic more opaque and less translucent. So, after trying it, we decided not to shrink the plastic but cut it to fit and hold it in place with extra planks as we did in our first dome. Based on this experience, we would not recommend shrink plastic for a greenhouse dome. Read more about covering a geodesic dome greenhouse here.

Our hope is that you find this ‘how-to’ for building a geodesic dome greenhouse using pipe connectors helpful. We would love to hear from you if you build one.
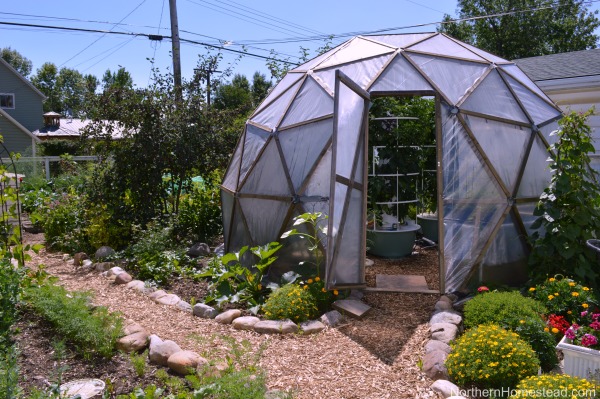
We love our geodesic dome greenhouse. The round structure allows for optimum light penetration and stability in storms and snow. The pipe connectors make it easy to repair the greenhouse if needed.
Don’t forget to subscribe to Northern Homestead and follow us on Facebook or Pinterest for the latest updates.


Your model greenhouse has been part of our dream in another cold climate. We’ll look forward to your Version 3 kit for next year. In the meantime, we’re drawing on your winter windowsill garden tips!
Hi, I noticed that with all your posts, you left out the length of the wood struts. Acidome doesn’t give me a length or they don’t work. My green house is 35 cm in diameter and I chose 3V, 7/12 of sphere, and left everything else default. The website says the struts should be like 14 cm but that doesn’t work. I can’t work off of angles alone because of the nature of my project. Is there a unit or formula I am missing?
Thanks so much,
Oliver
Hi, Love the greenhouse! Please explain how you manage to screw inside the small pipe pieces. A regular screwdriver won’t fit inside an an angle well enough to grab and push the screw in. I’m mystified how you did it.
the screws are 1-1/2″ lag bolts. In the 3″ pipe sections there is room for a box end wrench, ratcheting box end, ratchet and socket (depending on the profile) , and maybe even an air ratchet ( also depending on the profile) . When the 2″ screws (bolts) are used at least the first two are still valid.
I understand how you installed the lag bolts, but to advertise the use of structural screws of a longer dimension doesn’t make sense for me. You wouldn’t run into issues installing the screws through the first three holes in the ABS joint. But when you installed the last three studs you wouldn’t be able to gain access for your impact driver to secure the remaining three screws because the first three studs would be in the way.
When assembling the dome you start with the bottom struts and work your way up to the very top. Suppose the first three screws fasten the downward struts, then you put another screw through the next hole, place the ratchet onto its head pressing against the inner wall of the ABS pipe. Then holding the strut with your second hand place its end onto the tip of the screw and start turning. It’s advisable to mark the point on the strut where the screw needs to go in. Also, an air ratchet will make this job a breeze.
Hi Jakob & Anna,
Thank you for these write ups and posting your knowledge and experiences with these very cool greenhouses (and your many other projects). Ive read through both dome build pages in detail along with the comments. I have one main question:
How did dome 1 fail under the snow load?
Im assuming the failure was at a joint, hence dome 2’s revised joint style.
Was the failing joint near the top of the dome? or bottom or somewhere in between? Was it anywhere near the door?
Did the deck screws at the joints fail? Or did one of these pull out or split out of the side of one of the spars?
Did one of the wedge-shaped spar ends get driven through the joint like a stake?
Im considering a build using the dome 1 style of cone joints and that is why Im curious. Oddly the complexity of the joint preps is what attracts me to this method.
Thanks,
Jeff
Our dome 1 has never failed, it’s only that some people would mention that their dome had collapsed under the snow load. We don’t have any details neither on the structure nor on the point of failure.
Hello from the West coast,
I came across your plans for the Geodome greenhouse and am so excited to get started on this project with my husband as our first major project in our first home. I am completely new to woodworking and had just a few questions if you would be so gracious as to answer them I would greatly appreciate it.
The first was my newbie confusion on just how long I will be measuring my struts and I’m totally lost. I noticed there are two different numbers, in the section under ‘edges’ for A it shows a length of 867mm with 16mm on either sides to make up the 83.2 degree angle. However in the next section labelled ‘faces’ for A it shows 944mm with a 83.2 degree angle that is a difference of 77mm. Is this because the section labelled ‘faces’ is taking into account the addition of the Vertices or am I completely missing something.
The second question was wether or not you believe I would still require a heating and cooling system with the water tank method in a hardiness climate of 7, I’m from Vancouver Island on the west coast so far from the chilly temperature you Northern Albertans have to deal with just curious if this step would still be necessary in a significantly milder temperature.
Thank you so much for creating an amazing website with such great insite and help it is so appreciated and inspiring.
Cheers,
It is very exciting to build this beautiful dome-shaped structure!
You already answered your first question. It is absolutely correct, the pipe diameter is 76mm and the ‘faces’ section is taking it into account. Sorry for the confusion.
In your climate, you might not need the heating and cooling system to keep the dome temperatures in the winter above freezing. And in the summer you would certainly require good ventilation so it would not overheat on hot sunny days. It would still be worthwhile to have a small water tank above ground for thermal mass. It’s also convenient to have warm water for the plants.
Thank you for the kind words. It’s very encouraging and much appreciated.
Cheers
Hi,
I was wondering if and when the v3 of less involved assembly version will be around?
I’m considering building one here in Norway during the spring/summer.
Thank you for this fantasic informative blog!
Thanks for kind words.
We are working to have the kit available by the summer of 2019.
Amazing work! What sort of foundation did you use for this?
We did not use any foundation, just placed the dome on top of garden soil. Since the dome is round it does not go anywhere. However, you can build whatever foundation fits your needs.
I just stumbled upon this as I was researching greenhouses. I live in a area with a lot of open area so wind is a issue. What kind of wind speed have you seen them withstand? It’s not uncommon to have 70 or 80 mph wind speeds around where I am at. Thank you.
Yes, we do get that kind of wind here too. However, our dome is in a sheltered location. We have not secured our dome to the ground at all and it has not budged. If you are in open, you might consider securing the structure. Also, we build our door the way that it is integrated into the structure, no corners for the wind to grab. The whole dome is round and the wind just goes around and above.
Do you have any snow load calculations for this style of joint?
Ever thought of using aluminum pipe instead of the black PVC?
How much strength does the black PVC lose in the cold?
Aluminum is not readily available to most people, so it wasn’t an option. We don’t have snow load calculations, but if you happen to come across this kind of information, we’d like to hear from you. Cheers!
Is there anyway you can give a more detailed explanation of the Acidome software? I’m trying to use it but I’m kind of confused about some of the edges calculations and don’t want to waste hundreds of dollars worth of lumber.
Please read the first post with all the comments about building the GeoDome.
Enjoyed your site. I have a similar question to one already posted. Looking at the cutting layout and not sure why there is an angle given on the “long” sides of the edge? One example shows L85.1 degree on one line and L84.5 on the opposite side. Are we looking at the top of the edge? The dashed line indicates the bevel to the hub/verticeses? I assume this would make sense if I am looking at the top of the member. Just unsure about the long side angles shown.
Take care
Brian
The angles on the “long” side are only of importance if you are using “hard faces” like polycarbonate sheets.
Cheers.
Hey Jakob,
This is such a great design, I think I will be trying to build mine this summer. The Acidome calculator is an awesome tool!
My only question, and maybe Im being dense here, is where do I find the values for the miters on each stud? Its not the 78.1, 78.5 and 80 degree values found in the ‘Edges’ section, or is it? Also, in that same section, Piece B shows two different values (82.8 and 85.9) on the top and bottom of the piece. Are these angles, distances? Im sorry if you answered this question before but I’ve read through the V1 and V2 comments and plans to try and understand but Im still lost.
Thank you for the help!
The value for the miters on each stud are shown at the end of the corresponding stud.
This is really a marvelous and the most simple way to build a geodome I have ever seen.
I think the pipe idea is great as connector.
I am excited to build mine as quickly as possible.
Thank you very very much and congratulation for all your work.
Greetings from Switerland or just close to Switzerland in France !
Nice clear instructions describing geodesic dome framing and covering. I built one of these a long time ago. I am impressed with your hub configuration using PVC pipe and lag screws. So impressed in fact that I may build another. Best regards from Fritz Creek, Alaska.
Hi there,
Marvelous work, wanted to ask you if you ever thought about making it portable. That is, possibility of de-assembling it after winter for storage?
We have not, we use it in the winter for storage and like to start early in spring when there is still snow on the ground.
Good day from Florida. How did you do to build in the door frame into the dome structure? I started building the structure leaving out the hexagon where the door would be located and continued on with the build. This caused the structure to settle in a way that when I was getting to the top of the dome the designated pre-cut sections would be too short. When trying to compensate for that issue, the 1 1/2 inch screws were pulling out of the holes, stripping the holes out. So, I would highly recommend a longer screw. As long as you would be able to fit inside the connecting pipes. If you have any tips that you are willing to share, please shed some light. Kindest regards.
Sorry to hear about your troubles, I didn’t encounter any issue with our dome.
Hi, nice work! and thank you for the explanation. I have a question, the part of the full sphere is 5/12 or 7/12?
Greetings from Chile!
Thank you. The dome is 7/12 of the full sphere.
Thanks so much for the info. I live in South Africa and decided to build a 4.2m diameter dome with a 0.75m pony wall. It has worked out brilliantly and kept us busy while the whole country has been in lockdown due to Covid-19.
Would love to send you pics.
We would love to see pictures. The best way is by using social media.
Love the plans! We are starting our build soon and I have a question about the pipe diameter measurement in the software. You have 76mm (ID), but the pipe actually measures 89mm (OD). Which measurement should I use? I know it’s minimal, but overall could change the done quite a bit.
Thanks for your help!
You should use the 89mm (OD) dimension. Enjoy the GeoDome greenhouse!
Thanks a lot for sharing your building process, we just nearly completed our own dome using your method and it looks amazing. Quick question about the ventilation, did you use any system at all ? Windows, vents or other method? Seems like it’s going to get too hot in there for the plants. We are thinking about a roll-up type of ventilation but might be a little extensive to do everyday. Thanks for the input !
You could build windows powered by an Automatic Greenhouse Window Opener. Without any ventilation it can get very hot in there.
Hello to our Northern Neighbors! I am building a Geodome II for my pandemic project. We are in Colorado and I have decided to trench and insulate at the base to 30″ – based on advice from the CSU Extension office for our elevation/latitude. I rented a tiny excavator and put the trench in yesterday. I’ve also decided to poor 6 post holes with 4×4 posts as anchors, level with the bottom of the base, because sometimes we get crazy wind here and I want to anchor it. Probably overkill, but what the heck. I am including the pond and feel like a kid at Christmas – having a greenhouse is a lifelong dream for me. I have a big garden, but the growing season is short here. Funny story – I forgot my high school geometry and confused radius with diameter when prepping my plans on Acidome! I was getting ready to stake out my base in the trench and it wanted me to lay 15 ~6′ boards for my little 16′ diameter dome. Thank goodness I am used to having to double check my work (i.e. staking before purchasing and cutting the lumber!). I just wanted to say that while I was nervous about the scope of this project to begin with, if you are patient, read EVERYTHING twice and prep carefully, it is possible even for someone who has forgotten which is radius and which is diameter to follow the Acidome plans and your instructions. 🙂
I see you use the lag bolt, you say you recommend structural screws but i can not see for the life of me how i would get them to screw in. Any ideas or stick with the lag bolts.
I’d recommend structural screws, regarding screwing them in read this reply to a previous comment. How to install sctructural screws
Hello! I’ve got my plans printed and materials list read to take to the lumber yard, but am feeling daunted by the hubs. I have 6 unique hubs from the acidome formula I selected (8′ radius, flat base, 7/12). I am wondering if you can advise what tools/jigs you used to get the proper angles defined so that you knew where to drill in each hub? My angles vary from 55.7 up to 72, so I don’t think I can cheat and go with 60 all the way around. I am thinking about drilling a slot instead of a hole, and then using a rubber backed washer (on both sides?) so that I can build the wiggle room into my hub if I can’t figure out a way to drill the holes as the plans direct. I don’t own a drill press – I will have to mark along the circumference of the ABS and drill by hand. I’d be grateful for any advice you can offer. Thanks from Colorado, USA.
Just finished my first 7/12, flat base dome yesterday. Without your information this would have been a big challenge. After the materials were ready it took about 7 hours to assemble. Prepping the materials took approximately 4.5 days.
Tips… Definitely use construction screws. I used lag bolts which can easily strip out a strut. This didn’t happen but the potential for it is very high.
If you can find a machine shop to cut and drill the connectors, do it. This will save a significant amount of time.
Thank you for this amazing tutorial. Thanks to this website, I’ve purchased a TowerGarden (and gave you credit to the sales rep), built a beautiful garden with all your tips, and now I’m building my first dome! I recommend this site to everyone with an interest in growing and building!
I’m about to start my dome and I used Acidome.ru as my calculator. I would like for my 7/12 dome to be flat at the base, and would love if you could clarify: “or as shown in the picture below cut those red struts 3.6% longer” — do you mean only those two red struts in that position, or all red struts, or all red struts in that position in the first row? Perhaps I’m overthinking it, but any clarification you could provide would be huge!
Thank you so much,
David
Thank you so much for this amazing site, and for this fantastic tutorial. Thanks to this site, I’ve purchased a TowerGarden (I gave you credit to the sales rep), developed a productive garden, and am starting on my first dome! Thank you.
I am following your process, and I would like for the base to be flat. I would love if you, or someone reading this, could help clarify what you mean “or as shown in the picture below cut those red struts 3.6% longer.” Do you mean only two red struts in a position like the one you’ve pointed out? Or all red struts in that position on the first row? Maybe I’m overthinking this, but if anyone could help clarify I’d be super grateful!
Thank you,
David
Thank you, David, for your kind words. This is a great question, and yes, the different length applies to all those red struts in that position in the first row.
Cheers.
Thank you for your informative diary! I always enjoy reading about your continuing gardening adventures. One question: with the wood treatment, how long do you expect your wood struts to last before they need to be replaced? I ask because I am seeing some consistently wet spots at the joints from condensation and unsure if this is a problem.
We expect the wood struts to last for many many years. There is no sign of rotting at the joints yet.
Would your plans be able to work for a 22 foot dome/ or 24 foot?What are the costs for your plans? love domes.Thanks Tony
Yes, you can adjust the plan to whatever size you want. It is not our plan, just follow the link in the blogpost.
I am planning to build a geodesic green house this spring and am preparing the materials. I was wondering what kind of stain you used. I am looking for something that will last a long time as re-staining once it is built would be very difficult. There are so many different types oil based, water based, and many different opinions out there. Which brand di you use?
We used Eco Wood Treatment and so far 4 years and counting it works well.
Do you have a cost estimate for this? Thanks in advance 😎
It is so difficult to do a cost estimate since prices vary so greatly. It is better if you look for the materials needed at your local supply store.
How has version 2 held up? I’m in SE Alaska and planning to build a geodesic dome greenhouse this spring.
The connectors held up very well, as for the struts I’d recommend treated wood because they are constantly exposed to moisture. If you have access to larch lumber then IMHO it can be untreated.