

Fermented cherry tomatoes are a delightful treat. They have a sweet and sour flavor, bursting in your mouth with a refreshing explosion. Yum!
The only problem is getting them to that stage.
I have made fermented cherry tomatoes for years, but to be honest, the results were always hit-or-miss. One time, they would turn out beautiful, and the next time, I had to discard them.
My favorite book, Fermented Vegetables, could not help me either. It has information on fermenting green tomatoes, but not ripe ones. Tomatoes, although delicious, just didn’t ferment consistently well.
That was till I learned a little secret about fermented tomatoes. This German YouTuber shares it; being multilingual is really helpful.
The little secret is indeed a bit dirty. The trick is not to wash the tomatoes.
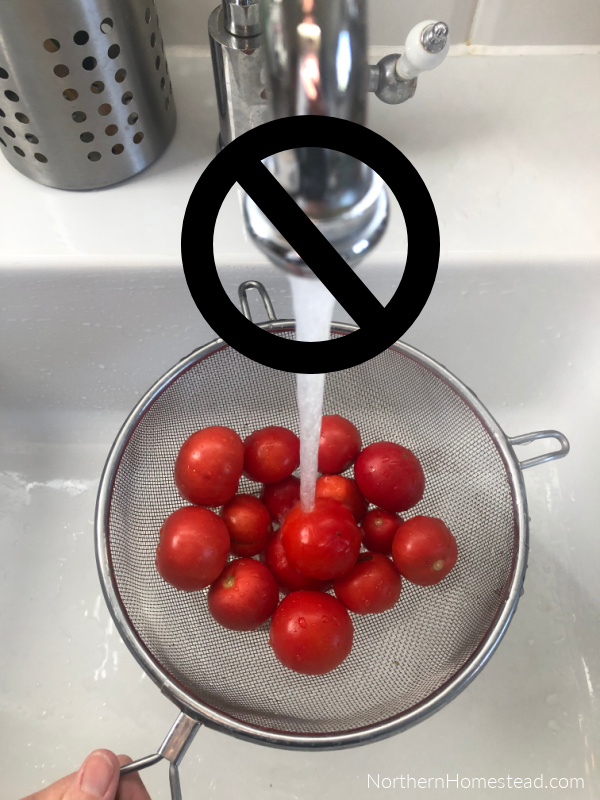
Tomatoes have a high sugar content and are protected by their skin, which makes the fermentation process more difficult to start. Leaving them unwashed allows the natural bacteria on the skin to initiate fermentation more quickly. Who knew?
I usually rinse them quickly, but don’t wash them thoroughly. While not washing them at all is even better, I can’t help but feel like a typical Virgo who wants to wash everything we eat, haha.
What tomatoes to choose for fermenting
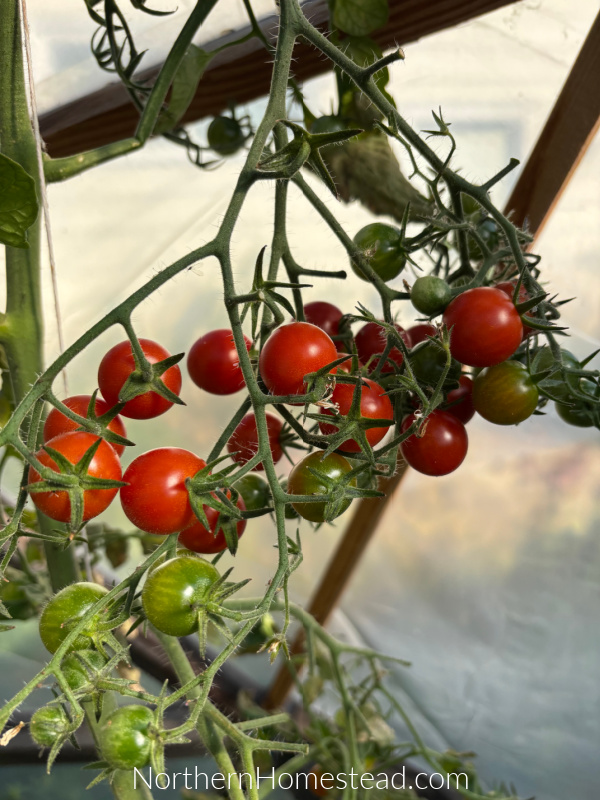
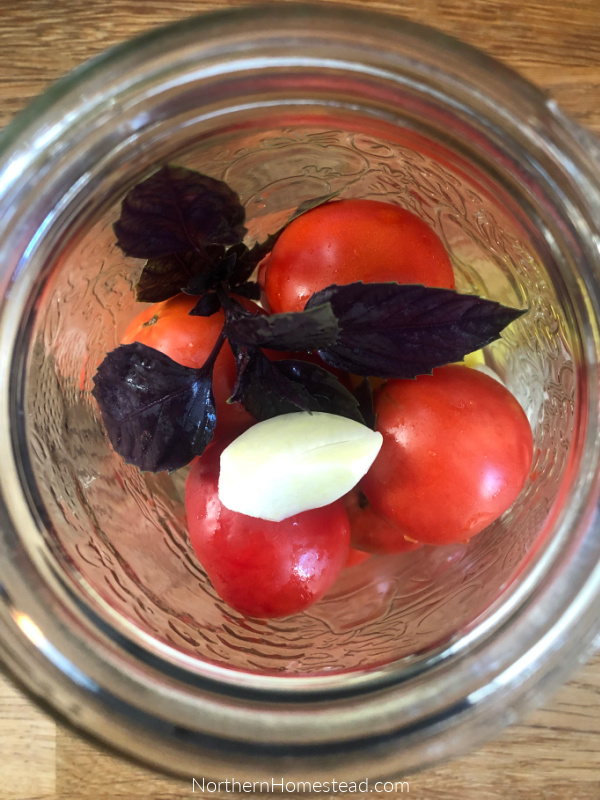
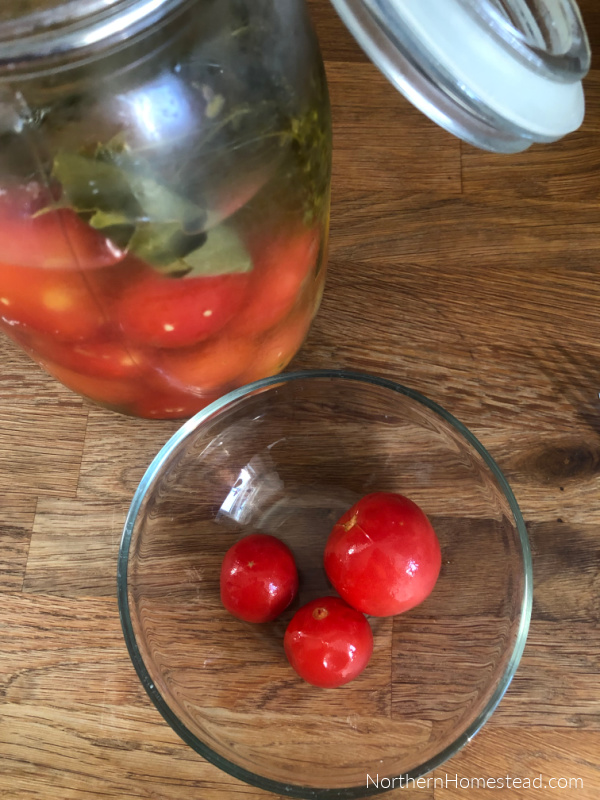
Cherry tomatoes tend to be very productive, making one wonder what to do with all of them. Fermenting them comes to the rescue. The Sweet Million variety, with its abundance of tiny tomatoes, is perfect for this purpose. However, any small tomatoes, from cherry-sized to slightly larger ones, are also great for fermenting. Ideally, you should be able to pop the whole tomato into your mouth.
Firm, slightly underripe tomatoes are best; they tend to stay firm for longer.
Preparing the cherry tomatoes for fermentation

As we established before, the tomatoes should preferably not be washed. Giving a quick rinse has worked for me. If homegrown, you can leave them totally unwashed. After all, they will be covered in a salt brine before being eaten.
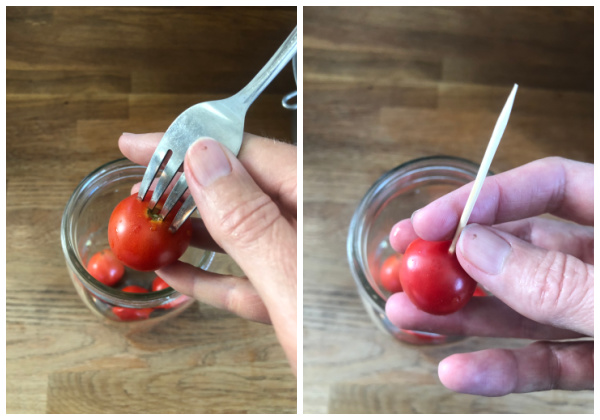
Use a fork or toothpick to make holes in the tomatoes. This allows the brine to penetrate the tomatoes, aiding in fermentation. I’ve found that tiny cherry tomatoes ferment well even without being punctured.
Spice it up
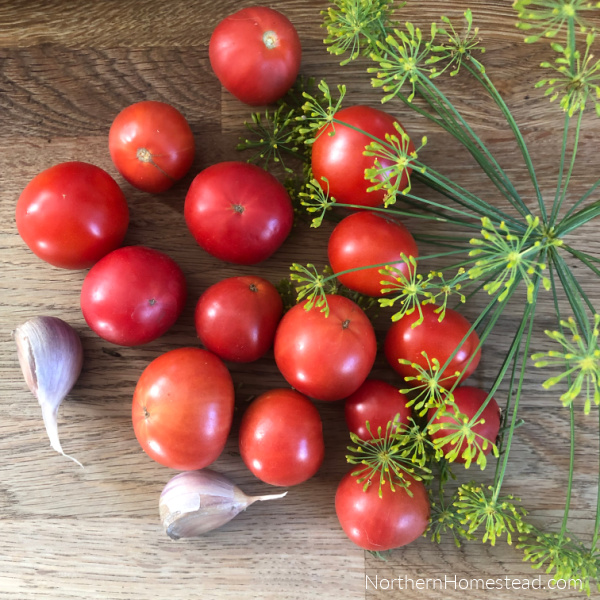
Tomatoes can be fermented using just salt, but adding herbs, garlic, hot peppers, or spices can enhance their flavor. Great herbal options include dill, basil, rosemary, and thyme. Garlic is my favorite ingredient in almost any fermentation. Get creative and discover what flavors suit your taste!
Choose a fermenting container
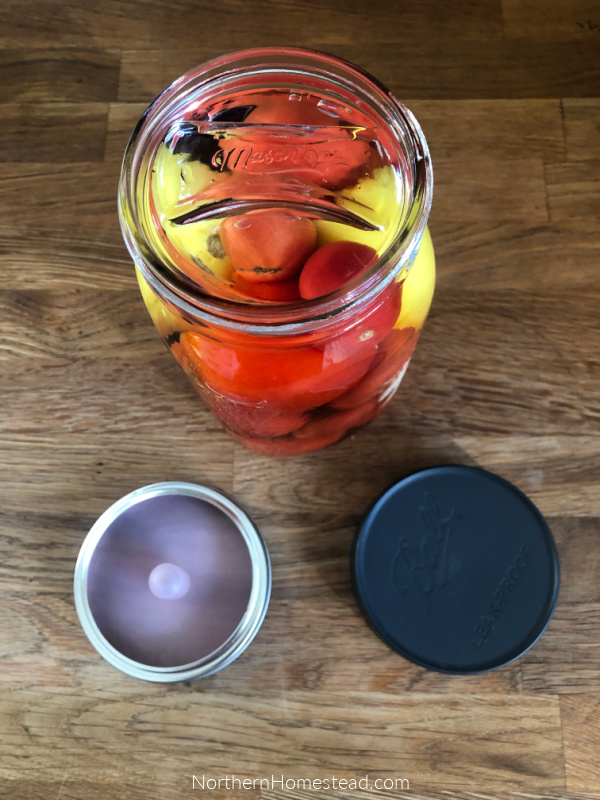
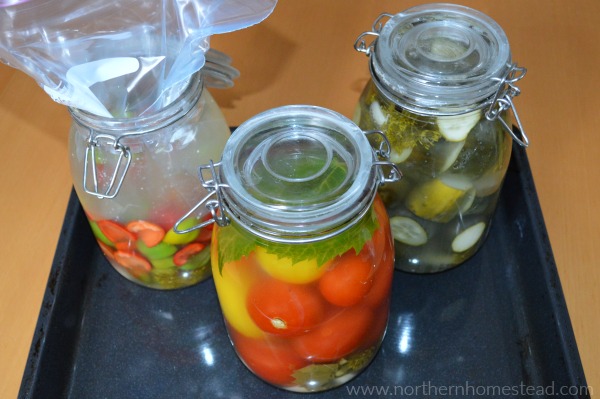
Since tomatoes are small and should be eaten quickly, using a jar is the best option. Both quart canning jars and Ikea jars with lids work well. It’s essential that the container is clean to prevent the introduction of any unwanted bacteria during fermentation. If you use a lot of antibacterial soap, be sure to sterilize the jars as well. However, if you prefer a more natural approach in your kitchen, simply cleaning the jars should suffice, as you likely have beneficial bacteria already present.
When filling the jar, fill it to the shoulder, leaving some space for the weight and brine.

When fermenting, it’s essential to keep everything submerged in the brine. To do this, place a weighting stone or a clean rock on top of the tomatoes in the jar. This will prevent the tomatoes from floating to the surface and spoiling.
If you don’t have a weighing stone available, a clean bag filled with water can also serve as a substitute, as shown in one of the pictures below.
Brine Recipe for cherry tomatoes
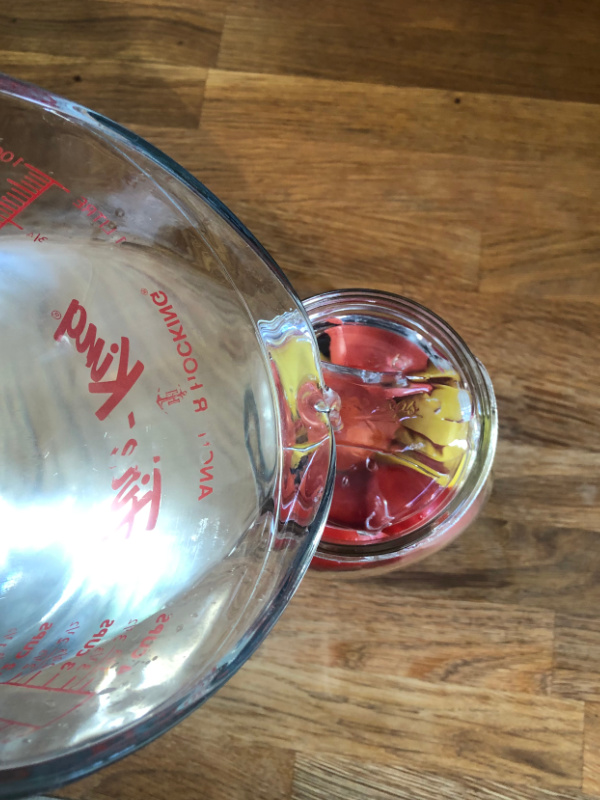
For the brine, use 2.5 tablespoons of canning salt for every 1 liter (or quart) of water. Be sure to use pure salt without any additives.
If possible, use filtered water. If you don’t have a filtration system, boil the water to remove chlorine and allow it to cool before use.
Mix the salt thoroughly in the water, then pour the brine over the tomatoes, ensuring they are completely covered.
Covering the Fermenting container
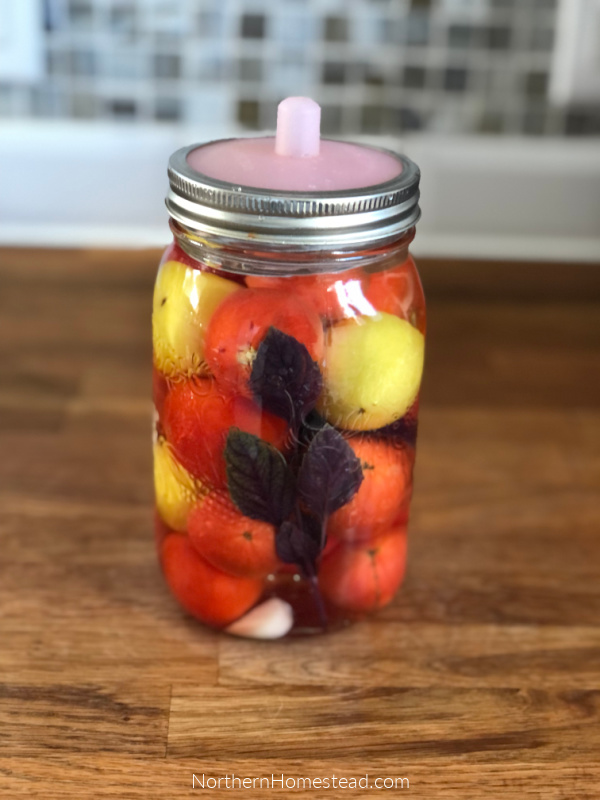
A lid and Econolock are, in my opinion, luxuries that are not necessary. If you have one, feel free to use it.

A fermentation kit is a great kit to have, and we would recommend it. The kit comes with weighing stones and pipe airlock lids. A stumper is also a great tool for making saurkraut. However, as we explain in Fermenting is simple – learn the basics, you can start with whatever you have in your kitchen.
You can also use a simple lid for fermentation. Just make sure not to close it tightly, and vent it periodically to release any gas buildup. When using Ikea jars, I remove the sealing ring during fermentation and add it back for storage. It works beautifully.
The fermentation process
Place the jar or container on a plate or baking sheet and leave it at room temperature for about a week. It’s normal for the brine to become slightly cloudy, and it should have a pleasant sour smell.
After 5-6 days, you can taste the tomatoes. If you find them to your liking, transfer them to a cool place to halt the fermentation process. If you feel they need more time, that’s perfectly fine, as tomatoes often require a bit longer to ferment.
In our experience, fermented tomatoes do not store for long. Use and enjoy them soon.
If you have never tried fermented cherry tomatoes, we would love to hear your thoughts. Make a small batch and discover what you’ve been missing.
We invite you to subscribe to Northern Homestead and follow us on Instagram, Facebook, or Pinterest for more yummy recipes.


Leave a Reply