

If you have followed our blog for any length of time, you will know that we love fermented food. If you are new here, welcome! I assume you came here to learn how to use a water-sealed fermentation crockpot.
We have been huge advocates of simple fermentation using whatever pots, containers, or jars you have. You can read more about it in our Fermenting is Simple article.
For beginners and small batches, this is still a great way to ferment. There is a time, though, to upgrade to a water-sealed fermentation crockpot.
The Water-Sealed Crockpot Story
I did not think that the difference in taste and texture of the end product between an open crock (container, pot, jar, etc) and a water-sealed crockpot would be so significant.
I wasn’t even looking for a water-sealed fermentation crockpot when a fellow homesteader posted one for sale. I’m not sure if I was more eager to support her or finally own one, but I seized the opportunity.
It is a 10-liter crock, and I was a bit surprised by how much cabbage it took to fill the pot. Do we really need that much sauerkraut?
After tasting it, I knew: Yes, We Do!
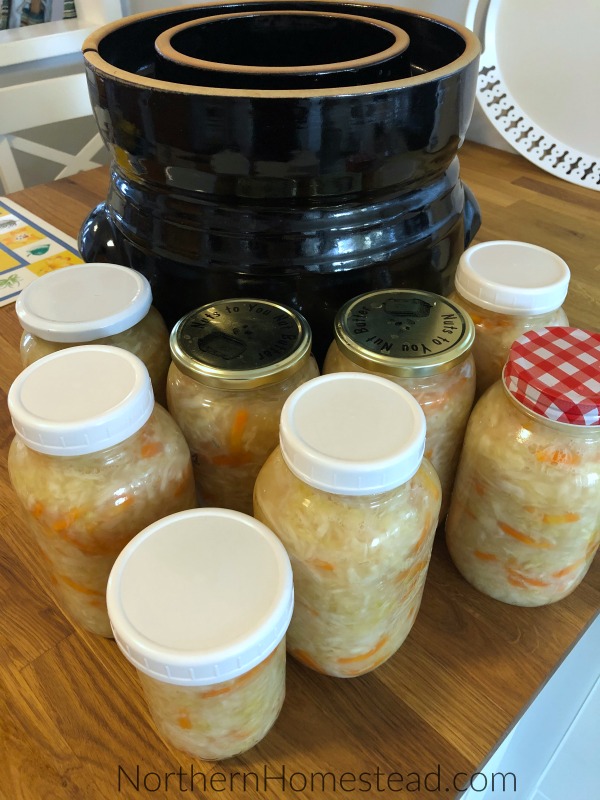
We got 8 jars out of our first batch of sauerkraut. I still had some red kraut that I made in an open crock left in the fridge from a previous ferment. Let me tell you, after a while, we still had a jar of red kraut but were running low on the sauerkraut from the last batch, so we needed to make more.
What is a fermentation crock?
Fermentation crocks are stoneware pots used to hold vegetables during fermentation. They usually come in two shapes: open crock and water-sealed crock.


Technicaly any container can be an open fermentation crock. The difference is the stoneware, which helps keep the temperature from fluctuating too much. I have used an old slow cooker for years; it worked great.
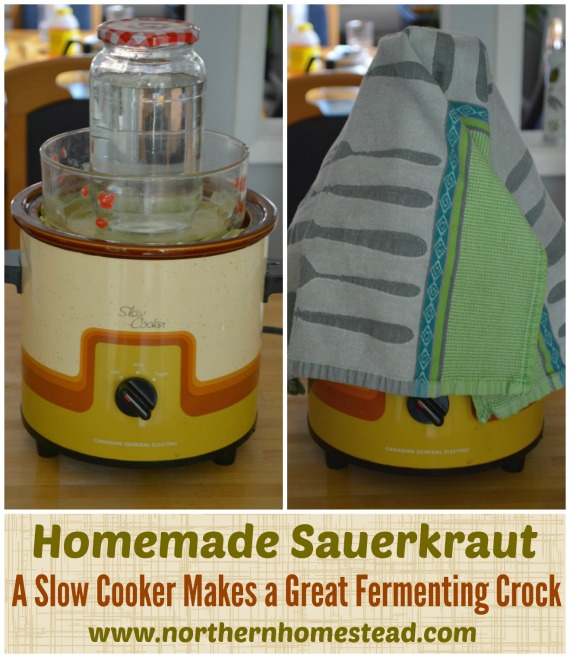
You can also buy open-fermenting crocks, but since any crock pot can be used, I would not recommend them. If you are going to spend money, get a water-sealed fermentation crock.
Water-sealed fermentation crocks come in different sizes and shapes. You can even start a fun collection of them. In this blog article, though, we are talking about a bigger stoneware crock.
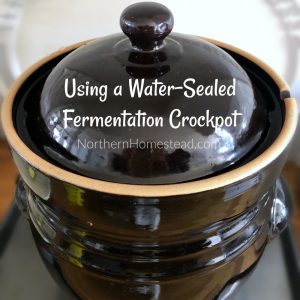
What is a water-sealed fermentation crockpot?
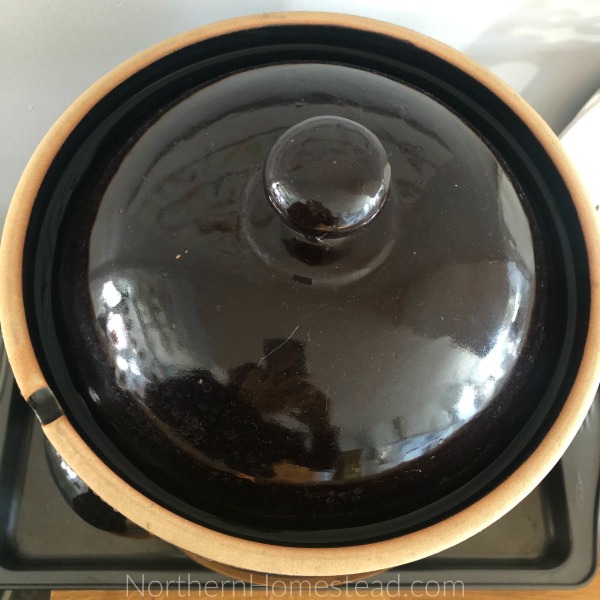
A water-sealed fermentation crock, or sauerkraut crock, is a stoneware pot used to prepare fermented foods. It holds cabbages and other vegetables in a brine solution and features a sealed top. The difference between a sealed crockpot and an open one is a moat around the opening where the lid fits. This moat has to be filled with water at all times when used for fermentation.
The water in the moat allows the CO2 that builds up in the crock during fermentation to escape, but no air can enter. It is essentially an airlock, like those used in winemaking. This prevents aerobic organisms, such as yeast and mold, from entering and growing on the surface. As a result, the end product is tastier and of higher quality than when using an open pot.
If you only want to ferment small batches, you can achieve similar results with various fermentation lids for jars. But it also seems to matter whether bigger batches are fermented at once. And the ceramic holds a consistent temperature better than a jar does.
We do both, fermenting in jars and pots, depending on what it is we are fermenting. For larger batches of sauerkraut and other ferments, the water-sealed crock is amazing.
How to use a water-sealed fermentation crockpot
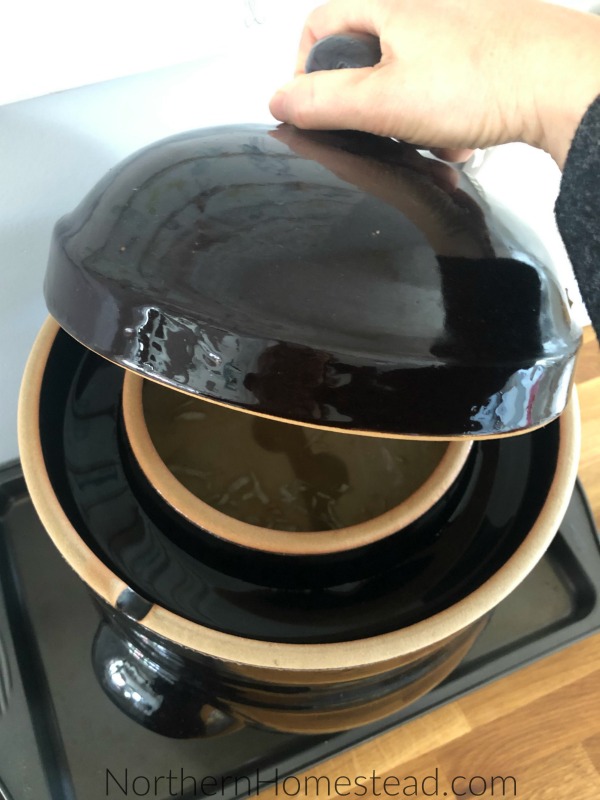
It took us some time to get used to the water-sealed crock. The ceramic pot is heavier, and the opening is smaller, but it’s worth the little inconvenience because the end product is so much better.
Otherwise, using the water-sealed fermentation crock is a no-brainer. The only difference from an open pot is the lid, which sits in a water-filled moat around the opening. You have to make sure there is always water to seal the lid during fermentation.
The overflow
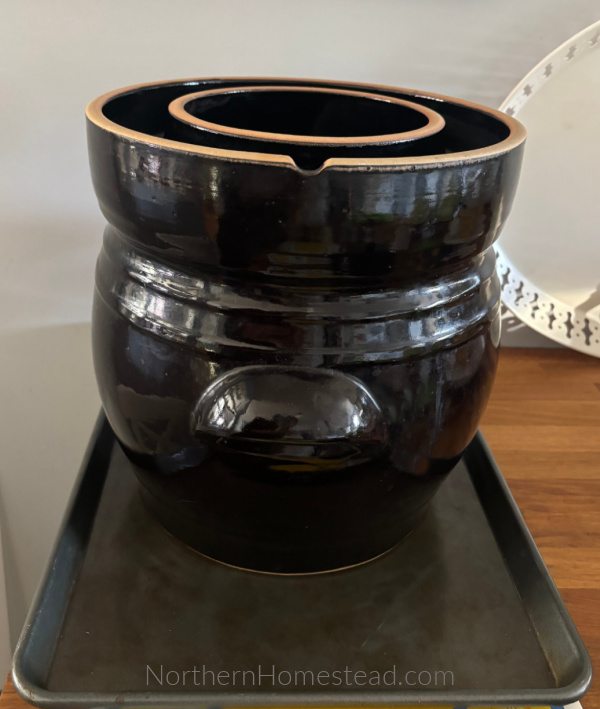
Any fermentation can expand during the process. The pot already comes with an overflow opening (See picture). Before filling the heavy pot, place it on a baking sheet to catch any overflow.
The weighing stones

Some fermenting crocks already come with weighing stones, and sometimes, they are extra. I never used them in an open crock, but they are a must-have in a sealed pot. Since the opening is smaller than the pot, you can’t just use whatever to weigh down the ferment. When fermenting, it is important to ensure the food is submerged in the brine at all times.

The weighing stones are made to fit into a crockpot; they are split in half to fit through the opening, and a good covering of the contents. If the sauerkraut has little liquid at the beginning, we sometimes add a small jar of water on top of the stones to add some weight.
Once the fermentation is done, clean the stones with a dish brush and let them air dry. Store them in an airy location, not a bag or the crock. They can get moldy.
What to ferment in a water-sealed crock pot?
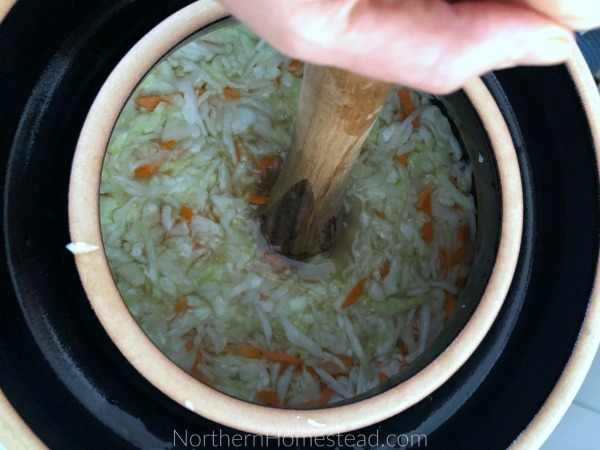
The most common use for a fermenting crock is sauerkraut. We share here how to make sauerkraut in a water-sealed fermenting crock.
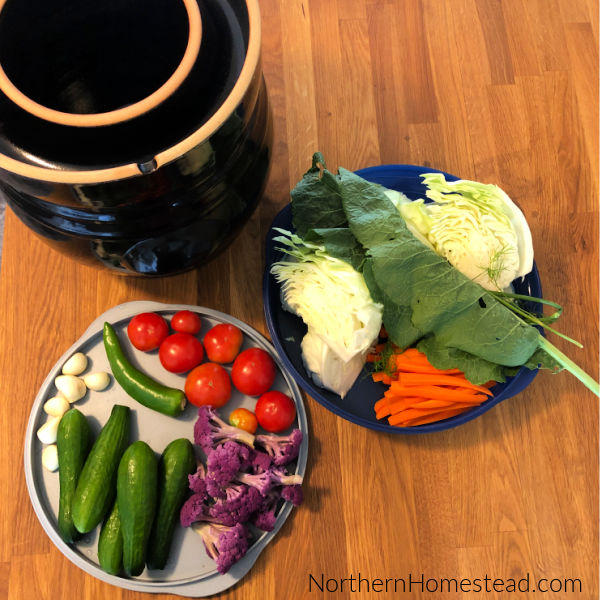
However, the crock is great for all kinds of vegetables you want to ferment. A vegetable medley in the middle of summer is a great option. Layer the vegetables in the crock and cover them with brine. Weigh down with the weighing stones and close the lid. Add water to the moat and wait for the magic to happen.
To get more ideas for what to ferment, we recommend the book Fermented Vegetables: Creative Recipes for Fermenting 64 Vegetables & Herbs in Krauts, Kimchis, Brined Pickles, Chutneys, Relishes & Pastes.
When is the fermentation done in a water-sealed crock?
Since the crock is sealed, you cannot see what is happening inside. This raises the question: how can you tell when fermentation is complete? Quite simply, the crock will indicate this for you.
Due to the water seal, air can only escape through the water, creating a burping sound. When fermentation is very active, this sound will occur quite frequently. As fermentation slows down, the pot will become silent. This is usually when you can start checking the progress. If you like the results, great! If not, it might need a few more days.
The fermentation time depends greatly on temperature. Warmer conditions will speed up fermentation, while cooler conditions will slow it down.
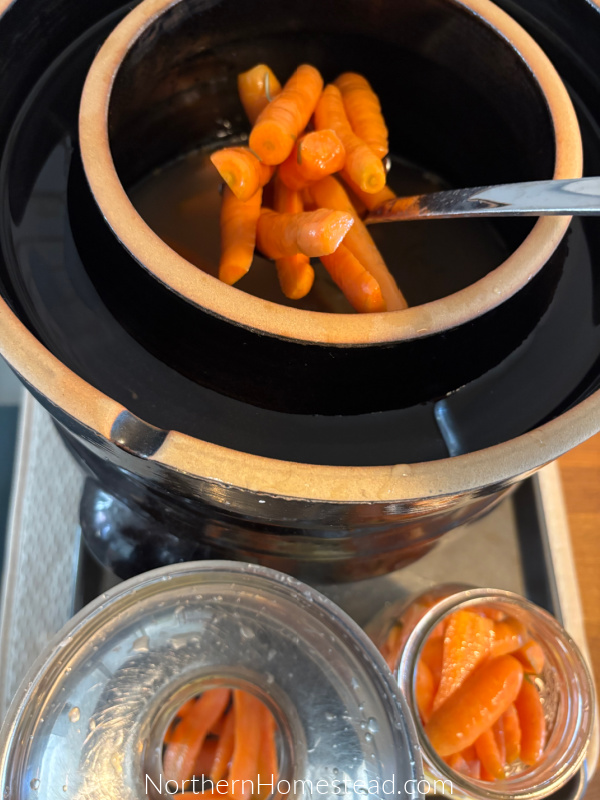
Once fermentation is complete, the fermented food can be stored in the crock by moving it to a cooler location. However, we find it more convenient to transfer the ferments from the crock into jars. When doing this, ensure each jar is fully submerged in brine. The jars can be easily stored in the refrigerator.
Cleaning and storing the fermentation crock
During routine use, we carefully clean the crock with warm water, ensuring no dish detergent is used. This is important to prevent any residues from lingering in the stoneware, which could interfere with the fermentation and impact the flavors of our ferments. Only in the event of a failed fermentation, when things would go awry, would we resort to sterilizing the crock to ensure it is thoroughly sanitized for future use.
When storing the crock, we place a folded paper towel into the moat, so the lid is not closed tightly, allowing some air into the crock to prevent mold growth.
We hope we have inspired you to take your fermentation to the next level with a water-sealed fermentation crock.
We invite you to subscribe to Northern Homestead and follow us on Instagram, Facebook, or Pinterest for the latest updates.


Thanks for this easy explanation. I ordered one from Germany about 2 weeks ago. Expecting it any day now. It’s 26 liters !
Awesome, I hope you enjoy the crock as much as we do.
Hello.
Great article.
Can you share some more details on using the slow cooker to ferment .
Thank you so much.
Making sauerkraut the simple way has all the details you are looking for.
Does it matter if the crock is not full? I’m looking to switch from jars to a 5L crock and worry it’s too big for some recipes (finding it difficult to source a 2-3L crock right now). I can see just adding more brine for some things like pickles or carrots etc, but with kraut it makes it’s own brine so I’m worried there would be too much air in the crock if I only fill it half way. I guess one potential solution is to just make more kraut 😉
We have not found that it matters much. We seldom fill our crock to the top. The difference that we have noticed is the fuller the pot the more burping we can hear. That’s the air, or gas that builds up and escapes.
This will be my first time making it. Thank you for your detailed explanation. Question I have is, we do not have enough refrigerator space to keep it in when done. Can I pressure can it or will the heat mess it up?
The heat will kill the beneficial bacteria. Ferments keep well in a cellar or cold room. That’s where they have stored traditionally anyways.
Great article, thank you! I’m going to follow this recipe. After the specified time, is it ok to open the lid and then close the crock again a couple times throughout the fermentation process? Does opening the lid affect quality or increase risk of contamination?
We do open the lid sometimes to check if all is okay and have not noticed that it would affect the product in any way.
Thank you for the instructions, I have a 5L water seal crock and am in the process of making my first batch of sauerkraut, I covered my cabbage with the weights and everything was submerged, how ever I did not use cabbage leaves on top of the shredded cabbage will that hurt anything? my crock has started burping to day 3 days into the process.I have my fingers crossed. When should I open the crock to check the Kraut?
Thank You!
Tom
That’s a great question. No, the leaves are only there to keep everything submerged, if you manage to do it without leaves, you are all set.
You can check on the kraut whenever you want. We have not noticed a difference if we open it or not. Usually, if it is happily burping, we leave it alone. When it slows down, you can (don’t have to) open and check on it.
Hello. I have a water seal crock and while I was away the water dried up for a day or so. It happened a couple of times actually 🤦♀️ Does that mean it’s bad? Should I throw it out? It’s also been on that crock for a month.. first timer here. Help! I don’t want to make anyone sick!
You can ferment without a seal, so it would not be bad just because there was no seal for a day or so. However, it seems that you have been fermenting for way too long. Depending on the temperature where your fermentation is placed it might be too sour by now.
You can keep the fermented food in the crock, but it would have to be in a cool place.
First, go by smell, if it smells sour, it is still good, if it smells rotten, it is not. It’s that simple.
Then taste and see how you like it. As I said it might be very sour, but that will not make you sick, just maybe not what you want.
You have inspired me to start fermenting!! As a newbie after the sauerkraut has finished fermenting do the jars need to be sterlized before they are stored? If so where is a good place to read on how to do that? Thanks Susan
We do not sterilize the jars. Just use clean jars and store them in a cool place.
Hi there.. I was wondering if you had any info on making barrel pickles with a water seal crock. I have made sauerkraut many times. And made barrel pickles using the open air fermentation method with the pickles where you skin off the too everyday. But I would like to know about using the water sealed crock for making pickles? Would I need to skim the top off everyday with the water sealed crock?
I’m not sure what you are asking since I have never skimmed off anything when making pickles. I think it would depend if you want the pickles to be clean or if you do not care that they have a bit of a white film. They are just as tasty though.
Hi
what is the manufacturer of the crock you use?
Thanks
Sadly, I do not know. I got it used from a fellow homesteader and have no information except a sign on the bottom that does not say anything to me. I would have love to support that manufacturer.
Anna, what an interesting thing the water sealed crock pot is. I can’t quite tell from the pictures, am wondering if the pot inside enlarges below the narrow neck inside the outer water ring? So does it balloon out so to speak and hold more kraut at the bottom?
Exactly, it does kind of balloon out. But that is unique to my, not all do. You can get one that is more cylindrical. The important part is the water seal at the top, where the lid sits.