

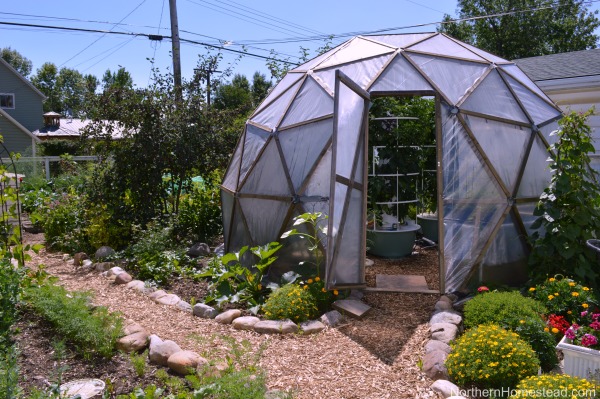
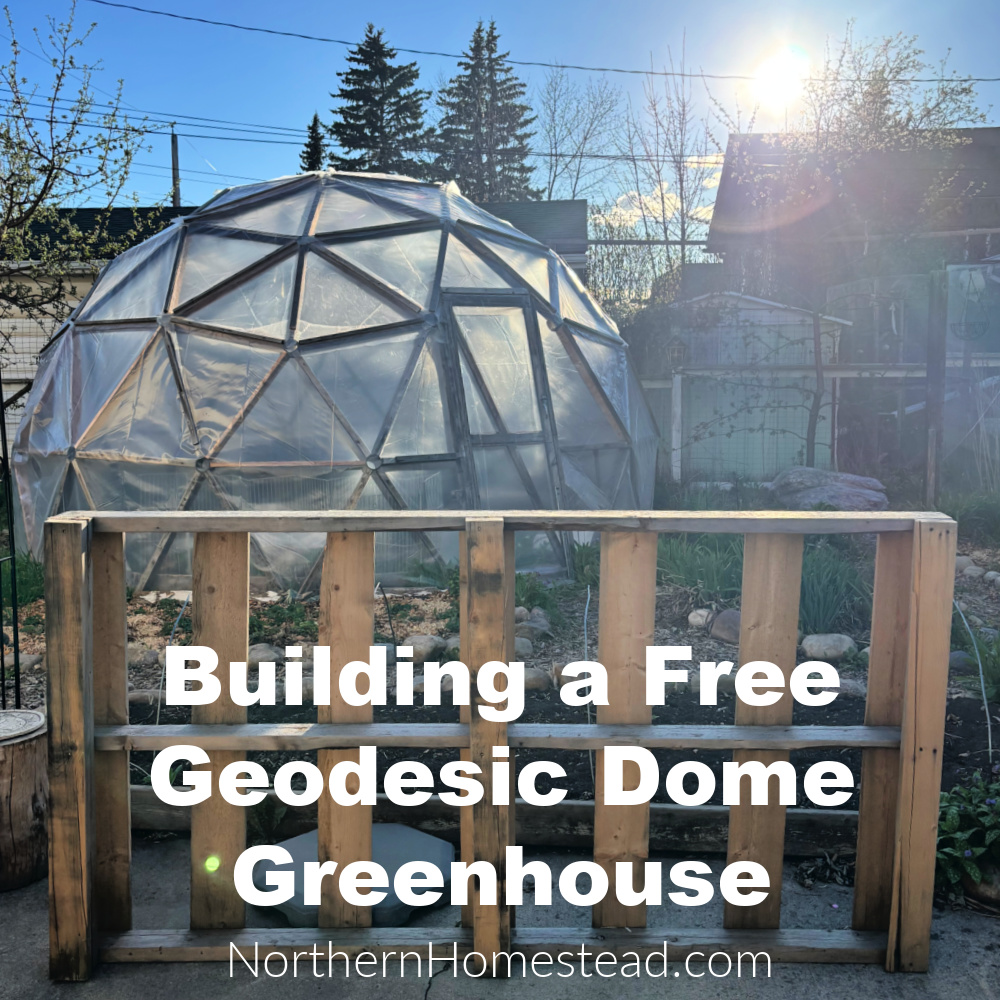
Here, we share how to build a geodesic dome greenhouse. It is our building experience for anyone who wants to build a DIY GeoDome. This dome is an all-wood cone joint dome. The article also has general information about geodesic dome greenhouses.
Check out how to build a geodesic dome greenhouse with pipe connectors. Version 2 is a more straightforward woodworking project that uses DIY pipe connectors, resulting in a distinct appearance that may appeal to some people.
Why a GeoDome /Geodesic Dome Greenhouse
When it comes to gardening in colder climates, a greenhouse is almost a must-have. Because a greenhouse extends the growing season and gives the plants a lot more heat, we can actually pick ripe tomatoes here and grow some plants that we would not be able to without one. A greenhouse can also be a great place to hang out on those cool spring days and summer nights.
When we started to look for one to build, our expectations were very high. In a northern garden, we have to deal with frost, nasty winds and, hail, and loads of snow. Our days in spring and fall don’t have much direct sunlight, so we need to catch every sunbeam we can. Plus, we live in town, and the greenhouse in our small backyard needed to be somehow catchy. In our research on regular greenhouses for home gardeners, we came across the GeoDome greenhouse. Dome greenhouses are:
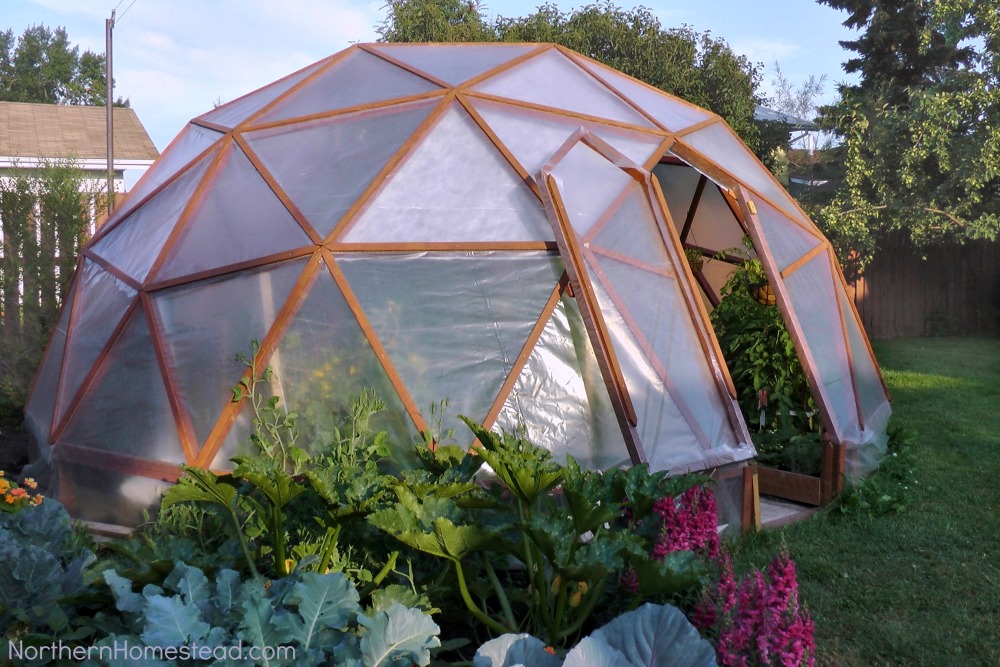
- Very unique, lightweight structure
- Stable in the wind and under heavy snow loads
- Optimal light absorption
- Has the most growing ground space
- A unique hang-out place
- An eye catcher
The GeoDome greenhouse seemed to be a great option, just what we were looking for. Since there is no foundation and this structure can be portable or temporary, we did not need any permits and would be able to take it with us if we moved. So it’s all good! But … How does a person build a GeoDome greenhouse?
What materials to use? What plan to go by? Which tools are needed? How do you do the angle of the cuts? How to assemble the GeoDome? By what method to cover the GeoDome?
We looked at dozens of how-to instructions and even bought a pricey e-book (with very little value). But all together, it helped us build the Geodesic domes we love.
Materials needed to build the GeoDome greenhouse
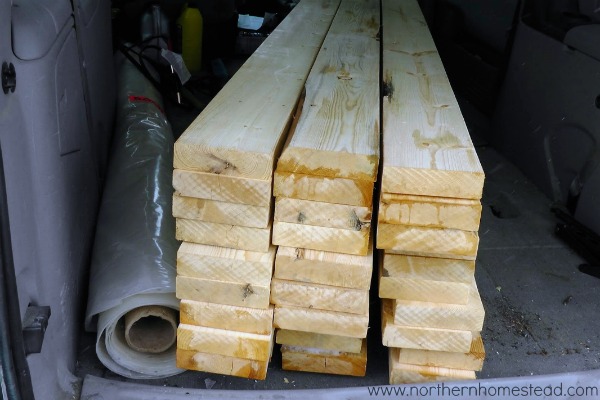
-Wood. We used untreated spruce lumber and stained it before assembling it. You could also use Douglas Fir, which is more durable.
– Screws, about a pound
– Covering. We used greenhouse plastic that was given to us from a commercial greenhouse. Plastic from a commercial greenhouse can be easily reused on a dome since there is not so much pressure on it, and it can last another 3-5 years. You can also cover the dome with greenhouse film, shrink film, or polycarbonate panels.
– Automatic window openers and hinges for the door and the windows.
GeoDome Greenhouse plans
Acidome is one of the best GeoDome calculators we were able to find on the internet. Choose your language at the top of the page. The Geodesic frequency can be 2V, 3V, or 4V, depending on the dome size. Smaller geodesic structures can have a lower frequency; for our 18′ dome, we chose the 3V frequency. Anything bigger than 18′ should have a 4V dome frequency. Keep also in mind that whatever the width of the dome is, it will be half that in height. For example, our 18′ dome is 9′ high, plus the 1′ pony wall.
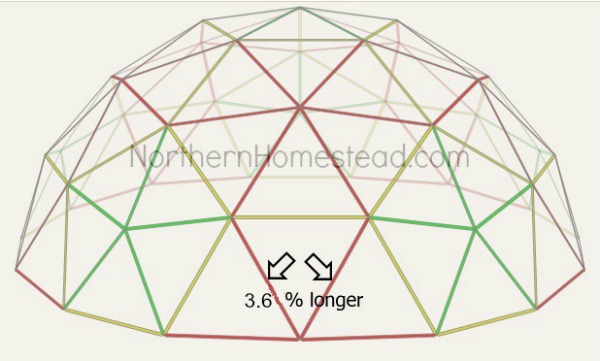
The challenge with a 3V Dome is that the red struts at the bottom of the dome, as shown above, are 3.6 % longer than all other red struts. Most plans on the internet do not do this little adjustment and end up with an uneven bottom. Sure, it is possible to level the foundation, but it is much easier to adjust the length of the ten red struts on the bottom, always in between the pentagons.
Why did we go with 3V even though it is the more complicated version? We had a spot for an 18′ dome. To have that size in 2V would make the triangles too big and too small with 4V. If you want to avoid the problem of leveling in a 3V dome and have the space, go with a bigger size in 4V frequency!
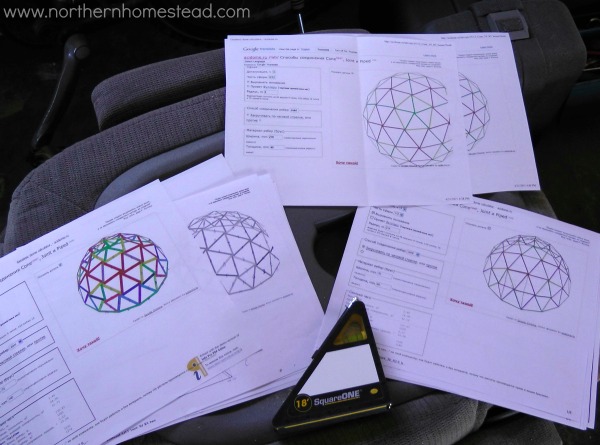
Once we had the plan, we printed it out in color, so it was helpful on the job site.
Tools needed to build the GeoDome greenhouse
– pencil
– level
– dual bevel miter saw, or radial arm saw
Cutting the struts
Firstly, we ripped the 2×6 to 2″ wide boards. Your lumber store might be willing to cut the pieces of wood for you. For cutting the joints a radial arm saw is preferred because it can make very precise cuts. We used a dual bevel miter saw, and it also did a good job – precision is key when making those angle cuts. And because precision is important to us, we went with the metric system. Here’s the link for our dome size: Acidome.com
How to use the Acidome.com calculator?
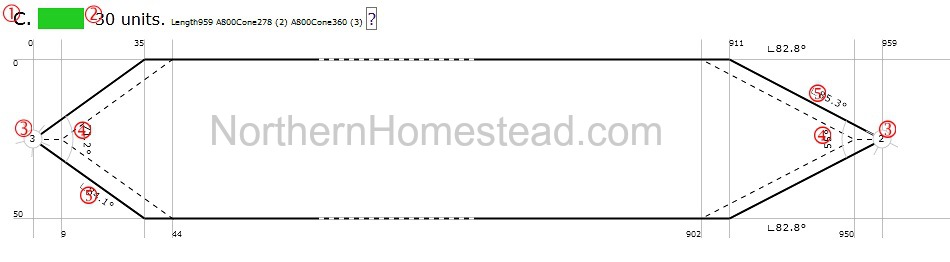
- Alphabetic index of the struts
- Number of struts of this type
- The numeric designation size vertex to which this edge rests on this end
- The value of a flat angle to the plane of the outer edge
- The value of the dihedral angle between the outer plane of the edge and the plane of the cut
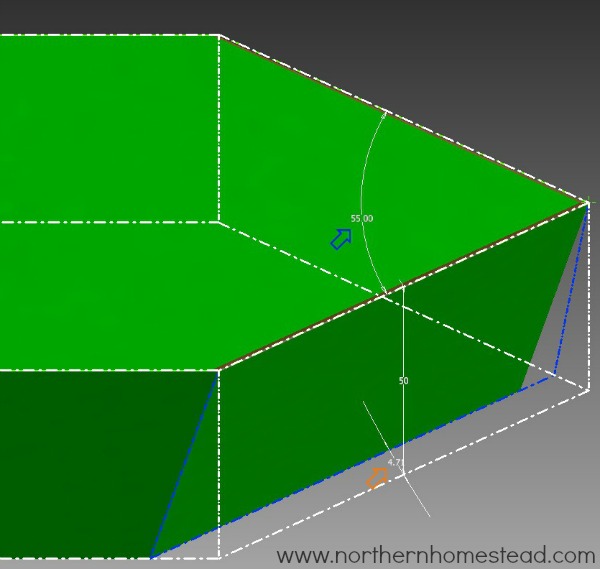
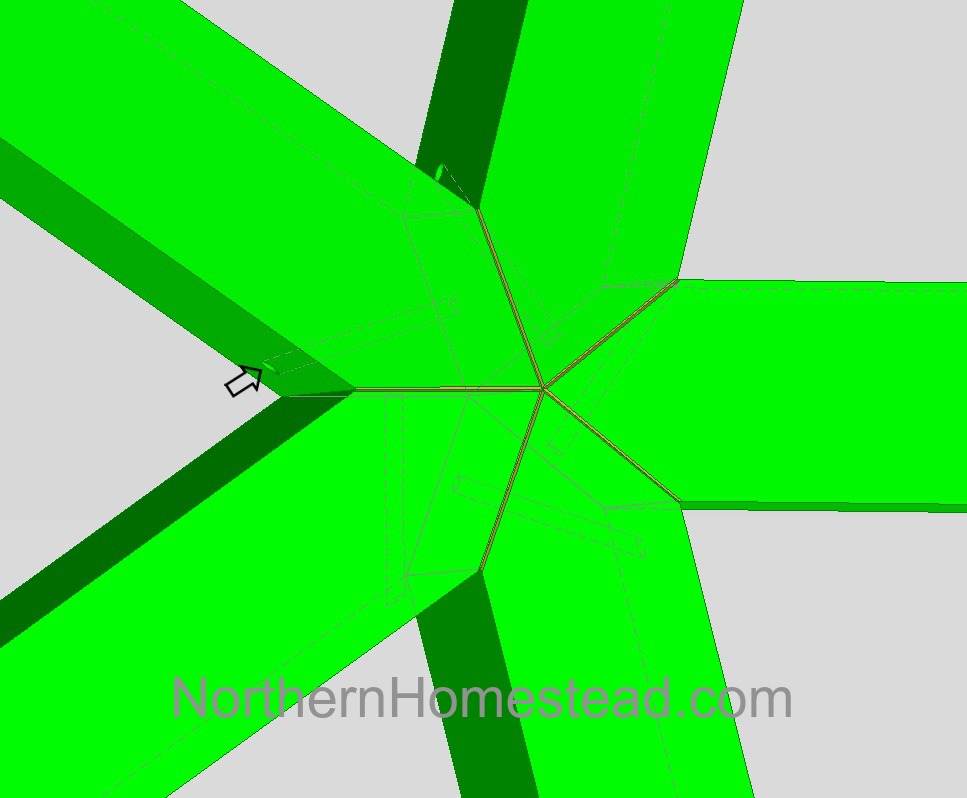
Here’s a graphic of the end of a strut in 3D.
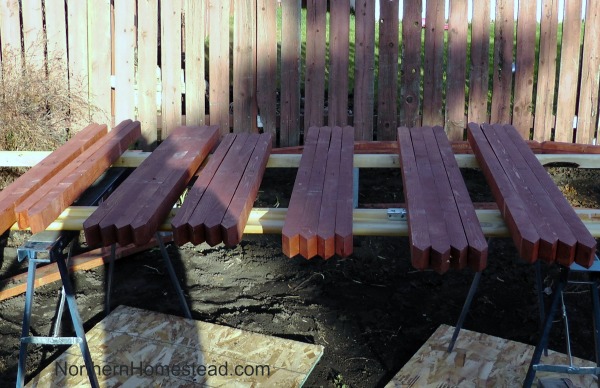
Finished struts are ready to put together the entire structure.
Assemble the GeoDome Greenhouse
First, we built a 1-foot (0.30 m) high pony wall. You will gain some height with a pony wall, and the extra space can be very important, especially for a small dome. Some users make a pony wall up to 3 feet (0.91 m) high.
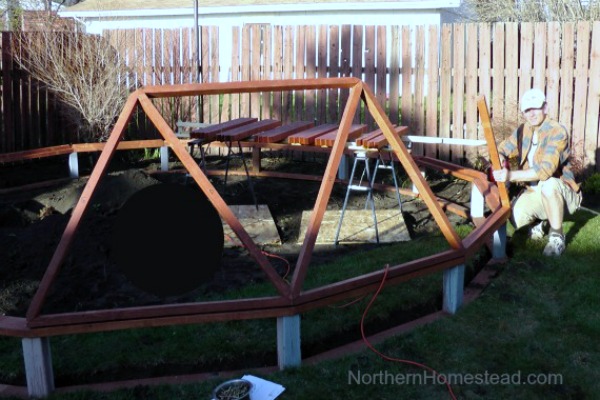
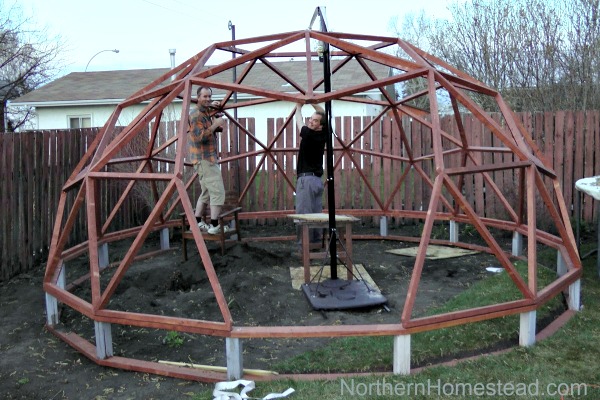
Now, we started assembling the dome. It’s a bit like playing Lego on a bigger scale, following the plan. The struts are all joined using a miter joint and are held in place by screws, as indicated in the graphic below. We recommend pre-drilling all the holes so the wood does not split.
We assembled the top of the dome separately and installed it as one piece. It was a bit heavy and challenging.
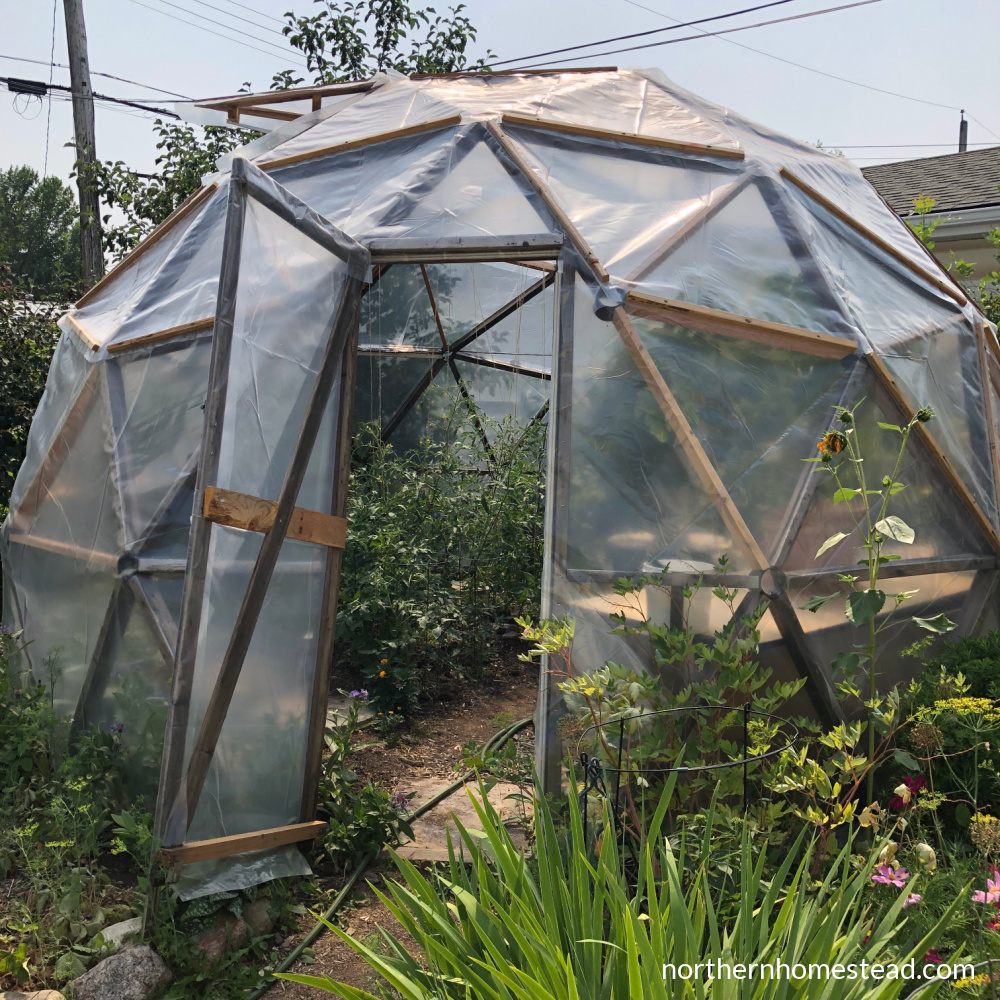
Covering the GeoDome Greenhouse
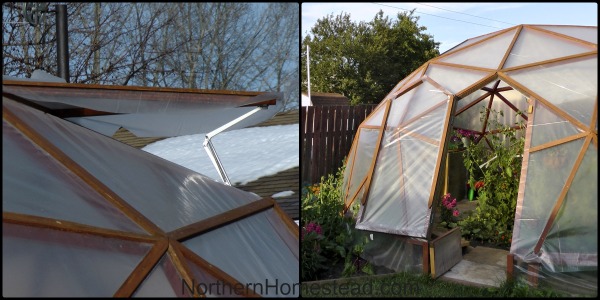
Covering a dome can be tricky because of its shape. Cutting the polytunnel plastic for three facets in a row worked the best. Acidome also calculates the size of the facets, which is especially important for more valuable coverings. We laid the struts on the plastic cover and cut the 2-3 facets approximately. Any overlaps were trimmed with a utility knife.
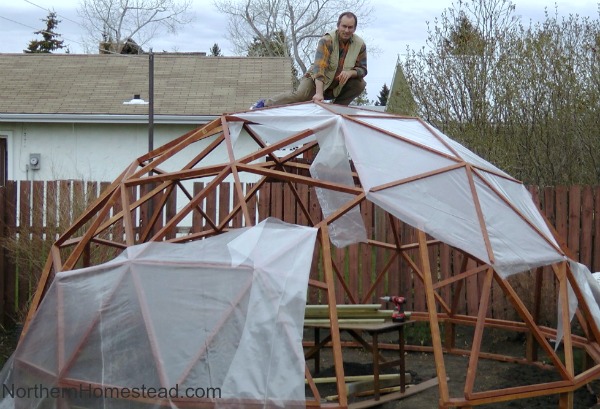
First, we stapled the plastic to the struts and then used the 1 cm planks to hold it in place, which also pointed out the structure of the GeoDome even more. We like it :). You can also see in the picture how sturdy the structure is! Read more about covering the GeoDome Greenhouse here.
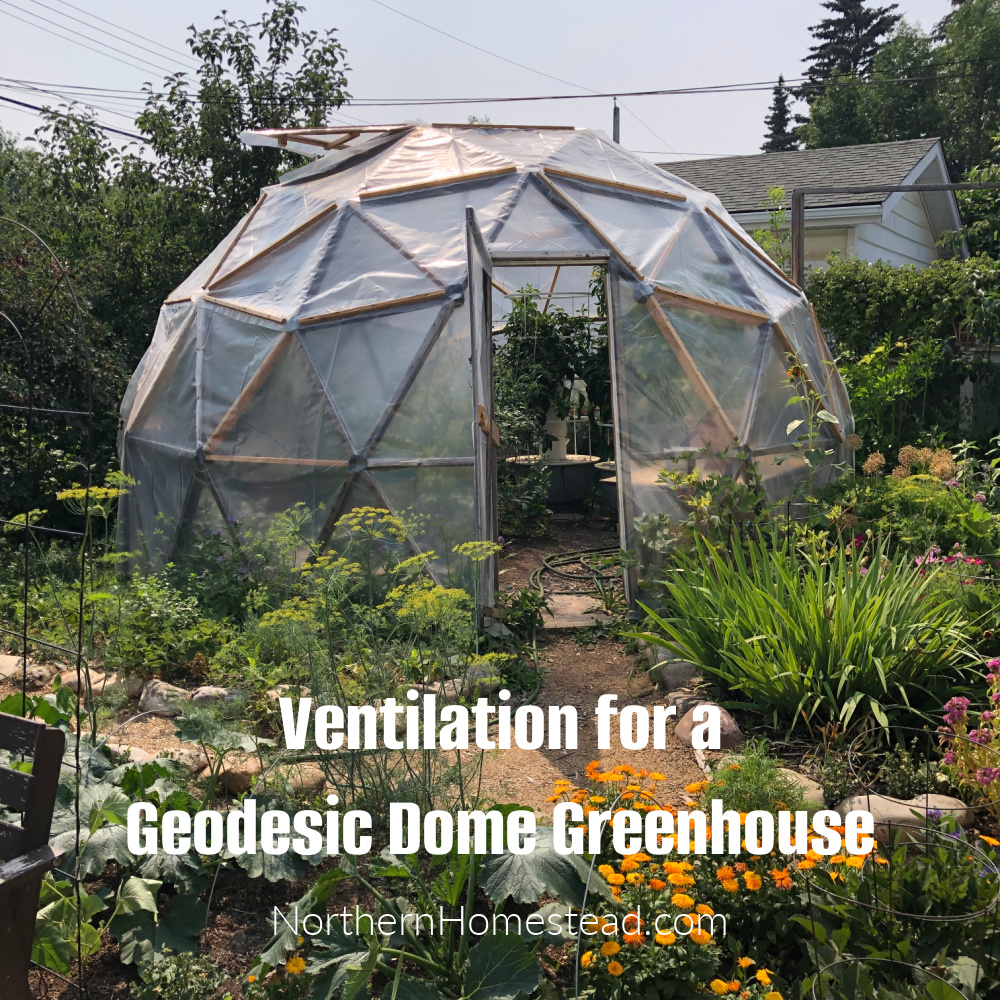
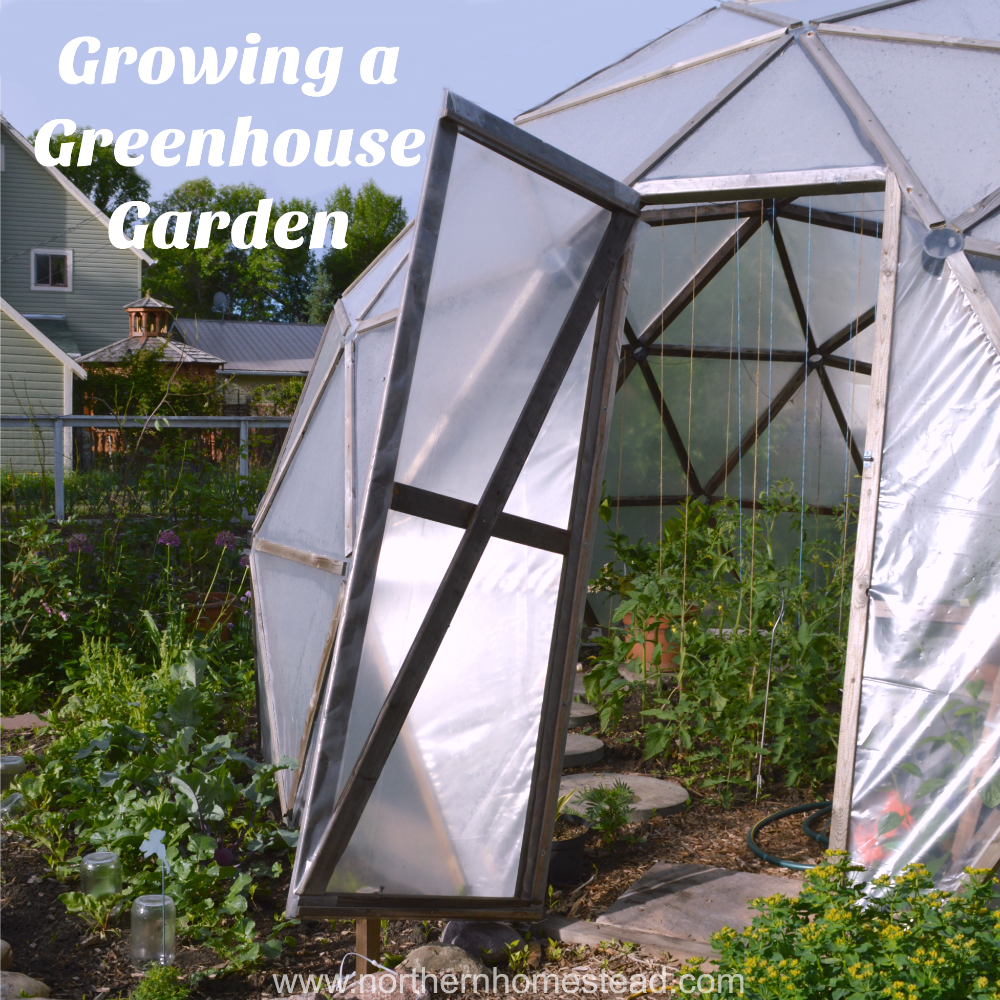
Door and Windows for the GeoDome greenhouse
We built the door frame right into a pentagon; as you see in the picture, it has two vertical struts as doorposts. We really like it that way. It does not interrupt the shape of the dome, which is perfect, especially in winter with all the snow that slides off the dome. It also allows us access to the dome even with snow still on the ground, and in the summer, it gives us an additional opening at the knee wall even if we have to close the door because of severe weather, which is a bonus.
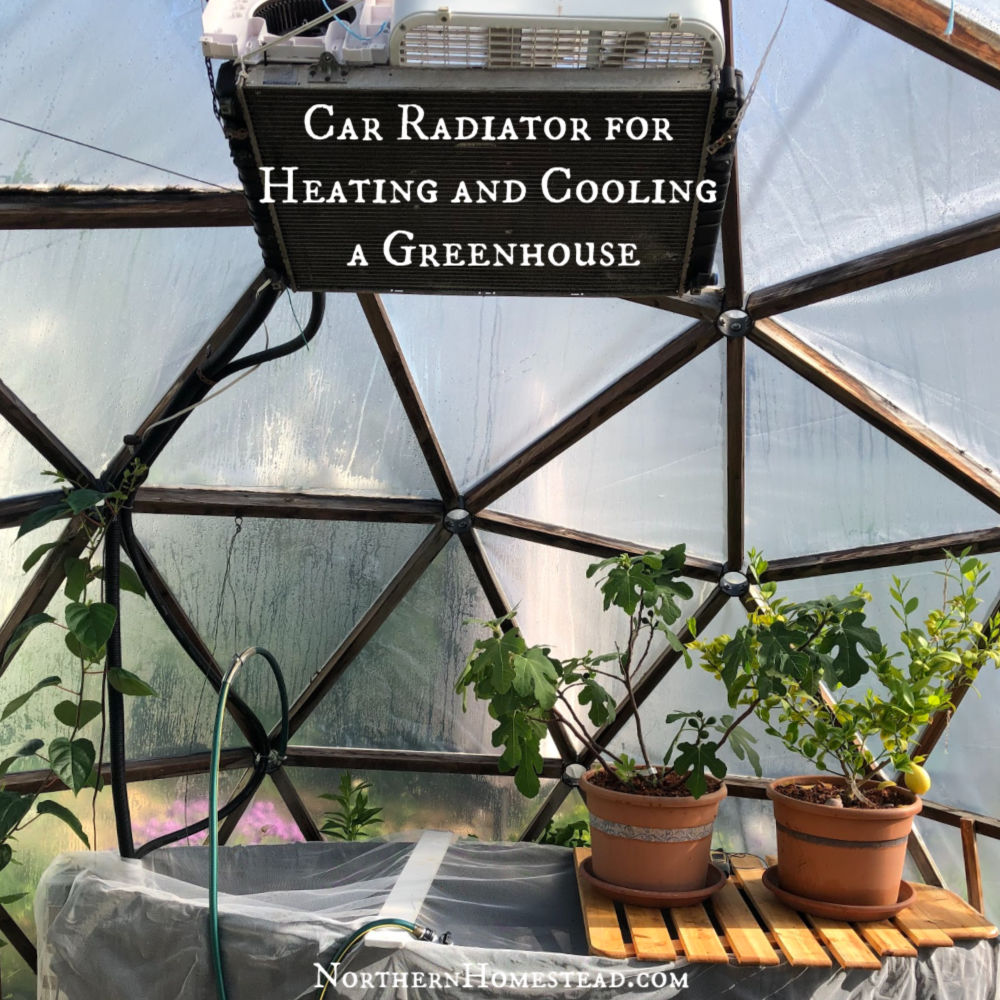
Our dome has two windows, both with an Automatic Greenhouse Window Opener. However, two windows are not enough if you are not using a cooling system. We built the door and the windows from the same struts as the structure and covered them with plastic.
This how-to on How To Build A Geodesic Dome Greenhouse (DIY GeoDome) comes from our personal experience. We are thrilled that we can inspire so many readers to build their own geodesic dome.
Please read the comments for any questions you might have; chances are, they have already been answered. After building two domes and combining 12 years of use, we have also written a Geodesic Dome Greenhouse Building Review.
Don’t forget to subscribe to Northern Homestead and follow us on Instagram, Facebook, or Pinterest for the latest updates.


This is fantastic information. Thank you Anna for posting so we can benefit from your experience!
Wow! This looks amazing! We aren’t very handy around our house, unfortunately, but I still dream of putting together some kind of greenhouse someday. I never thought of making a dome-shaped structure for one!
To have a greenhouse is a blessing, for sure. Hope you can have one soon, too.
You know, I can not thank you enough for sharing this information. This is literally a gift to me; since you posted this on the exact same day as my birth day! I believe I know of the “pricey” e-book you mentioned and my gut had told me to wait and keep looking for the info. I needed to make this “bio-dome”. Again, thank you. I would like to share this with others if you do not mind.
So glad we can be of some help. Sure you can share it as long as you link it back to here.
hi i cant figure out how to use the acidome web site i got all my lengths for my struts all ready cut but i need to find what degree angles i cut them at. and i cant seem to see it on acidome? please help i have been researching the internet for two weeks and i keep finding different answers and on your pictures i cant see what the numbers where.
I will ask my husband to answer you, hopefully today or tomorrow. So stay tuned, do not give up it was not as difficult.
Hi Felicia, please have a close look @ the forth section of the post, particularly below the graphic ‘How to use the Acidome.ru calculator’. This graphic shows an example of strut on Acidome.ru. The various numbers on the pic have an explanation below it. What you need to pay attention to are the #4 and #5:
4. The value of a flat angle to the plane of the outer edge.
5. The value of the dihedral angle between the outer plane of the edge and the plane of the cut.
The key word is ‘the dihedral angle’. Maybe this link to a sample pic will be helpful to see what it means: scale_strutangle In that graphic are shown dihedral angles between the planes with one common edge.
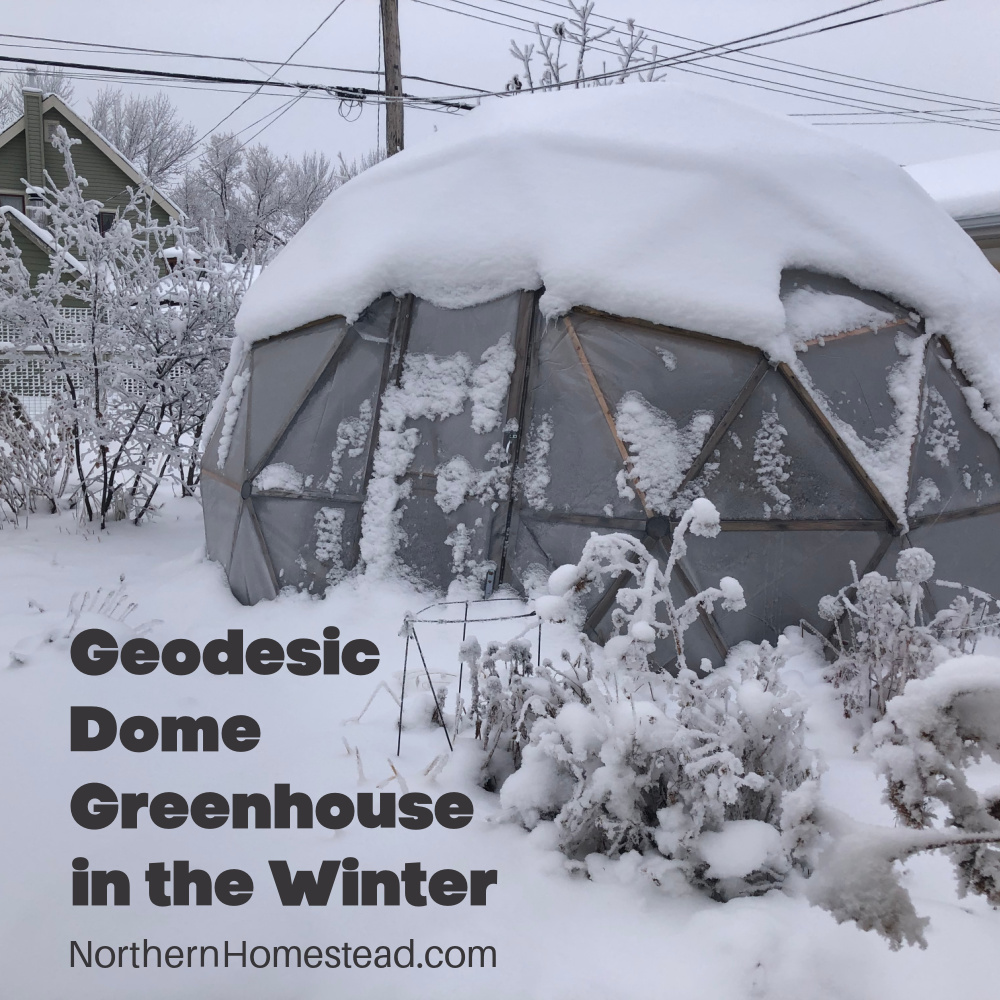
Can you tell me please how warm does this thing stay in the winter?
It totally depends what you cover it with. A single layer of greenhouse plastic poly keeps it 4 degrees warmer at night than the outside temperature. You also can cover the dome with double layer plastic poly filled with air or double walled polycarbonate panels which would increase the protection.
This looks like a much better option then the makeshift greenhouses we put together this year. Pinning this for next year:)
We sure love our greenhouse. Good luck with planning and building one!
This is so cool. I think we will be needing to make one of these!
Just amazing…! Thanks so much for sharing your geo- greenhouse with us!
It looks right at home in your backyard homestead… BTW…How fare north are you?
Deb
Your very welcome. We are in Alberta, Canada. Where are you?
This was fantastic! We shared with our FB/Twitter readers at homesteadlady.com.
Thank you! I appreciated you to share my blog post. You can also come and share a blog post on You Share.
What a wonderful post! I’ve seen these domes and felt incredibly jealous of those that have them! How wonderful to have all the information to build one ourselves now, thanks to you!!!
I wonder if there’s a simple way to do this on a small space kind of scale just for herbs during the winter? Would they last with the limited sunlight hours?
It totally depends where you are. Plus some herbs (like oregano, or thyme) survive even our Canadian winters, they do not need a greenhouse but would be green all winter long if you had one.
I have made domes since the 70’s and find that even a 2 frequency done is OK for a greenhouse. All boards are the same length and the dome is closer to 3/4 than 1/2 like shown. All faces are pentagons and smaller ones can be covered with a single sheet of greenhouse film for no leaks. Small ones can be made using 2×2 redwood and larger with 2×4. There was a company that sold Star Plates 1/4 inch sheet metal connectors that made everything easy using 2 bolts per strut end. The frames with 4ft – 6 ft 2x4s were strong enough to climb.
The star plates make a single frequency dome which does have all the struts the same length. A 2 frequency dome has 2 sizes of strut length.
I found this site based on the inforamtion you gave above. They seemed to have translated it into English.
Thank you for sharing these instructions. I’ve moved from southern California, to the Great Northwest, and honestly, the only thing I miss are the citrus and avocado trees. They would never survive a harsh winter here. I do miss having potted dwarf citrus trees year round on the patio. My hope is to build a greenhouse that will help (1 each) dwarf orange, grapefruit, lemon and a avocado trees happily survive & thrive, to bring homegrown organic fruits from garden, to kitchen.
Homegrown organic fruits from garden sounds good to me. Happy building and thank you for stopping by!
What I would like to know is if this project could work with the stacks of pallets that I have? I have a huge collection of pallets just waiting for me to “release” the wood.
As long as the quality of the lumber is good enough, the origin of it does not matter. Just make sure the struts don’t have cracks or fractures.
Beautiful dome, I really like the way you have jointed the struts direct rather than use connectors. I have not made a 4v dome yet and may well use your plans for one. I hope you don’t mind but I have put a picture of it up at my ‘make a greenhouse’ website – with a link back to you of course.
Glad you like it. Let us know how it goes if you build one. No, we do not mind honest link backs ;), thank you for stopping by.
My original 3 freq greenhouse was one more full level of triangles taller.
I then went to a 2 freq 8′ radius half sphere, which is pretty efficient for a small greenhouse. All struts were made from 2×2 by 8 or 2x2x10 stock, with almost no wastage.
I built a square, vertical doorframe for a 36′ wide aluminum storm door where a pent hub would normally be.
Also, use white, water base stain –any oil base or dark stain eats plastic.
Hi, friends!
how Cutting the struts radial arm sow ??? 55 degrees for example.. it is very accuracy !!
Who already made it ?
usually saw has a fixed angle 45 , 90 , 30
Hi Ivan, radial arm saw can cut in various angles, at least mine does. Even though the dome as described in the post I cut with a dual bevel miter saw. Jakob.
I would love a pre-made kit for this like the furniture you can buy at Ikea… 🙂
I bet you would :). Thank you for stopping by!
Kafir, GrowingSpaces, is one place to look for a kit for a geodesic dome greenhouse. We have a 26 footer from Growing Spaces with polycarbonate glazing as described by Mary below (#19), and it uses hub connectors rather than detailed angle cuts on the struts. Our dome is on a 2 foot kneewall so the center height is 15 feet. Right now it is snowing pretty hard, yet the glazing holds the heat well enough so that, even with the woodstove going, it still retains the snow. Another advantage of the polycarbonate glazing is that when I am in my 70s I won’t have to be up there replacing plastic film. I used aluminum strips to cover the junctions between panels so I won’t have to replace tape over the gap between glazing panels. Since I expect the dome to last a couple of decades, at least (it’s 6 years old now), I want the long term maintenance at a minimum.
Hey, Douglas
I hope you are well and doing good. Wanted to ask about the junctions between the panels. Do they still hold up? Cheers from Estonia.
Aadu
I have an 18 footer that was a kit from Growing Spaces in Colorado. It has 5 layer polycarbonate facets. It stays about 20 degrees warmer than outside. I am in zone 3 and I grow amazing tomatoes in it. In fact we just finished eating the last ones that we brought in the house to ripen. I will start new plants on March 1 to go out by the end of the month.
Good for you! I am so looking forward to planting time too.
Mary, do you have issues with mildew due to high moisture in your dome? Mildew has been the bane for us with tomatoes. On the other hand pepper plants and eggplant grow enormous plants that seem to gush fruits. We have greens growing now, with fresh plantings of peas and beans yesterday.
To control humidity , cover the planting beds with mulch, to reduce evaporation, and use a dehumidifier which is also a cheap way to heat green house in winter !
Thanks,
Alex
I have a geodome, bought from Growing Spaces. For it to be year round it must have an insulated foundation, down 4 ft. It also needs some kind of heater for cold winter nights. I use propane wall heater. With this cold winter it’s consuming a lot of fuel. During the day, as long as there is sun, it will heat itself between 20C and 30C in February. But this winter hasnt seen much sun at all so far.
Thank you for the info about the insulated foundation. Good to know for those who want to grow year round.
I have a dome from Growing Spaces as well, in the Berkshire Hills of western Massachusetts and do not find that a 4 foot frost wall is necessary here. We have a woodstove to heat in the winter, but even when left unheated it did not get cold enough to kill the citrus trees. We have a perimeter bed which may help keep out the frost. This winter a lot of wood is being burned, but then there are the mustard greens and chard to consider… and the limes. The dome’s 2 foot kneewall is on a ring of pea-stone on the ground with no other foundation.
Thanks for sharing your dome experience – I’m inspired!
Can you advise on the tradeoff between 5/12 Sphere with pony wall and 7/12 sphere without?
Also what about all the options on the dome design site? How to choose to simplify construction?
Thanks
Jim in South Carolina
Glad to inspire you, Jim.
Are you asking about the tradeoff on the height? I’m not sure if there is any tradeoff, it all depends on the height of the pony wall and the difference between 5/12 sphere or 7/12. It all comes down to the height you want your dome to have.
Can you elaborate on the other questions?
Jakob
Thanks for your reply Jakob.
I am not clear on the complexity of construction between pony wall vs. 1/6 more dome. Your pony wall is 1 ft, but could be taller, matching the height of the 7/12 dome. Also the extra height will make construction more difficult. I’m building 1/10 scale models of the 5/12 and 7/12 domes to get an idea of the visual difference. If you can email me I’ll send you photos.
Thanks
Jim
Are you going to have raised beds along the wall? If yes, then a pony wall would be already a part of the bed. If you are putting the plants into the ground and need more height then it would be easier to go with 7/12.
You can send the pics to anna at northernhomestead.com
Happy ‘GeoDoming’,
Jakob
Hi Jacob,
Can you explain the 82.8° angle that is not referenced in the first illustration in “Cutting the struts”?
Also, you say “A smaller dome can have a lower frequency; for our 18′ dome we chose the 3V frequency. Anything bigger then 18′ should be 4V.” Is that recommendation structural or to keep the triangles less than 4ft in case polycarb panels are used to cover?
Thanks
Jim
Hi Jim,
you can ignore the 82.8° angle as it will be the angle between the outer plane and the edge resulting from the both cuts.
The recommendation for a certain frequency is only to keep the triangles small enough for the panels.
Jakob
Firstly great job on the greenhouse!
I also have some confusion about the dihedral angle shown. I’m using the goodkarma connection type (here’s the link to the parameters used in the calculator)
http://acidome.ru/lab/calc/#Align_7/12_GoodKarma_3V_R3.3_beams_87x42
I wanted to confirm that the dihedral angle shown in black text needs to be cut, or is it the resulting angle after the triangles are assembled?
Many thanks in advance
Thanks. In black text is the resulting angle between the side wall of the strut and the face/covering. Not critical if you use plastic.
Hi! Greetings from Azores! I want to build a greenhouse just like yours! The problem here is the wind and I suppose this is the best shape, wouldn’t it be? Could you tell me if the dome calculator gives exact number of parts to use? Thank you!
Yes, the dome calculator does give you the exact number of parts.
Thank you! It was a matter of scrolling down the page… 🙂
This is very attractive. Has it stood up well against the wind and hail? Those are things we would have to deal with here in Oklahoma as well. Thank you for sharing this at the HomeAcre Hop; I hope you’ll join us again this Thursday.
Yes, it has stood up well without any foundation. However in an open space we would recommend a foundation.
Thanks so much for sharing your awesome greenhouse on The HomeAcre Hop! I featured it today 🙂 Hope to see what else you’ve been up to!
Thank you for featuring it.
Want one so bad I can TASTE IT! I know Eddie could build this! Must talk to him. I think we could do this by the end of the summer, no problem. Pinned it for him. Thanks!
Jo, you would love it and be able to grow all winter long! Good luck with building one.
Anna, Jakob,
Congrats with the amazing greenhouse. We were also thinking of building one and are going true the same process as you did: checking plans, tutorials etc.
If I’m correct you used 5cmX5cm wood, right? Does that feel sturdy enough to you?
The only thing i don’t get in the plans are the L 80 something ° angles. Could you explain that to me a bit clearer?
Anyway, amazing greenhouse you have!
Niels
Belgium
Niels,
the size of the struts we used to build this dome is 5cmX5cm, correct, and it was more than sturdy enough for this dome.
The angle of L 82.3° would be the angle between the hard face/panel in relation to the longitudinal cross section of the strut. You find those numbers again in the drawings of the panels. Those angles matter when you taper the top surface of the struts from the center line toward the outer edge.
Thanks,
Jakob
Jakob,
Thanks for your fast reply. I decided to move on to cutting the struts. It’s working fine for the moment.
I was wondering if you changed the angles on the 10 A struts that you elarged with 2,77 %. Did you cut the angles exactly the same and just made it longer? Did that work out wel during the assembly?
Thanks
Niels
Niels,
I cut the angles on those struts exactly the same and it worked well.
Happy GeoDoming,
Jakob
how does one obtain all the information/blueprints to build this?
Just read the post careful, and follow the links. You should find everything to build one. Some comments are helpful too. Good Luck!
1st off thanks for this info. I’ve been looking into this for some time now. My question is at what angle do you cut for the top pony wall? I cant seem to find it for sure anywhere. I am thinking of building that part with 2x4s 2ft high. I think I have all the struts figured out from the postings.
It is 360/25/2=7.2 Total is always 360. We have 25 joints, and each joint has two struts joining. Hope this helps. Congrats on building a dome!
I thought it did have to be divided by the number of joints and degrees. It just helps when you get an ok on things like this. I cant wait to get started on this project. Im hoping to use solar to help heat it in the colder months. An old friend of mine made solar heaters some years back so I have an idea of how to put those together. The plan is to keep this as a stand alone off the grid project. Thanks for the help.
Hi Jacob, when using the same dome, I see 15 pieces of wood for the pony wall. So that would make 365 /15/2 = 12.16
Or am I missing something? Cheers.
sry 360/15/2 = 12
hey, great job, i was wondering how long the struts you used are or how you can read it on the acidome website?
The length depends on the size of your dome. Acidome has a great calculator.
thanks, the more i look at it the more sense it makes. about how much did it cost y’all total to build this?
About $300 I think. We had some used material. It always depends what quality wood and cover you use. It is worth it though.
Hello,
I am trying to build one of these, with some modifications. I have a compound miter saw, but am completely clueless with how to cut the struts. I have been using acidome, but i do not understand how the numbers play into the way I am supposed to adjust the saw. Im sorry but any help would be greatly appreciated. I am trying to make a 2.75 radius 3V geodome (5/12) with 2×2’s, with a cone joint. (the beams are actually 1.5 in by 1.5 in.)
Oliver, when I started to cut the struts I had similar feelings and few of the struts had to be cut twice. I would encourage you to start with some test cuts till you get the desired results. I’m not a woodworker by profession but I like to work with wood for a change from my IT work. Just don’t be afraid to start doing it!
Jakob
Greetings from your western neighbours in Prince George!
Just a quick question, when you say “automatic windows,” do you mean you have them rigged to a thermometer and can tell them what temperature to open and close at?! If so….what did you use for that? I’ve been looking for exactly that sort of thing. Also hoping to measure solar radiation too…
We used Automatic Greenhouse Window Opener
Hello. First I commend you for your greenhouse. I live in Ushuaia, and believe me: I need one.
I do not understand some points acidome scheme.
For example: watching triagular panels on the sides, one angle and two numbers. So: 543 A 83.2º 591 These numbers correspond to what? I apologize for my english and thank you in advance for the answer. Greetings.
If you add up 543 and 591 then it gives you the length of the A strut, and 83.2 is the dihedral angle of the strut to the triangular sheet.
What would you cover it with to avoid wildlife getting in? Like raccoons and bears… I’m always worried if I build a greenhouse, that they would tear it apart to get the fruits and tomatoes.
Good question, bears do get into cars for food, so I do not know what material would protect from them. But for my knowledge they don’t care so much about tomatoes, do they? Polycarbonate panels is about as safe as you can get for a dome. To protect from small animals that come from underneath you could have a metal grid under the growing soil attached to the base of the dome.
After reading this I’m super excited to build mine!!! my neighbors have a dome for their house and i thought it would be cool to do a greenhouse like that. the only questions that i have for you is what size screws did you use for your miter joint and what are the dimensions for the 1 cm plank reinforcements you used for the cover? >w<
Sorry for taking so long to answer. I had to ask Jakob for the answer, since I do not know this things ;). Here it is: 2 inch long deck screws. The plank would have the same width and length as the strut it is attached to.
Hope this Helps. Happy building, you will love the Dome Greenhouse!
Hi,
Thanks for all the information, it is a great site to read!
I want to make a geodome in the same size you made one, I just had a question about the sizes of the wood I will buy. Did you take 5 by 5 cm or is it stronger to take maybe 5 by 7 cm ( metric).
Would be nice to hear your oppinion or maybe the sizes you used.
Thanks, liane
I used struts 4 by 5 cm and IMO it was a very strong structure.
Hello. Have to say that that’s a brilliant construction. We’re thinking of building a dome in our back yard though a bit smaller.
I was wondering, since I am using a dual bevel miter saw which sadly doesn’t have dihedral angle cutting ability with precision of 0.1 degrees, can I cut the angle at an approximate (in my case case cutting 81 instead of 80.7 or 80.8) ? Would it still assemble properly or I need to equip myself with a better saw?
Thank you.
Glad to hear you want to build a dome. You won’t have any problems assembling the dome with approximate cuts.
Hi Jakob, thanks for all your great work and support.
There have been a few questions on saws and cuts before, but one thing remains unclear to me, how to make the cuts with a dual bevel miter saw. I’m looking to buy one, but not sure how you cut the struts.
First option is a ‘normal cut’, along side the fence of the machine. These cuts range from 60,5 to 62,4 degrees. But most machines can make cuts from 0 to 45 degrees. Some go up to 60 but none more then that.
So my second option would be to place the wood perpendicular to the fence of the machine, so in the same line as the blade, allowing to make cuts between 29,5 and 27,6 degrees. But this seems really fiddly and not so stable, especially when you have to make so many cuts.
I’d love to hear how you made the cuts and if you have any tips on the sort of dual bevel miter saw.
Thanks,
Boris
Boris, I see you have put a lot of thinking into this. The saw I used didn’t do more than 60 one side and maybe 55 degrees on the other side. I simply cut a jig in form of a triangle out of wood to place it in between the strut and the fence of the machine. I don’t remember the exact angle of my jig but I would suggest to make it as small as possible so you would still have a good grip when pressing the strut against the fence. When you opt to use a jig like I did then you can work with any dual bevel miter saw. But remember: you get what you pay for!
I hope this helps, and happy geodoming 🙂
Здравствуйте ! Использую калькулятор acidome.ru для постройки своего дома!!очень круто) Благодарю за возможность! ! Есть к Вам вопрос…скажите пожалуйста,я ввожу радиус 4,5 М при брусе 150*50,good karma, выравниваю основание,по часовой… и в результатах мне показывает число 4,43 радиус,площадь 59,95 ….объясните где этот размер относительно каркаса? Внутри,снаружи,ось? Мне нужно привязаться к фундаменту ,по моим подсчетам 4,43 это внешний размер …а 4,5 М находится вне купола на 70 мм … видимо с бруском и кровлей получится ровно 4,5….Заранее благодарен
В калькуляторе появился режим “План” (english “Base”), используйте его, чтобы понять откуда берется радиус основания для вашей фигуры.
Using a wedge at the fence of your mitre saw can increase the angle that you can cut.Many saws have a clamp that is designed for cutting crown molding that will clamp this to your chopsaw table.Caution should be used when cutting sharp angles this way as the blade will be attempting to pull your wood towards the saw.I would also suggest investing in a tapered countersink for predrilling the holes to screw the parts together at the intersection.This will reduce the amount of splitting of the wood and allow you to drwaw the parts tighter together without them creeping
Thank you for including information about your jig for cuts. We are planning on following your instructions to build a geodome on our property this summer. Not much use for this growing season, but ready to go for next year!
Congrats on your building project, Sara!
It seems that the calculator of Acidome has been upgraded and now allows to align the base of the dome for level 3 domes! A wonderful tool!
Not completely true! The option to align the base of the dome only works for the piped joint (which I was planning to use in my design).
We use old tent frames for our greenhouses. Either wrapped in plastic as greenhouse, or with netting against the deer. Works perfect. Cheap, recycled, sustainable.
Great site. Thanks for all the info. I want to build a 3v 5/8 at 16′ diameter on a 16″ wall. I’ve scoured the internet and have attempted to build a scaled down model based on information from other sites, not from the Acidome calculator. I’m unsuccessful at getting the models built as the struts don’t line up properly. I see on Acidome that the strut lengths are comparable but the angles are slightly different. I’m going to try the model again based on the Acidome calculator. I’m just amazed at the varying information in the internet. Can these other places be so inaccurate? With so many people building them from scratch I figured that there must be some allowable slop or tolerance. I doubt that many, if any, could be down to 0.1 degree and 1mm tolerances on the their strut joints. I’m a pretty seasoned woodworker with all the right power tools so it should be a breeze but I’m off to a very unsuccessful beginning.
Thanks. I don’t know about other sites, but I’ve had good experience with Acidome calculator. Happy Geodoming!
How would you print the diagrams from ACIDOME.RU site ?
thx
Amir
Hello. First of all, I got to say that I fell in love with the idea of having a Geo-dome in my back yard to use as a greenhouse the first time I came across it. Since I have no one to do it for me I have to figure out how to make it for myself, so I started looking for information and a saw (since I don’t have one) and got a hold of a friend of mine who has a “JCB-SCMS210 Single Bevel Sliding Mitre Saw” and who was also wiling to lend it to me. So I want to ask, the way I understand it the value of the flat angle to the plane of the outer edge is calculated by subtracting the value of the angle from 180 degrees and dividing that in 2 since u have 2 angles to create that 71.2dgrs (as in your example). So, since if I’m right and my math is all right I have to make 2x – 59.6 degree cuts on either side of the struts, but the saw I mentioned before only goes to 45 degrees on either side, left and right. My question is assuming my math right, is there a way for me to complete it with that particular saw if it only goes to 45 degrees on both sides, or I have to find another one?
If I have made any mistakes in the terminology I apologize but I’ve never done anything as this.
Thanks beforehand.
I’m sure you will enjoy your Geodome. To cut the struts you need a Dual Bevel Mitre Saw. Dale says in a earlier comment: “Using a wedge at the fence of your mitre saw can increase the angle that you can cut.”
me parece muy buena la construccion, en el caso que se quiera realizar una vivienda, los triangulos son más chicos?? con que material se tendria que recubrir, por el frio y la lluvia atte Carlos ( Argentina)
Hi, thanks and very interesting and informative!
Just one question regarding the plastic covering. You secured the covering with the additional 1cm planks on top. Does this mean that the covering is permanent and can not be changed when it exceeds its endurance? Or can still be easily replaced?
Thanks.
It still can be easy replace if you use screws to hold the planks.
Great Dome
one question, why did you make the base from wood, which is ‘inserted’ into soil. Is it Cedar at least, or? i plan to put it on double row of mortared concrete blocks. (aprox 50cm high)
Also thinkng about to place dome groung 50cm under the ground level (the hight of that concrete wall). Do you think is it ok to have greenhouse ground 50cm under the level (few steps down when entering)?
Thank you
Wood was readily available, and it could not be a permanent structure.
Hi,
I love this!
I am on an acreage East of Calgary and am wondering if a Geodome Greenhouse like this would be likely to hold up to our strong winds as we are more exposed than in a town back yard.
Hi Isa, we love to hear from local gardeners. In your case we would recommend a foundation to stabilize the structure (In a back yard we did not need it). Otherwise I can not see a problem. The dome has no corners the wind can hold on to, it just goes around it.
In the diagrams of the strut your numbers in red obscure the reading of the actual degrees and dimensions that we are supposed to study, and the graphic end of the strut also has such tiny numbers that they are impossible to read. I therefore cannot figure out these critical dimensions from your diagrams. I would be grateful if the article could be imporoved in this way.
I really appreciate this article and the design, and want to build a dome such as this as soon as possible
The graphics in the article are not for replication, for that we provided a link to the Acidome.ru website in few places throughout this blog entry where you find all critical dimensions.
http://acidome.ru/lab/calc/#5/12_Cone_3V_R2.75_beams50x50
Hi
Thanks for all
I have a question. I’m doing a good karma dome of 4.6 meters diameter. Now, I’m trying to cut the wood, but I’ve been confusing about the angles. I know equilateral triangles have horizontal angles around 18° and vertical 27,8° (the last measure it’s gave me for the acidome programe). But why is 27.8°? instead 30° which is the internal equilateral complementary angle?
And Why the other vertical angles aren’t the exact complementary of the internal angles of each kind of triangle?
Thank you
I’m waiting your answer.
Regards
Julian
I don’t have an answer to your question but I would suggest to follow the acidome calculator. Also, google is your friend! 🙂
Hi,
How big is the miter angle on Your saw?
I figured that since the detail B has a cone angle 54,8 degrees; the miter angle on your saw has to be 62,6 degrees. I can’t find any miter saw with so big numbers.
Please help.
Please read the answer in the comment section here. http://northernhomestead.com/how-to-build-a-geodome-greenhouse/#comment-158342
We need to study more and get the length and compound angles, but we planto build one.
What I don’t understand about the acidome calculator is how does one get the the 60* and 72* degree angles needed so that the struts will fit together to form the 360* hub. I would like to see it worked out on paper first before I go cutting a bunch of boards. Has anybody got an explanation for this?
I do see where the angles will add up to approx 360 degrees but is that close enough. Is something lost in translation?
How did you get 50mm struts from a 2×6? Aren’t they actually 38mmx140mm? Thanks for the great article!
Rip them in half and then make another rip cut on each half to get the planks for fastening the poly.
Has anyone out there tried using hot glue (instead of staples) to secure the plastic? If so, did it work well?
Hi there really good and helpful information, I’m looking to build a smaller version of what you have, 3m(~10foot) diameter in 2V, can you tell me what size timber I should use, I am hoping to get away with 2″ x 2″ for the struts, do you think this will be strong enough or will I need to move up to 4″ x 2″ ?
My wife wants it to be light enough to lift and move between 3 people as we may need to move it in the future this is why I’m hoping 2 x 2 will be strong enough for the build. Any advice you can offer will be appreciated.
EDIT: I’m actually planning on building V3
Hi Todd, my guesstimate would be 2×2, especially if you plan to move the structure after it’s been assembled.
This is awesome, thanks for sharing! Going to pin this 🙂
Very interesting project.
A great place to find free 6 mil plastic is the dumpster behind a retail mattress store.
Great tip, thank you Tracy.
I putting together the plans to make this greenhouse but I am stuck deciphering how to make the cuts on the struts. Is there any possibility that you could put together a tutorial or video on how you made the cuts for your struts?
Stay tune!
Hi Jakob! I’ve been challenged a bit by the calculations of the angles. When I enter my sphere radius to Acidome I can see the “resulting” toolbox.
I am not certain what the “sizes” and “triangles” sections are showing.
What is the “Angle between faces”?
When you calculated the very nice graphic of your struts with the angles, did you manually calculate it or is it somewhere in the Acidome calculator I have not yet found?
Planning to build a dome in Denmark!
Hi guys
Wow thanks for your information- it helps a lot.
I want to make a 3v dome with 2m Radius and 7/12
I recognized that the base is not plane.
You made the red struts at the base 2,77 cm longer, but how did you calculate that? Because its different with the 7/12 shape i try to figure it out how it could work.
Thanks for your help and sorry for my english
Greetings from austria
Jochen
Jochen, I don’t remember anymore how I calculated the difference in the struts to align the base. For 7/12 you need to shorten two other struts. When you choose ‘Semicone’ as connection type in the calculator, you will find the corrected length of the red struts. I hope this helps.
Cheers!
Hi Anna, Jakob
Help!
It was an ambition of mine to build a Geodesic Dome Greenhouse on my retirement. Following extensive internet research
I found your excellent website.
I followed the Acidome calculations/measurements and angles meticulously. I took great care in levelling the base to receive the 4V dome (rad 2.1M). I found to my horror when I started the assembly (starting with triangle struts “C” ) the struts “paralleled” to the base appear to be too long by approximately 10mm, yet, all struts are the exact recommended length.
I would like to submit photos etc. to whom so ever may be able to help me identify where I went wrong with this project.
I should mention, I would consider myself a competent woodworker having spent my life involved in the woodworking profession.
So disappointing!
Sorry to hear Martin, but as an competent woodworker you will know that this things just happen sometimes. Jakob is very busy right now building our Dome. I will tell him about your question, but can’t promise a quick respond. In meantime I would encourage you to go over the plan one more time and see if you got a wrong measurement somewhere. The Acidome calculations work.
Many thanks for the prompt reply Anna.
I understand perfectly the vagaries that can occur in any project.
I am at a loss to locate the discrepancy/s as I have double/triple checked all measurement and angles. I find measurement are within one millimetre and 1/10 of a degree, while in the majority of cases they meet the criteria as specified. As I mentioned earlier, I paid particular attention to my work as I was unhurried in the execution and enjoyment of the project and time wasn’t an issue. The woodwork machinery that I have used during my career is still available to me and therefore, was able to set up jigs, etc. to complete the work as close as humanly possible to the required specs. I understand that perfection in such circumstances is practically unattainable unless all joints are laser cut.
It would be great if someone would come along and go – “there’s the problem”, that would be music to my ears! I hope I don’t end up with very expensive firewood as teak was the preferred choice of wood given the climate where I live.
In any event, I continued erecting the first series of triangles around the base to find that some of them fitted as I expected – perfectly, while other were out by approximately 10mm, too long. Puzzling!
The reason I opted for the 4V and 1/2 sphere, rad 2.1, I understood the base would be level, and it is, as I paid particular attention to this aspect of the build. If this could be confirmed, I could rule this out of the equation?
Again thanks for your patience
Martin, what is the foundation for the GeoDome? What connection type are you using?
My sincere apologies for the late reply Jakob, I was away on an extended sailing vacation in the meantime.
While away I had a eureka moment! I figured, the only element that could be amiss in the whole operation was that the base wasn’t “fully” circular, which was exactly the case. Also, perhaps I was expecting too much perfection, coming from my cabinet-making background, where accuracy was at a premium.
To answer your “foundation” query, the dome base is laid on a 6×2″ teak wall-plate laid on “H” section fencing posts encased in concrete. I don’t expect this to move anytime soon!
All the pieces meet at a point then, glued and screwed as the jointing method preferred.
I am keeping a detailed photographic blog of the build that I am willing to share if needed when the whole operation it completed.
Regards
Martin
Greetings from Rhode Island –
Should I use the nominal or actual lumber dimensions (i.e. 2″ x 4″ or 1-1/2″ x 3-1/2″) with the Acidome calculator?
Thanks!
-Brad
With the Acidome calculator you want to use actual lumber dimensions.
Hi thanks for all of this
I want to ask in joint model with the simulator that you refer it in this site
Is the red panel in bottom is also 2.777 % bigger ?!
Thanks for the kind words.
In the joint model you can check off the “Align the base” in ‘Figure options’ and the simulator will do it for you automatically.
Hello,
I’m planning to build that Greenhouse and one question about 44 number on Acidome website. Between struts. What is it? Can you tell please. Thank you!
It’s a measurement in millimeters.
I have seen a lot of information on building a Geo Dome, and must say I have found information here that I have not found any place else. But, I still have not found anything about connecting Two Geos together… like a Home and a Garage, or Home and “Mother-in-Law” attachment. Q? how much trouble and how to connect Two together???
I have a question : do you only cut at the end of the wood or do you also cut the “long” side in an angle ? in other words do you cut an angle in the length of the wood?
when I look at the calculator it looks like it but when I look at your photo it doesnt look like it
thanks for replying
The angle on the “long” side is important if you cover the dome with hard plastic like polycarbonate. Because we use plastic film for covering we leave the “long” side as is. Hope this helps.
yes it helps a lot, thanks, so if I do polycarbonate, I use the same angles as in the domecalculator ?
Your post shows printed plans. Are those purchased from http://acidome.ru/ or downloaded for free from the website?
Thanks.
They were free printable when we build, not sure if they are selling them now.
Thank you so much for providing these plans! One question for you, could this be a moveable structure. I want to build one at my home for my friend. I am hoping I can put it in a big truck and move it at the end. Do you suspect that is possible? Thanks in advance!
Hi Northern Homestead,
Came across this while researching adding a greenhouse on my property. I love the idea of Geodesic Greenhouse. My wife is from the Dominican Republic and loves her native foods. Which don’t grow well in the Albany, NY area. My question has to do with the permitting and regulations on building this. It appears 15ft to 16ft in diameter would be ideal. However it looks as if the local building regs restrict square footage size to 10’x12′ for any accessory building. Any thoughts on this as being an issue. I looked at a 10ft dome with kicker wall of say 4ft. Partially buried for better insulation.
It depends on what your regulations are. Also, our dome has no foundation, and so it is not a permanent structure. Look at all those options.
Thank you for sharing. This is exactly what I have been looking for. We live in Iceland and the wind has been blowing up lots of small greenhouses during the winter. So the dome shape seems to be a very good solution and a very pretty one as well. This is definitely the next bigger project – hopefully for this summer!
Do you have a picture of the kind of saw that you mentioned? I need to buy one and it would be nice to pick a suitable one for this project.
Thank you!
A radial arm saw as shown in this link https://images.app.goo.gl/wqgWUpq17LpGnzqH7 is very suitable for this project. Enjoy the GeoDome greenhouse!
Thank you so much for this article. I’ve been thinking about building a dome greenhouse but had no idea about how to go about building one. I already have a dome home (kit I bought off of simpleterra.com) and when I’ve thought about doing a greenhouse, I wanted to do a dome to keep up with my property. I would prefer to build it myself, which is also why I went with a dome kit. I like the idea of living and using things that I’ve built myself and this will be great project for me. Looking over your design and plans I think this is something that I could do. Thanks again for posting this. I’ve found it most helpful.
You’re welcome.
Hello! Thank you for this post and documenting your experience! We are wondering how long it took you to build your geodome? We’re not sure how much time we should budget to still get it done before winter, or if we should push it to next year. Thanks!
It took us less than 2 months for the second dome, the first I don’t remember. About the same, I would think. Since we started both in spring and planted the same year. You can also prepare all the starts before winter and assemble and cover in spring. Happy building.
Thank you for this information!!! I can’t wait to get started building our greenhouse!!
In the blog post the bottom red struts are extended 3.6% to make the bottom of the dome flat, but in PDF on Scribd they are extended 2.77%; which is it? How is this calculated?
The correct value is 3.6%.