

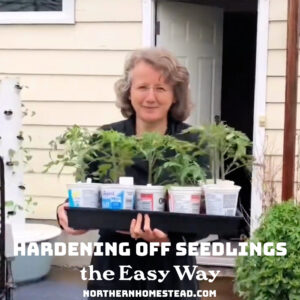
Hardening off seedlings that you started indoors the easy ways is different from the traditional method where you bring plants out on a nice and sunny day for 2 hours, then bring them back in, repeat that the next day for 4 hours and bring them in again. Adding a couple of hours each day, it takes 7 -10 days till plants are hardened off enough to be outside all day.
That’s a lot of work!
There has to be a better way.
If you prefer listening to reading, you can continue on YouTube, just follow the link.
Why harden off seedlings
Hardening off seedlings before planting them out in the garden is part of the process of starting seeds indoors. When we start seeds indoors for the outside garden, they are growing in an artificial environment. These indoor-grown plants are not accustomed to natural sunlight, wind, or temperature fluctuations.
To help them to adjust, they need to be hardened off.
The farther our seed-starting practice is from a natural environment, the more important the process becomes.
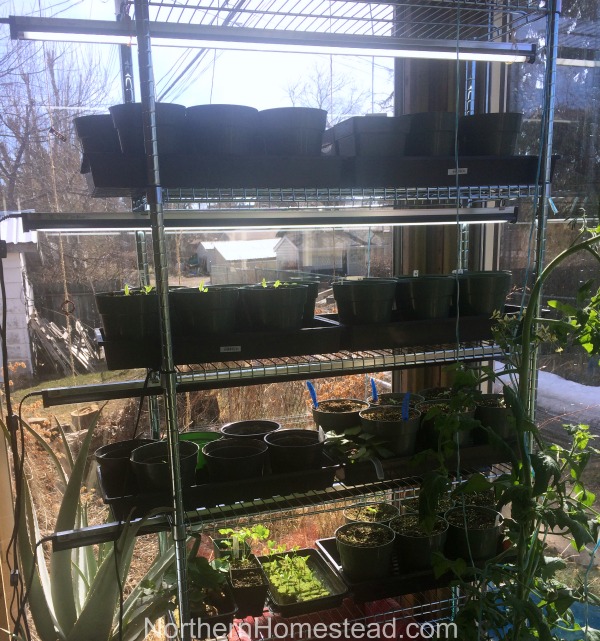
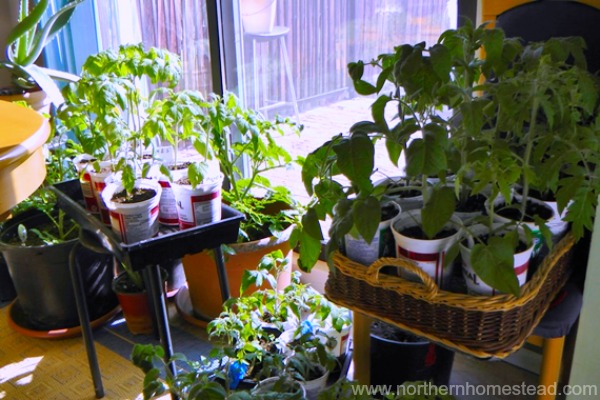
If you grow seedlings under a grow light, they will be more sensitive to natural light. If you grow them at a sunny window, they are to some degree already used to sunshine, but still need to get used to the wind and weather.
Personally I do not like the term hardening off, nor do I do it. It is too hard on plants and gardeners. But since it is the common term, I use it here to describe the gentle process of bringing out plants.
Plants want to be outside, feel the sun and the wind. It is not hard for them; it’s the natural environment.
What can be hard on plants, and often even kills a seedling, is when the plant has to get used to everything at once, bright sunlight, wind, and extreme temperature.
Eventually, a plant will have to face all that, but it does not have to happen all at once.
The hardening off in stages is quicker than the traditional way, simply because it is much gentler.
Let’s see step by step how to do it.
Note that young seedlings adapt more quickly than mature seedlings. They mostly do not need hardening off. Plant them and cover them with a frost blanket for a few days, and they will harden off in place. We talk more about protection at the end.
When to Harden Off Seedlings
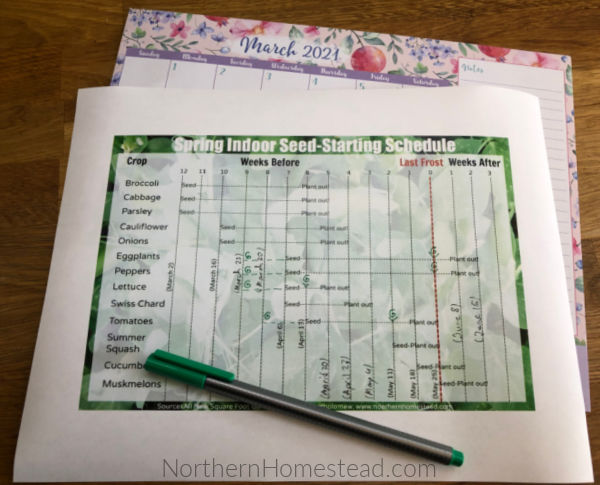
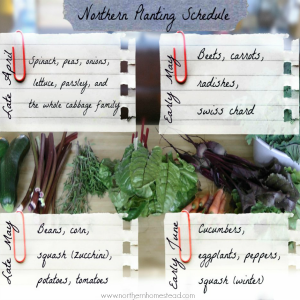
Start seeds indoors and let them develop into healthy, strong seedlings first, without hardening them off too early. A schedule of when to start seeds and when to plant the seedlings out can be very helpful, so you don’t start too early or too late.
Once the seedling is ready and the weather conditions are right, it can be transferred to the outside, aka hardened off. We talk more about the weather below.
If you follow our indoor seed-starting schedule, you will notice that most plants have different planting dates. It all depends on the weather, of course. But this way, we do not have to harden off all the seedlings at once. It is always only one plant category.
Once the seedling is ready and the weather cooperates, you can start hardening off plants the easy way.
Where to Harden off seedlings
To make your job easier, prepare a location for your plants to get used to the outdoors. The worst place is an open, sunny, and often windy deck, which will be hard on the seedlings.
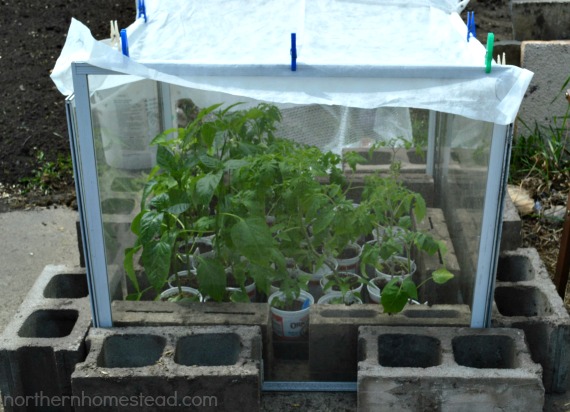
We started with just a few recycled window frames, held together with cinder blocks, as a temporary little greenhouse. It worked so well that it turned into a permanently raised bed, but the temporary structure worked perfectly for hardening off plants.
The idea is to give the plants some wind protection and the ability to provide shade.
Plastic will do just as well if you don’t have recycled windows. Railings on a deck or balcony can be converted; any sheltered location can work.
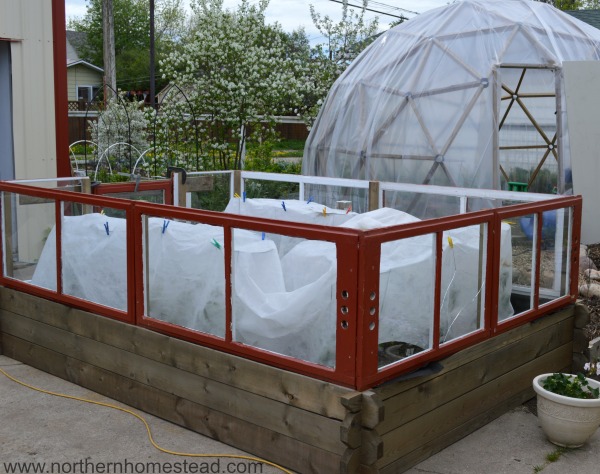
Now, we have a greenhouse and a raised window-protected garden. In spring, we use the indoor garden and greenhouse to grow seedlings; in summer, we grow heat-loving plants there.
We do not recommend the mini greenhouses; they overheat during the day and give you a false sense of security at night.
You want the walls to be enclosed for wind protection and the top open for ventilation.

Note that plastic little greenhouses do not protect plants from frost. If you have a frost-sensitive plant, keep it indoors till all danger of frost is over.
The Weather for Hardening Off Seedlings
Growing in a cold climate, we are always dependent on the weather. There is no need to start hardening off plants if the weather does not cooperate and you can’t plant the seedling into the ground in the next week or two. Keep the seedling indoors till the weather improves.
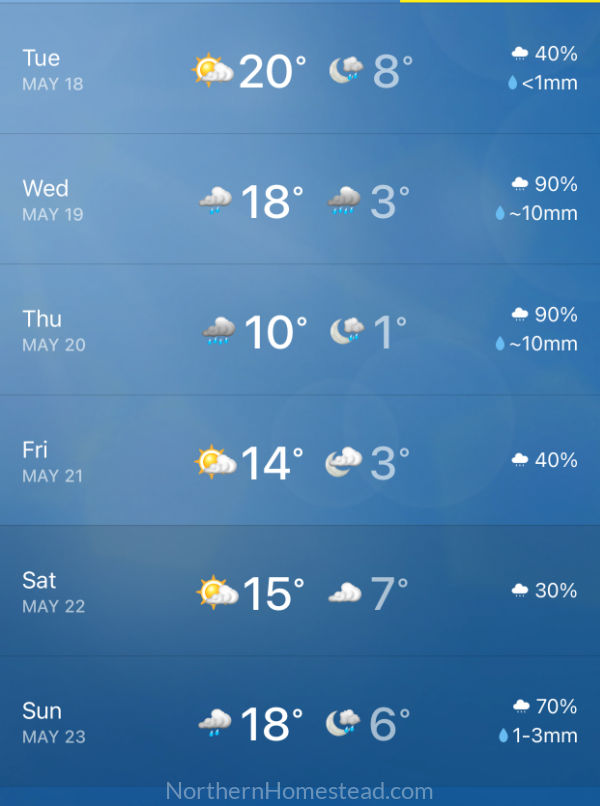
Here is an example of our weather at the end of May. The weather looks good except for 3 days in the middle. 1C (33F) in the forecast can mean frost on the ground. Read more about frost and frost protection here.
1C is also too cold in the greenhouse. An unheated greenhouse gives you about 2 degrees at night. Using a frost blanket can double that, but we are still below the temperature we would want for heat-loving plants.
On an occasion like this, it is better to wait till the weather improves or be willing to bring the plants in for a few cold nights, which we want to avoid. Watching the weather forecast is essential.
How cold is too cold for seedlings?
That depends on the plant you are hardening off. Plants react very differently to frost. However, when hardening off seedlings, we want to keep them away from frost.
Cold-weather seedlings like cabbage, lettuce, and onion are okay above 2C (35F), and warm-weather seedlings like tomatoes are better not to go below 8C. (46F), Even though they would not die in 2C, it can set them back.
Cucumber, squash, etc., are the most sensitive plants; if possible, wait until the temperature is above 10 °C (50 °F).
This being said, in our cold climate, these numbers are not always realistic. We try to be as close as we can and work with covers and protection. Read more about it in the article Cold Spring Challenge in the Garden.
Sun or shade
If possible, choose an overcast day to start the hardening-off process. Yes, that’s right, not a nice sunny day, but a calm, cloudy day is perfect for bringing out seedlings.
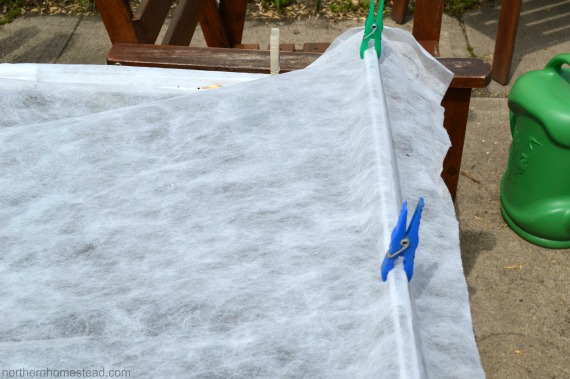
In our sunny climate, that is not always possible. We can have sunshine for weeks. In this case, I put the plants in the shade first or cover them with a plant protection blanket. The blanket is lightweight and is held in place simply with some clothespins, which are handy in the house and garden :).
The overcast day can still be brighter than a grow light, but it won’t burn the leaves. Since the location is sheltered, the plants don’t have to adapt to light and wind simultaneously. You can keep the plants outside for good.
If the plants were under grow lights or in poor light conditions, I’d make sure to put them under a shade blanket so they don’t get any direct sunlight during the first three days. However, I won’t move them in and out except under extreme, unexpected conditions.
After three days outside, you can remove the protective blanket and expose the seedlings to sunshine and wind. On a calm day, you can also move the plants to their planting location. Leave them there for one or two more days. This way, the plants will adapt to their surroundings before going through a transplant shock.
Watch the seedling closely. If it looks ready to be planted, plant it. If it needs a bit more nursery time, it can have it.
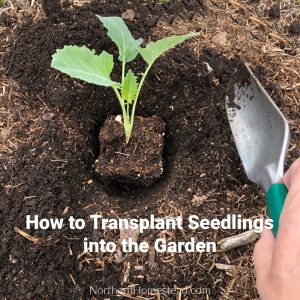
Protect the seedlings after transplanting
You might have already noticed that we do not harden off the seedlings; we gently change their environment to a natural one, which is good for them.
This gentle process for the seedlings and for us, the gardeners, continues when we transplant them into the ground. I like to give the plants some protection after they are transplanted. It might sound like more work, but again, it’s less. Remember, we did not have to move seedlings in and out. If we pamper them more, we will not have to deal with weak and sick plants afterward.
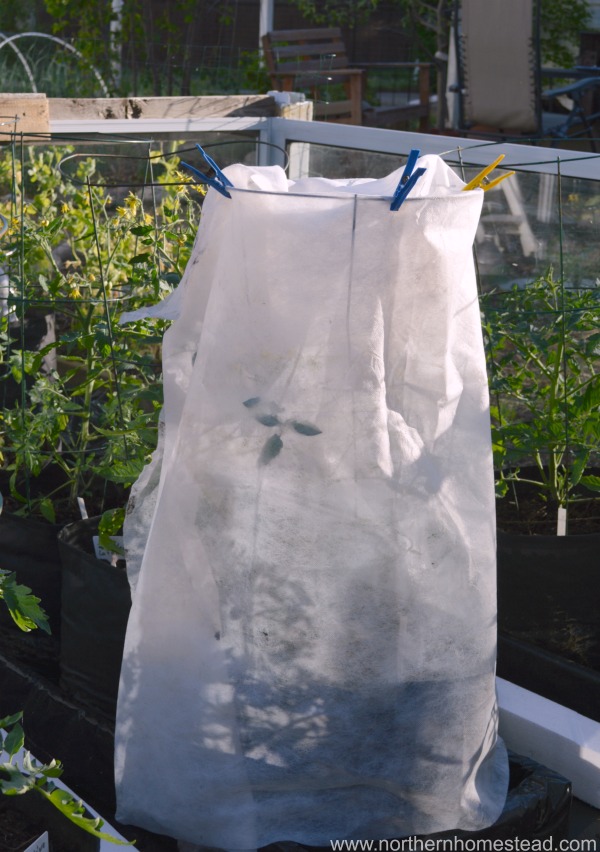
My first go-to tool is the protection blanket. We have several of those and use them in our garden. Wrapping an individual plant or covering a whole row is easy and quick.
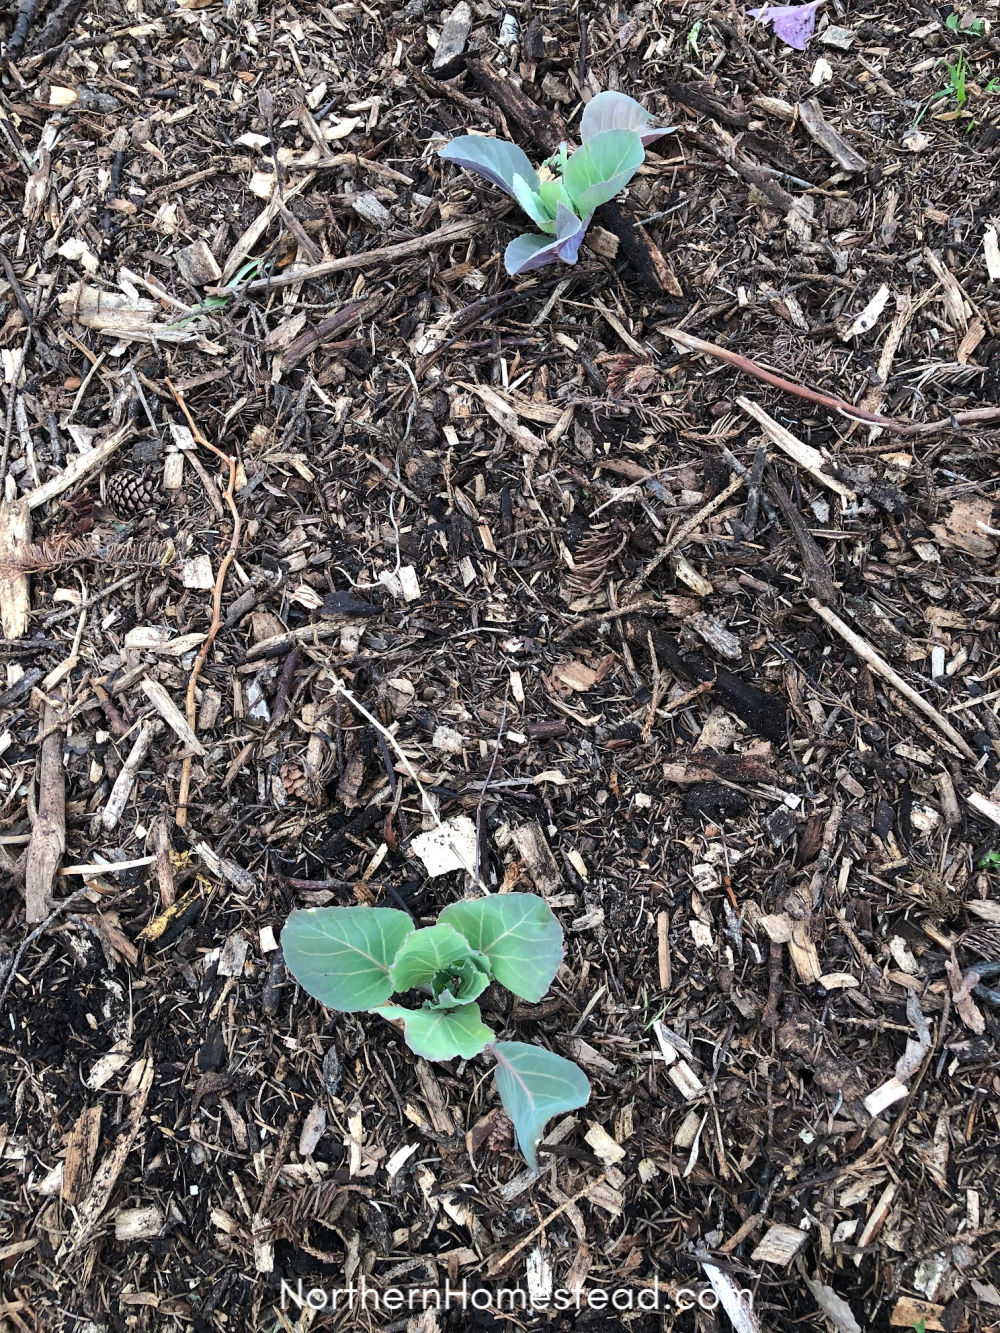
Mulch is another straightforward and effective way to protect young seedlings. Bedded into mulch, the wind can not be so harsh on them.
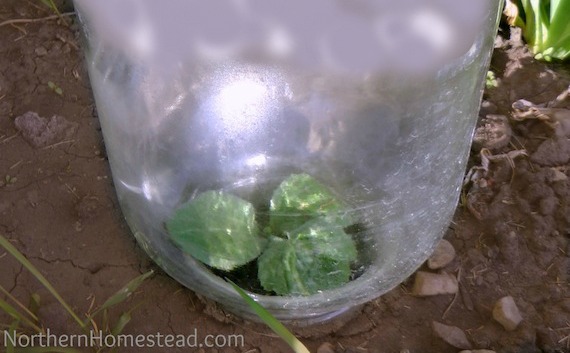
Be creative, for example, use a cut-open milk jug, an open-from-both-ends tin can, or a glass jar. Especially in extreme weather, those simple methods make a huge difference. Read more about the cold spring challenge in the garden article.
Hardening off seedlings the easy way is gentle on plants and the gardener. As a result, you get healthier and more robust plants, and gardening is more fun.
We invite you to subscribe to Northern Homestead and follow us on Instagram, Facebook, or Pinterest for the latest updates.


This info is a little late for me this year but your method makes common sense and I’ll be trying it next year. You described my current method perfectly: In and Out on the hot windy deck. And lots and LOTS of seedlings.
Gardening can be a lot of work, but thankfully it does not have to. We like to work smarter not harder.
Thank you for this article. I have a lot to learn! You said that mini greenhouses give a “false sense of security” at night. In what way? Thank you.
It gets quit cold in there. Of course it is also depending on the material it is build with. If in doubt take a thermometer and see the difference the greenhouse temperature has to the outside temperature. At night it might be the same.