

Have you heard of sowing carrots in cornstarch? It is said to be a way of planting lots of carrots quickly and easily for great germination no thinning needed and preventing seed waste.
Wow, that’s a lot to ask from a planting method, especially if it comes to something as finicky as carrots.
With starting a new garden in the country this spring, and lots of things to do, we needed a no-fail method. After watching this video, I had to try it myself. Here we share our experiment with sowing carrots in corn starch.
Preparing the seeds
The seeds can be soaked for 6-24 hours and kept moist for two days so they start to sprout. Soaked or sprouted seeds are great because they give you a head start. However, once they sprout they absolutely have to be kept moist. Since I knew that we could not be there to water, I went light on the sprouting. I still soaked them overnight but did not wait till they sprouted.
I would think that sprouting the seeds is optional, but if you want to do it, handle them with special care.
Prepare the cornstarch mixture
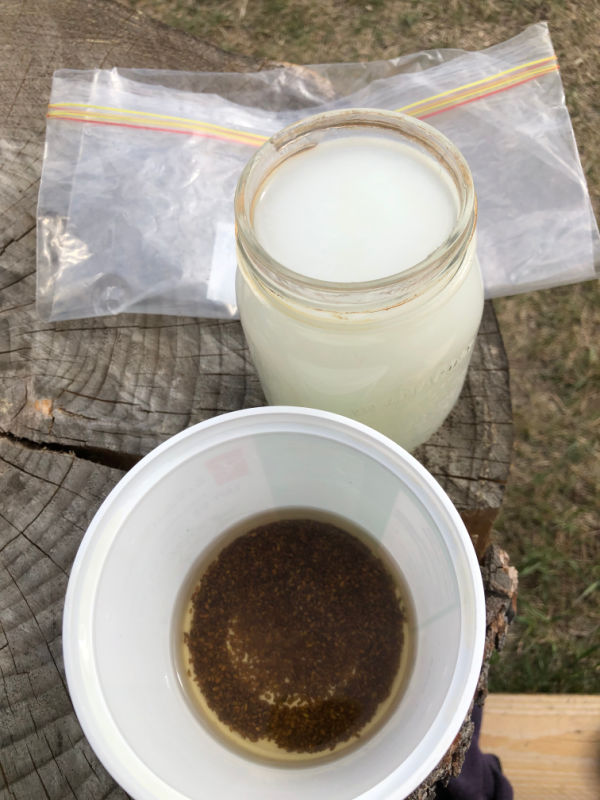
The corn starch mixture is 1 cup of water to 2 tablespoons of corn starch.
For a standard seed package, you will need about 2 cups.
Mix it in and bring it to a simmer so it becomes a nice jelly texture.
Let the cornstarch mixture cool completely.
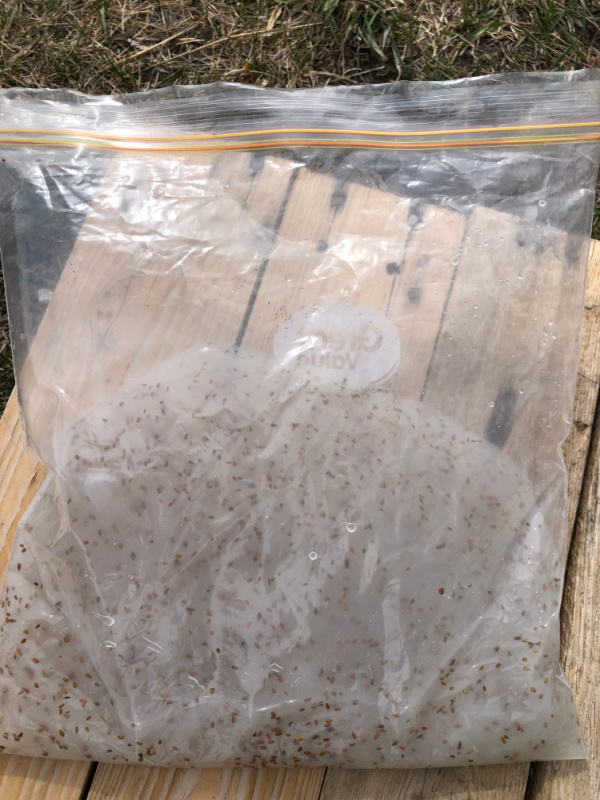
Pour the cornstarch jell into a freezer bag, add the carrot seeds, and mix well.
Now you are ready to head out into the garden to start planting. Take scissors with you, you will need them.
Planting the carrot seeds in cornstarch
At this point make sure that your garden soil is ready to plant. We share more about growing carrots here.
When you are ready, cut a little corner of the plastic bag with the cornstarch, and carrot seed mixture. In my first attempt, I made the hole a bit too big, so too many seeds came out.
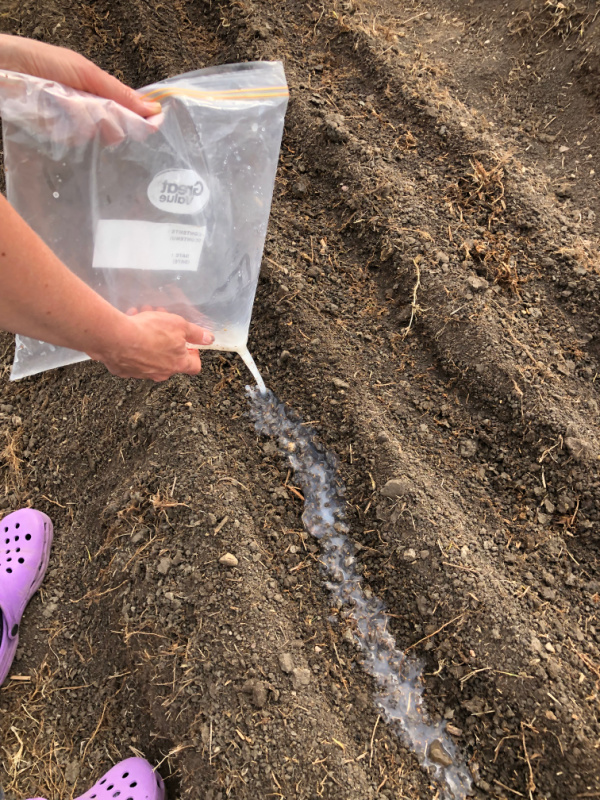
You really want to have a small hole, so the seeds are spread out evenly, and thinning is unnecessary. I still have to practice a bit more.
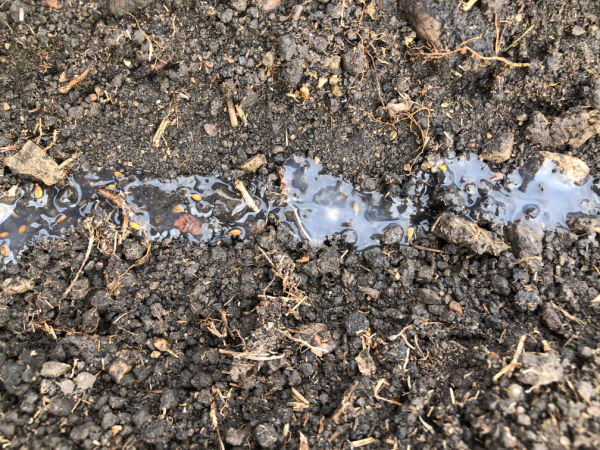
Cover the seeds with a little bit of soil, so they do not dry out.
Great germination
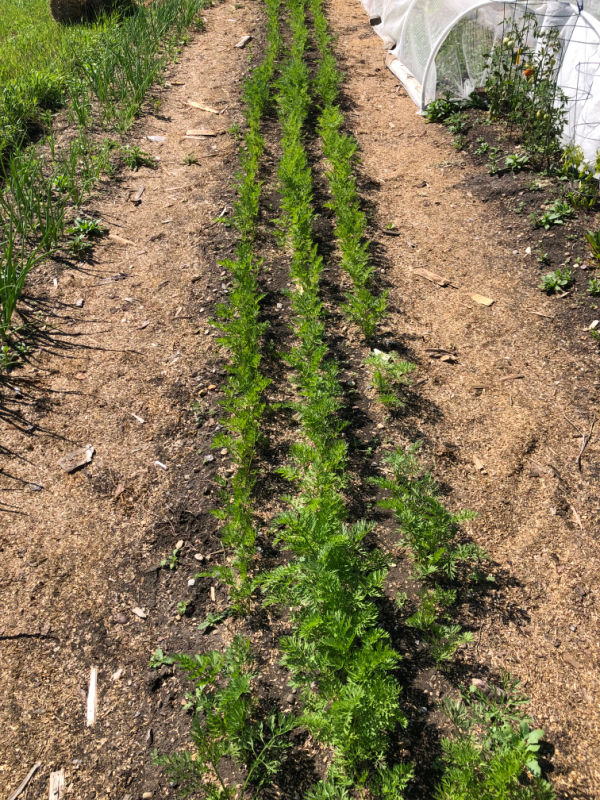
The result was great germination. As I said before, this was in our country garden, so we could not water much. We still watered whenever we were there, about once a week, or maybe twice on the weekend, but definitely not daily. It was also a dry spring.
If nothing else, the soaking and the corn starch did help with germination. To see the dense rows was very encouraging.
Did we have to thin them?
However, the dense rows also meant we had to thin them. I noticed though, that even though we had to thin the carrots, the thining was relatively simple. It seemed that there was still at least a little bit of space between, not like sometimes a cluster of seeds would germinate that is almost impossible to keep apart.
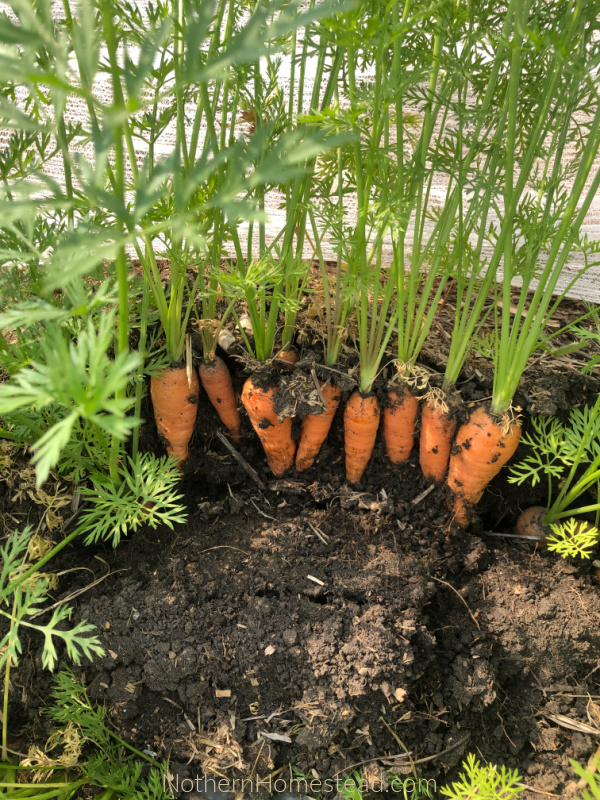
We thinned them a few times during the growing season and used the baby carrots. What was left, was still a dense row of carrots. In the picture above I opened up a row at the end of the season. They are beautifully growing mostly one by one.
Since we love fermented baby carrots, we did not worry too much about thining them perfectly.
Recap of our experiment
The fact that the cornstarch jelly helped to keep the seeds moist was very beneficial. That alone is worth doing it this way.
The thining, even though still needed (at least in our first experiment) was easy to do.
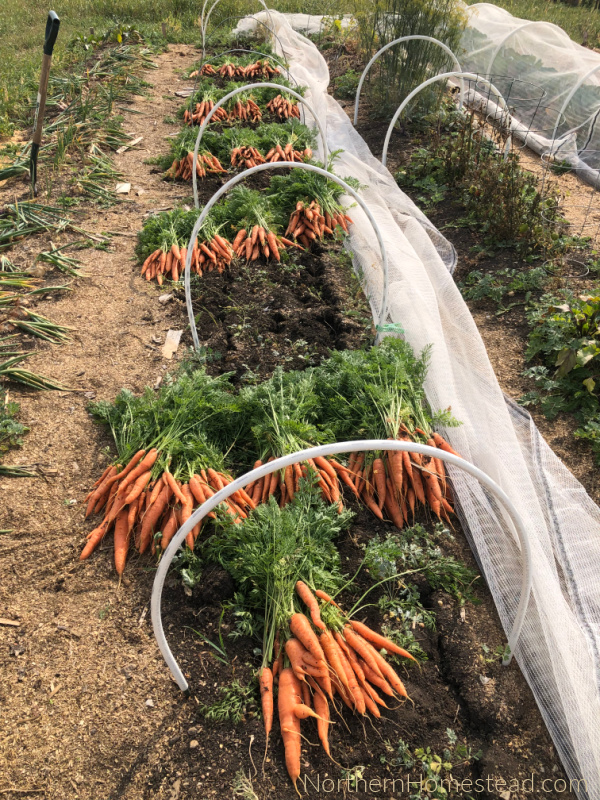
We ended up with a great harvest.
What is your way of sowing carrots? We would love to hear it.
We invite you to subscribe to Northern Homestead and follow us on Instagram, Facebook, or Pinterest for the latest updates.


I’ve never heard of cornstarch seeding before. And you’re right – carrots are fussy. I’ll be trying the cornstarch method next year for sure!
I really enjoy your blog. It’s so valuable for us novice gardeners in Zone 3. Thank you!
Thank you for your kind words. The cornstarch seeding method is worth trying out.
I can’t wait to try this in the spring!
Hope it works just as great for you.
The last 2 articles have been eye opening for me! The cornstarch soaked carrots will be a lifesaver, next spring, but the fermented ‘maters sound luscious! I have a whole picnic table covered with various sized tomato’s so I’ll experiment a bit. Wonder if I could cut a larger tomato into smaller chunks first? Any thoughts?
Thank you for your gift of inspiration. I’m moving, tho slowly, toward year round gardening, here in zone 6 Connecticut. My only hangup is the trip to the garden. It’s only about 100 steps, but here, in the snow, snowshoes are sometimes necessary and they are not so much fun to deal with.
Anyway, thanks again for your latest VERY helpful articles!
Happy gardening!
Larry
Thank you for your kind words, it is always encouraging to hear that what we write is helpful.
As for the fermented tomato question, we would not suggest cutting up big ripe tomatoes to ferment. The reason is that tomatoes have a very high sugar content and will turn into wine. Small whole tomatoes on the other hand ferment before turning to wine.
I dont use a bag but use a commercial kitchen squeezy bottle the sort they use for decorating the plates of food with flavoured oils. Used this method now for some 12 years after having a bad result from using wallpaper paste [the fungocide in that was too strong]. My neighbour uses the sort of pump type device used for applying bathroom sealant he says that the spouts that are provided can be cut to leave a very fine hole at the end of the spout. I will say I think my method is very slightly superior.
Love the squeezy bottle method, I can see how that would work perfectly. Thank you for sharing.
The squeezy bottle is a great idea. I’m going to plant carrots today in my unheated greenhouse. Since we now have 10 hours of daylight I’ll be starting more cool season crops this week.
Wow! I can’t wait to try this out. We also have a farm garden that we can’t water daily. This will hopefully give those seedlings a better start. I wonder if this method could be use for other seeds? 🤔 Will be experimenting with this in a few days. Spring is finally here!!! Can’t wait to start playing in the soil again.
Happy planting! We would love to hear the results of your experiments with other seeds.
I used it for beets last year with great results!
It seems the cornstarch method would be great for planting other small seeds too. I have also heard of mixing tiny seeds with fine sand and using a spice jar with a fine- holed top to spread the seed in the row or over an area.
I often mix radish and carrot or beet seeds and sow them together. The radishes grow quickly and are harvested first: they loosen the soil for the carrots or beets that form later. I also love to use the carrot and beet thinnings in my salads.
Those are great ideas, Vickie. Thank you for sharing them with us.
Thanks for the advice. I just did your method now and look forward to seeing the results. 🙂
Will this cornstarch method work with onions ans cabbage as well? I have a hard time with the spacing of my onions in cabbage.
I would not recommend this method either for onions nor for cabbage. Cabbage needs a lot more space. one foot is for most varieties not enough. Onions, too need more space than carrots, but can grow in clusters.
I found a method of planting carrots without thinning and thought I would pass it along. It is the toilet paper method. I lay out a strip of toilet paper (my garden is raised 3×6) so 36 inches long. Lay the seeds down the middle of the toilet paper and space accordingly. I made 11 strips 36 inches long. Then using a spray bottle, spray the toilet paper. With the seeds in the middle of the strip, fold the paper over the seeds than fold the other side over the seeds. Now you have one long strip of toilet paper with seeds. Keep wet and put in a air tight container. Wait 2 or 3 days, then plant. The seeds will stay in place. This will work with many type of small seeds.
Thank you for sharing your method. It’s also a great project for children.
So, would you say 1 tsp Carrot seeds to 2 cups of Cornstarch mixture?
I know, seed packages very greatly, I tsp would be a good measurement.
I’ve used this method for a few years now. We love it. I suggest make more gel than less. It’s easy to get the concentration of seeds too high in the bag with the gel. So use more gel and if it’s too much you just squirt more in the furrow.
Thank you for sharing this information with us.
I am constantly having issues with good carrot germination. I will definitely try this. Do you drain the soaking carrot seed prior to mixing into the corn starch gel? Thanks!
Yes, you have to drain them so the corn starch doesn’t get to watery. Hope it works great for you.
I prepare the soil. I use a long rod to guide my finger to make a shallow trench the length of the bed. I put the seeds in. I cover the shallow trench with some light potting soil. I cover the entire bed with an old bed sheet. I now water through the sheet. This prevents the seeds from being washed away. It also keeps the soil cool and moist until the seeds sprout. I leave the sheet on until the majority of seeds are well spouted and growing.
Thank you for sharing your method. I have tried to do the same with a frost blanket, but it only helped with seeds not being washed away. I can see how an old cotton sheet would also keep moisture for longer. Great idea.