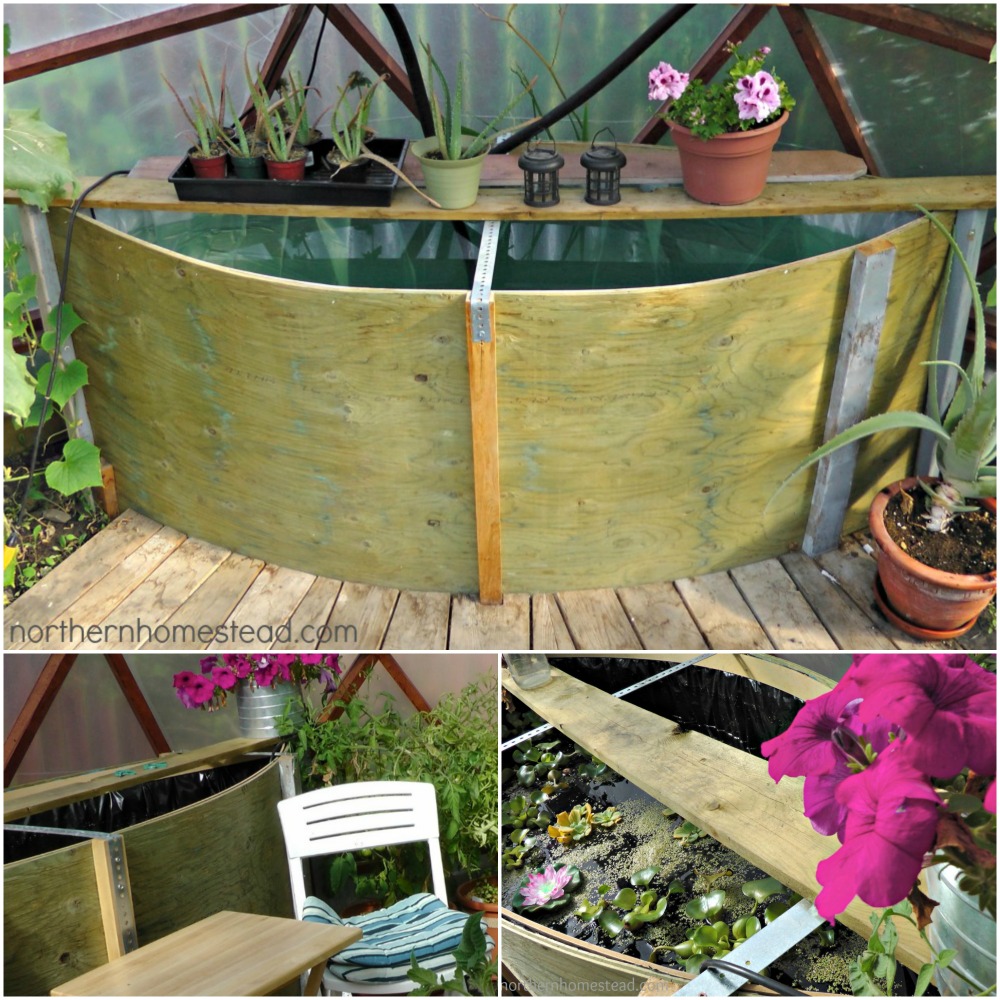
To have a greenhouse in colder climates is very valuable. It helps to extend the growing season and gives the plants a lot more heat. Although on some days there is more heat than the plants can use, the greenhouse gets way too hot.
A good way to regulate the temperature in a greenhouse is by using a thermal mass, and water has a very high specific heat capacity. The absorbed heat from the air warms up the water during the day and gives it back during the night. In our Geodesic Dome greenhouse we installed a 280 gallon water tank.
To use water as a thermal muss has also the advantage of serving as plant watering water. Plants grow better when watered with stagnant warm water. Learn more at How-to water your vegetable garden.
The Greenhouse Water Tank Structure
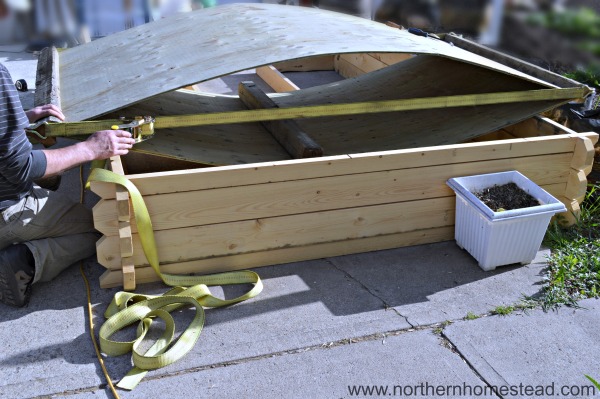
We built the tank out of two 4X8 5/8″ sheets of plywood. The sheets are held together on the short edges and the water then presses the sheets outwards forming a fish shape. The tank is buried one foot in the ground, this way we did not have to worry about 2200 pounds bursting the tank. The top long edge of the plywood is being held by a metal band. There is a lot of water to hold.
For our second Geodesic Dome greenhouse I built a different shape as you see on the picture below, which worked much better and seems to be more stable.
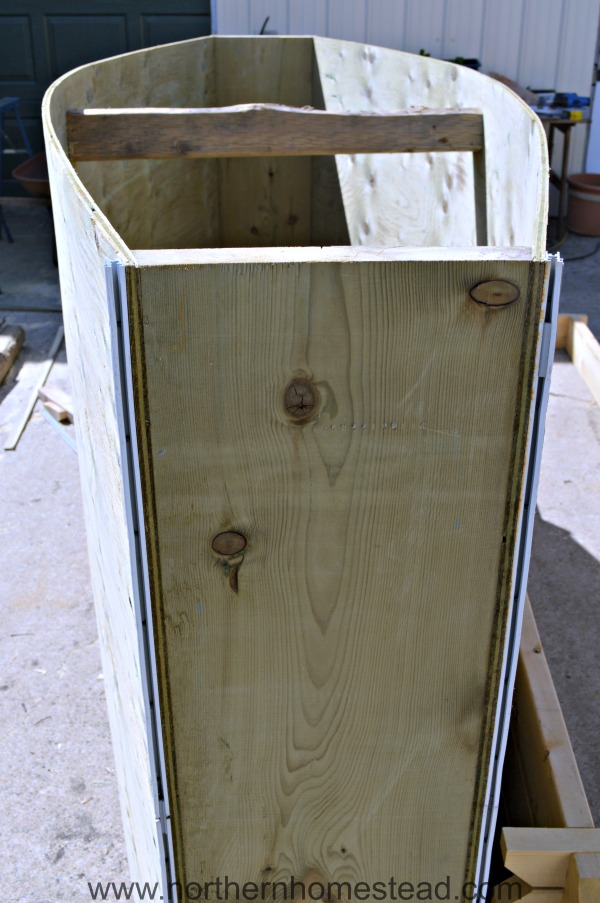
Here is how you build one for yourself: You will need two 4X8 5/8″ sheets of plywood, two 2X10 4ft long boards. Then you bevel the long edge of the boards at a 13° that makes them a trapezoid when viewing from the end.
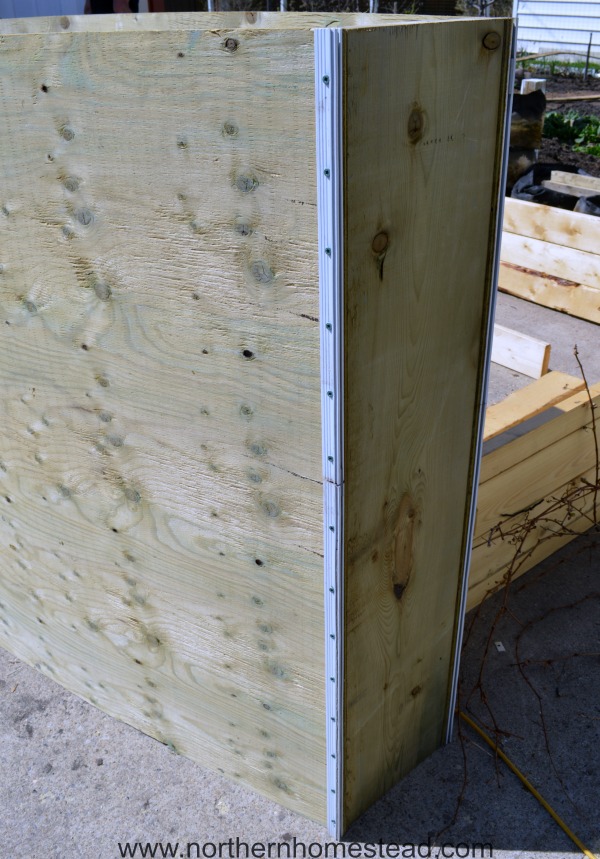
Attach the short edge of the plywood to the long edge of the boards using screws with large OD washers or better reinforcing the plywood edge with a metal strip. For my tank I used recycled aluminum windows frames.
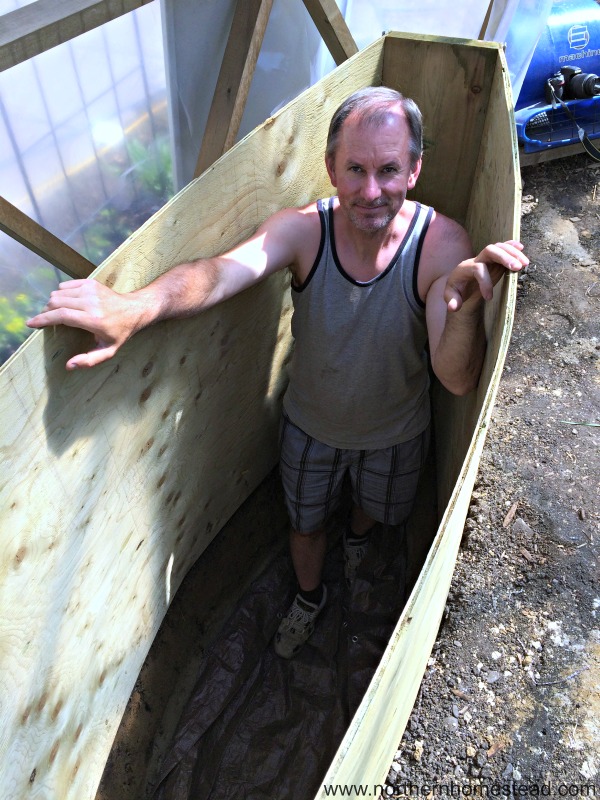
Since our second greenhouse is a bit smaller, I dug the hole for the water tank about 4 ft deep for couple reasons. For one, to increase the volume because the amount of water is important to cool and heat the greenhouse with a radiator. For two, the ground at 4 ft has a lower temperature than at the surface, and since the lowest 2 ft of the lining is below the plywood and has direct contact to the ground that will add to the specific heat capacity of the tank.
The Greenhouse Water Tank Lining
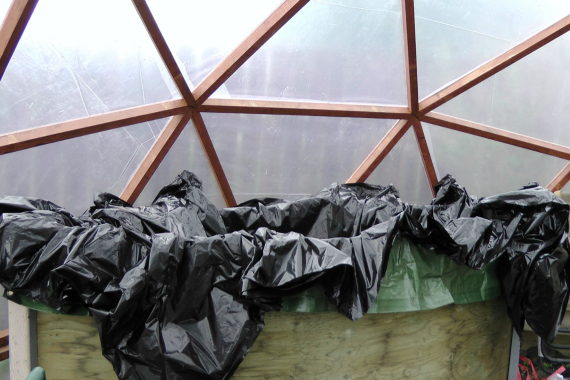 We lined the tank first with tarp and then 4 layers of 4 mil black plastic. It lasted for two growing seasons. The reason why it ripped was partly because of the ice that built up in the winter. Our frost comes so suddenly that one year we hadn’t emptied the tank on time and ice damaged the plastic. The second year we were on time, but there is always a bit of water left.
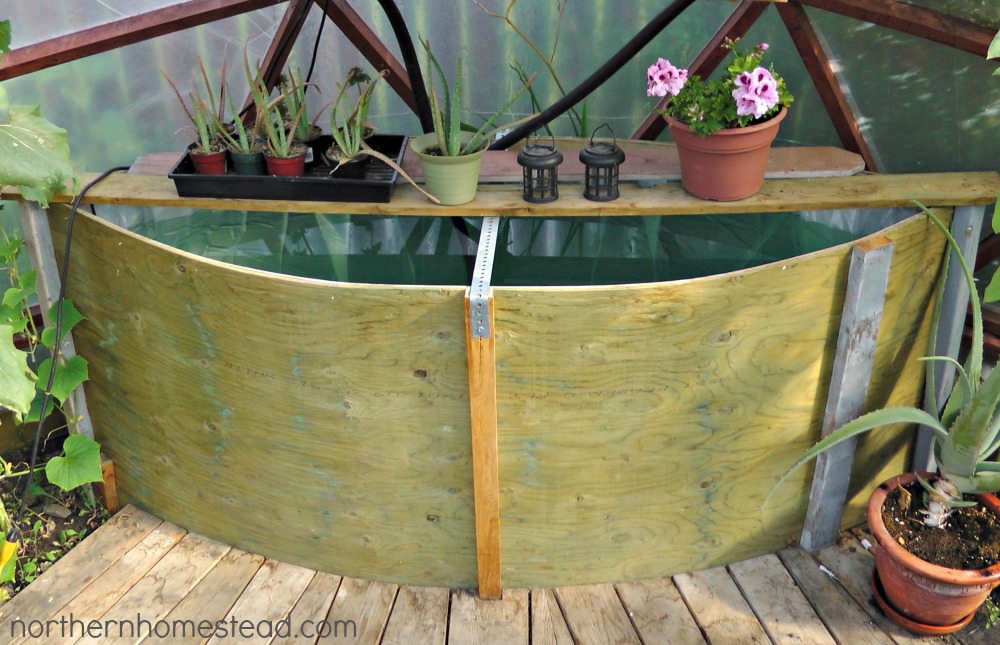
Then we exchanged the black plastic with 2 layers of 6 mil vapor barrier plastic. Note: to line the tank with special pond liner would have been a better option but you would have to have it in one piece.
The Greenhouse Water Tank Biological Filter
For filtration we built a simple biological filter. We took a five gallon bucket with a lid, drilled a hole in the lid and on the site of the bucket near the bottom. The opening in the lid we connected to the pump and the one at the bottom functioned as an inlet so the water could be circulated through the bucket. We filled the bucket with sponges. Soon bacteria built up in the bucked on the sponges and started to clean the water biologically. Note: You only need a filter if you grow plants or fish in the tank.
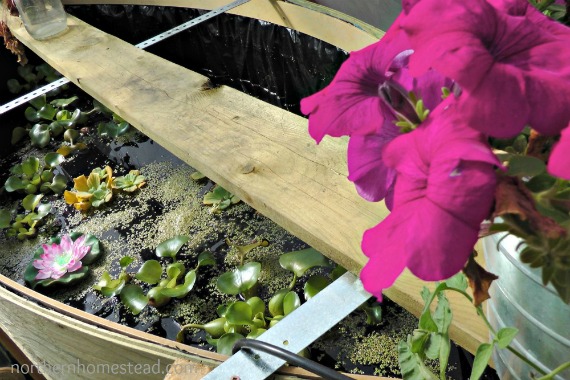
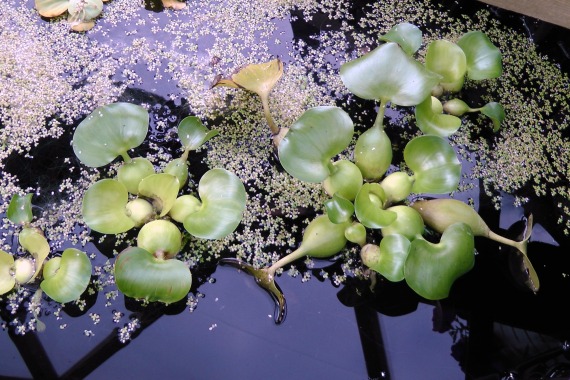
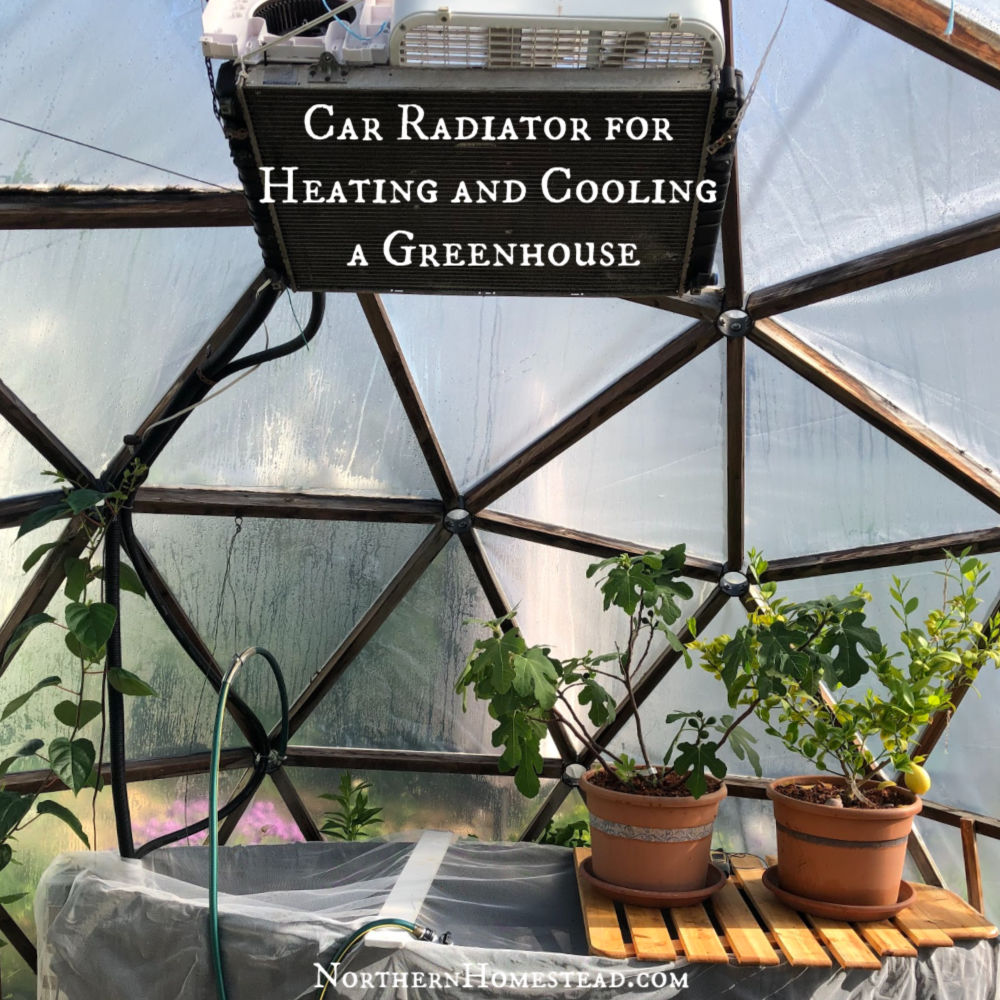
We could have raised some fish in the water tank but we did not. Instead we grew some water plants in there and used the water for watering the plants in the greenhouse. Our water tank is also a base for an active heating and cooling system through a radiator. Read more Here.
If you want to build a Geodesic Dome too, we share a step by step How to build a GeoDome Greenhouse.
A Geodesic Greenhouse Book: Building and Using a Solar-Heated Geodesic Greenhouse.
Don’t forget to subscribe to Northern Homestead and follow us on Facebook or Pinterest for the latest updates.






I think it’s beautiful! We are hoping to build some sort of greehouse off of the southside of our home this winter. I love your dome!
This is awesome! I wonder if a person couldn’t implement this as a aquaponics system, and raise a few fish in there for the growing season. We’re in Billings, MT so ag zone 5… would definitely have a good 3 months downtime on it, but should get some good growth of fish in the other 9 months. Hmmm!
Thanks for this neat post!
I am sure you could raise a few fish in there. I think though you would have to line the tank with special pond liner and have a stronger pump, other than that why not. Go for it!
Years ago Bill McClarney, a founder of the New Alchemy Institute, did a great deal of work with dome covered Tilapia ponds. This was before aquaponics was much of a science. The New Alchemy published several journals and McClarney always used to comment that domes belonged over fish tanks. A simple idea would be to put a sump opposite the water tank which would become a fish tank, and the plant tanks would be lined all around the dome but drain into a sump opposite the fish tanks and be pumped back to the fish tank. The fish water would then gravity to the plants and then to the sump for pumping back to the fish tank. You would need to follow prescribed fish to plant ratios and all that but it is a very doable concept. You could also do rain gutter bag culture very easily which naturally morphs from a hydroponic style culture into aquaponics. A lot of possibilities.
Great ideas, thank you for sharing!
That GeoDome greenhouse water tank is SO neat! I love it!!!
Kristen from The Road to Domestication
Wow, what an ingenious idea is this water tank!
With the radiator in there, can you continue to keep frost out during the winter? I am in New England and I have a greenhouse and I was so determined the first year to keep the frost away. Sadly, without actual heat, things get cold at night and nothing but the broccolis and carrots can survive. I keep thinking about large plastic barrels painted black to fill with water and use as heat in the winter but that is quite a project!
It totally depends on how cold it gets in your area in the winter. The radiator does not produce any heat in itself, it is just the water. But you could heat the water in the winter with some kind of an aquarium heater. It is way to cold here for something like this though.
Your geodome looks great, im planning to build one myself. I live in Denmark, i dont know about climatezones, dont think we use same thing in europe, but winters isent nearly as long and cold as yours. Frost will start late october and end in april at worst.
You could use a solarpanel or a solarheater to heat up water during the day, it should be possible to keep frost out all year that way.
Try look at this company, growingspaces they use water for storing heat.
Good for you, we love our greenhouse! Our winters are very cold, colder than en European can imagine ;). But I am sure it could work for you in Denmark, except there might not be enough light in the winter.
a couple of ideas. Building your tank a little further in the ground would take better damage appears heating and cooling. in the winter, rocket mass water heater could maintain the heat in the water mass inexpensively.
You guys did a beautiful job, it has inspired me to follow suit! We will be building one just outside Lethbridge, AB. We are hoping this will stand up to our fierce winds, where in Alberta are you?
Oh great, we are so happy to be an inspiration. We are north of Calgary.
It is a beautiful greenhouse, just as pleasing to the eye as it is practical! Dan, how did you build go if you have finished it? And is it standing up to the winds? I am a new resident of the Crowsnest Pass and have the same winds to consider.
Love this whole idea and that water tank!!! It’s now on my to do list.
Being in San Antonio, I never really fear any frost nights.
However, I have a possible idea to hopefully resolve the many issues with frosty nights without a heating source, that I’ve seen in the comments. Might I recommend lighting a candle? In an enclosed location like this, the heat can maintain a nice warm temperature. I would assume that scented candles isn’t ideal. Obviously there are issues with leaving a candle on, however, there are always precautions one must take to prevent such hazards.
Thank you for your thought Shawn! A candle could help with some of the cold, not for real frost though.
We loved the water tank in the summer too, it was great for watering the plants in the greenhouse.
Hi! I just joined. I saw the dome and have asked my husband to build it for me for my 60th in May. Our problem here will be heat. Four months out of the year our temps are over 100 degrees and as hot as 115. Everything I tried to grow burnt to a crisp. What do you recommend for cooling in desert conditions?
Welcome Leslie. I would recommend water, and maybe a radiator too, see the link in the post. To have the water tank more underground could help to keep it cooler. I also have heard ideas to connect the radiator to an outside well, it really cools more when the water is cold.
Insulation would play a role too, where cold air can’t come in, hot air can’t come in either. Hope this helps. Excited for your new GeoDome!
Also plant a tree or two to shade or partially shade your dome or area. Helps create a microclimate.
HI, Leslie, For cooling , you could consider a reflective shade cloth that blocks out half of the light and heat . In addition you can use misting nozzles which spray a fine mist of water and provide evaporative cooling (especially with a fan blowing air over a cooling pad which is an absorbent wick like used to cool houses in summer in dry climates .
Another way is to recess greenhouse into ground since the ground keeps an almost constant average temperature year round ( if you add the hottest temp and coldest yearly temp and divide by two this gives the usual ground temp year round at about 4 feet down )
How did you keep the “fish”shape during construction? I understand the water keeps it out once full. Also what did you use at the ends to hold them? We are going to use this model in our greenhouse in Newfoundland, growing zone 5b
The short edges of the plywood were held together with 4″ x 4″ posts that had a “V” shaped cut out on the side. Then fit the sheet edges into the cutout and start pulling the posts inwardly using heavy duty tie-downs. To make the start easier you can push/pull the sheets apart in the middle. When you have the desired shape of the tank don’t forget to secure the plywood edges to the posts from the inside with several screws. Don’t underestimate the forces in play.
Hope this helps.
Hi,
Great ideas on the water tank & heater. I’m in the Spruce Grove area. I don’t have a geodome but I do have 2 rectangular greenhouses put end to end. Does the size of the rad make a big difference? I have a small rad from a heater, out of the back of a van. It already has a 12v fan wired in.
Regards,
Dale
The size of the rad certainly does matter but I don’t have any knowledge on the BTU/h calculation. You could try the small heater and see if it works.
J.
Hello! That tank looks great! I’ve not seen anything like it. As I’m just about to build it, I was hoping you could clarify the dimensions, you said that it’s 5/8’s thick, and I’m about to go out and buy a couple sheets but I hesitate to do so when I look at your pics and see it’s three ply pressure treat. Could it be 1/2 inch or 3/8’s? Thanks so much for all your posts, my greenhouse is at the assembly stage and I’m so excited!
Tal
Tal, please have a look at the updated post here https://northernhomestead.com/geodome-greenhouse-water-tank/
In the article about the second greenhouse tank, a 4 foot deep hole is described. The pictures show the installed tank with at least a foot of plywood extending above the ground and the man standing in the tank seems to illustrate that the plywood sheets are actually taller than 4 feet. I’m confused. Is the plywood actually 4×8?
Sorry for the confusion. The hole is 4 feet deep and the plywood is 4×8. The hole extends below the plywood for another 2ft which results in 6ft deep tank. You do not have to make it as deep, we just felt in our cold climate it would be a good idea to have more water in the ground so it does not freeze as quickly. So far it has worked well.
Plywood buried four feet deep in the ground would rot fairly soon, wouldn’t it? Is digging it out and replacing it every two years part of the anticipated maintenance of the water tank?
We will keep you posted. Cheers.
Hi, You could do away with the plywood by usnig ferro cement (search appropriate technology how to make ferro cement tanks ) Another option is to use a plastic tank like an IBC tote or an animal watering tank (plastic or metal )
Thank you for great plans and ideas for everything else.
When using the acidome calculator and using 3″ ABS pipe hubs, I assume you subtract 3″ from the length of each strut. is that correct?
I can’t see how to figure out the angle on the end of the struts where they meet the hubs. What are those angles?
Would you ever consider using plywood instead of plastic or poly panels on the North side where there is no sun exposure?
1 – No subtraction of hub diameter is needed, the calculator does all the calculation for you.
2 – The angles are shown in the calculator.
3 – Plywood is not waterproof, but you could insulate the north side from the inside.