

We have grown food in the Easy DIY NFT Hydroponic System for a few years. It is our preferred choice for indoor gardening. This post shows you how to set up a simple DIY NFT downspout hydroponics system to grow your own food at home.
There are different types of hydroponic systems: Water Culture, Ebb and Flow (Flood & Drain), Drip (recovery or non-recovery), NFT (Nutrient Film Technique), and Aeroponic.
We have been experimenting with Aeroponic Tower Garden, Kratky hydroponics, High-pressure aeroponic, and NFT. For indoor growing, this is our favorite system.
Hydroponics allows us to grow food year-round despite our cold climate. It’s a clean method to grow and is well-suited for indoor growing.
Hydroponics is a method of growing plants in a nutrient-rich water solution. Instead of using soil, the root system is supported by an inert medium such as vermiculite, Rockwool, peat moss, or clay pellets.
Hydroponics allows you to precisely control the variables that affect how well your plants grow. A fine-tuned hydroponic system lets plants mature up to 25% faster and yields up to 30% more while consuming less water than soil-grown plants.
What is NFT Downspout Hydroponics?
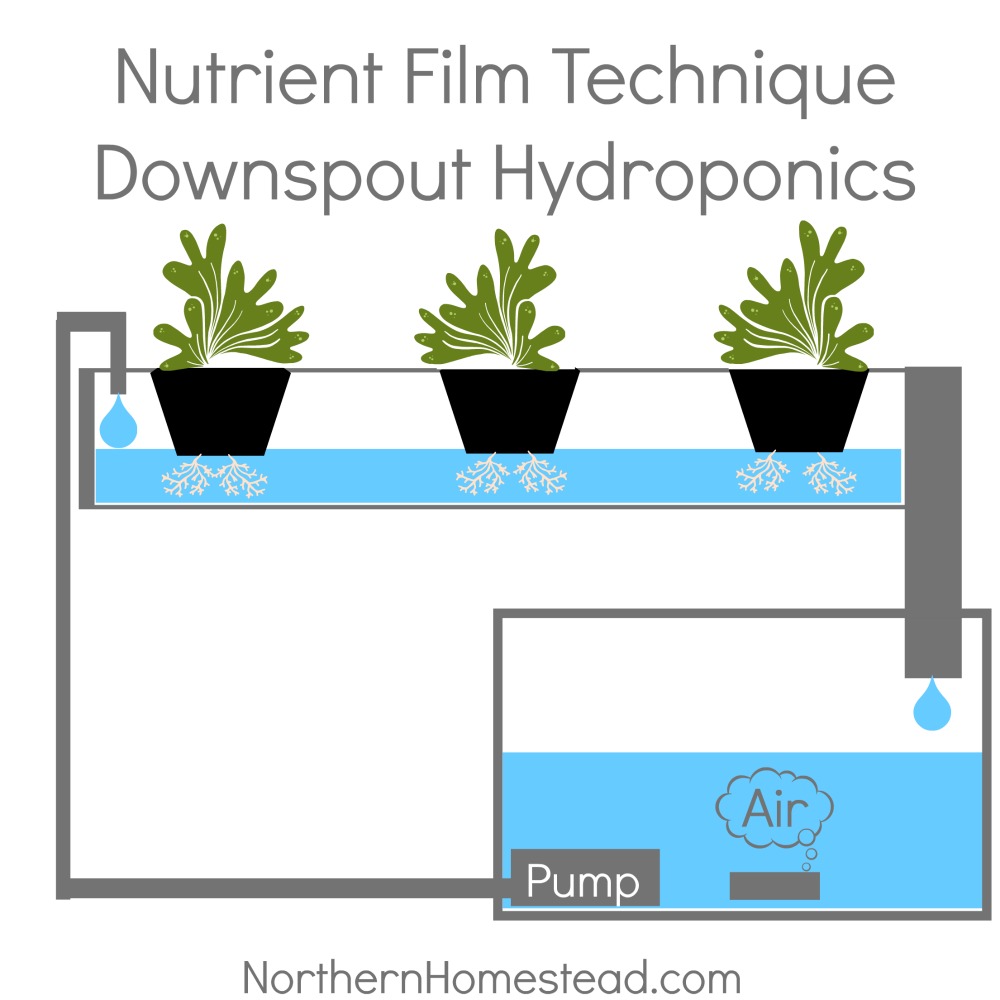
Nutrient Film Technique (NFT) Downspout Hydroponics is an exceptionally simple hydroponics setup. Nutrient-enriched water is pumped into a vinyl downspout, drifts over the exposed roots, and is drained back into the reservoir.
Generally, in the nft setup, the nutrient solution is pumped continuously, but we are experimenting with 15-minute cycles during the day and 30 minutes at night, and it works well. Pumping in intervals helps deliver more oxygen to the roots between cycles. If you let it flow continuously, it’s important to dissolve as much oxygen as possible in the solution using an air pump and an airstone (a.k.a. aquarium bubbler).
The downspout PVC pipe can be as long or short as you want. It can also be set up at different levels; as long as water flows through it, it will work. Every time water flows through the system, the plants’ roots are watered and nourished.
Planting for downspout hydroponics is just the same as any hydroponics. Read more about planting a hydroponic garden here. We cover everything you will need to know in that blog article.
Materials needed for the NFT setup
- White Vinyl downspout
- Amerimax White Vinyl A-Elbow
- Amerimax downspout flex elbow
- Submersible fountain/pond pump (200-300 gph)
- 1/2 Barbed elbow fitting
- Roll 1/2″ tubing
- U-hook (4-pack)
- Electric drill with a 2” hole saw
- 2” round net pots (pot should have a rim that makes it slightly larger than 2”)
- A large clean plastic tote bin with a lid (25-30 gal size works well)
- Zip ties
- Submersible pump
- Air stone or timer
How to set up an NFT downspout Hydroponics system
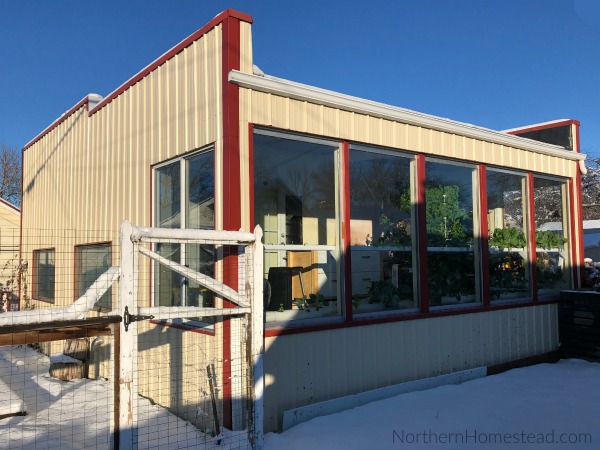
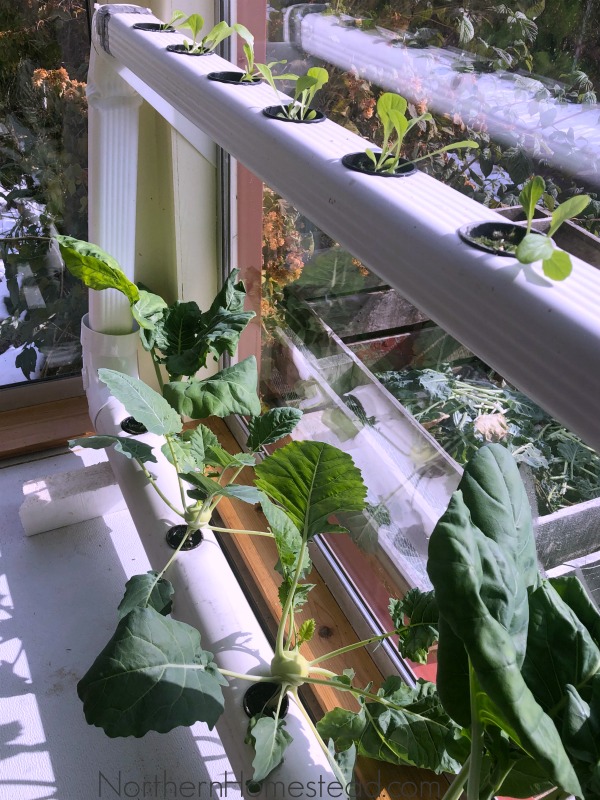
Note that we built our system based on our room’s situation. We have a 22-foot wide window area, so we installed the downspout along the south-facing windows. It allows us to grow without any additional lighting. It can be easily adjusted to any window or growing situation, with or without grow lights. Read more about the garage grow room here. NFT hydroponics systems can be small for small-scale or commercial growers.
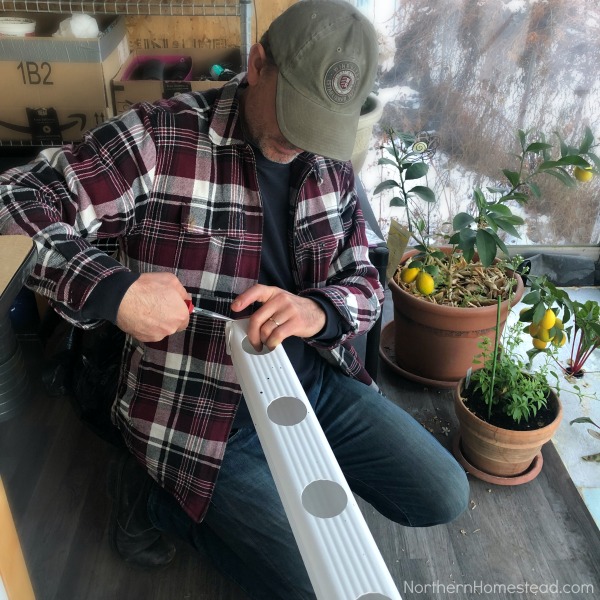
For all of our hydroponic growing, we use 2” net cups, which works for all types of plants that we grow. Read more about planting a hydroponic garden here. It also happens to be a good size for the PVC pipe. Dril 2” holes every 6” in the top/wide side of the downspouts. TIP: Before drilling ALL the holes insert the 2” net pot in the first hole to make sure it sits well and doesn’t fall through.
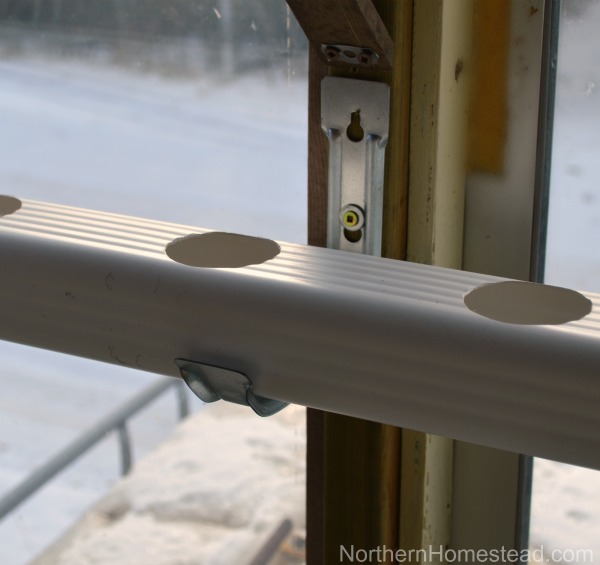
When installing the U-hooks to support the downspout, you need a slight decline (0.5 inches over 10 ft) toward the exit end of the system so the water can flow smoothly but not too fast. The other reason for the minimal slope is shown in the following picture.
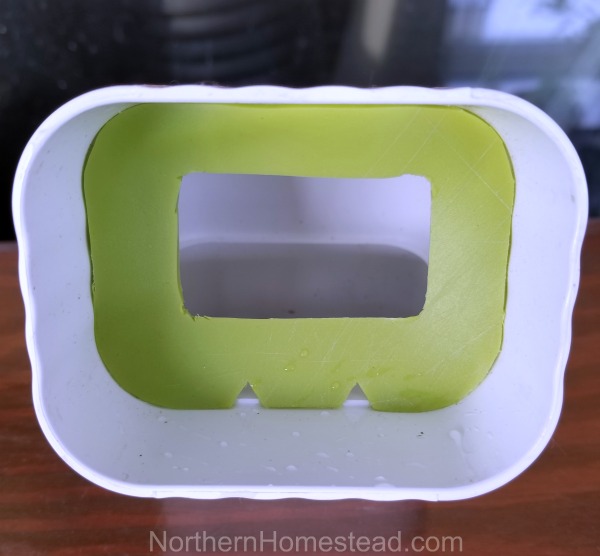
You see a green plastic plate inside the downspout with a rectangular hole in the center. The purpose is to hold back the water and raise its level so it can soak the Rockwool cube in the net cup, since the net cups are not long enough to reach the bottom of the downspout. This is only important for young seedlings when the roots are not long enough to get to the bottom of the downspout pipe. A thin film of nutrient-rich water flowing through the pipes is enough for more mature plants.
The two notches at the bottom of the green plastic barrier allow water to drain between the water pump run cycles. That allows the plant’s roots to be exposed to air oxygen, which contributes to faster growth.
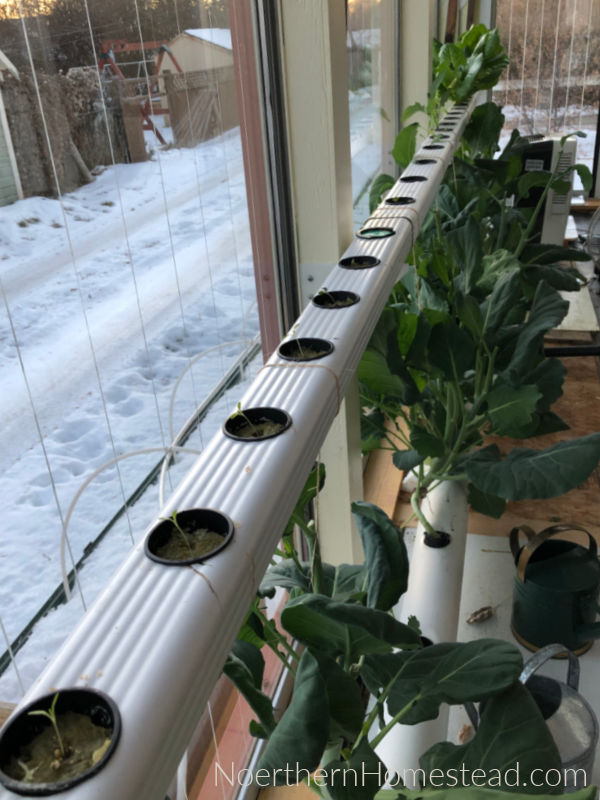
We have set up the 20′ long NFT downspout system alongside the windows of the winter garden using the U-hooks. However, you can adjust the length of the downspouts to the total width of your windows or available space. If needed, build a support structure
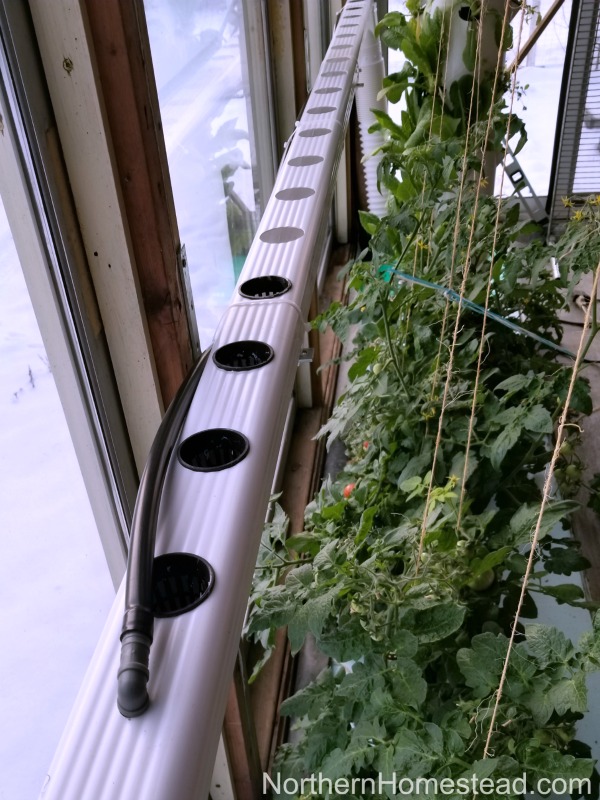
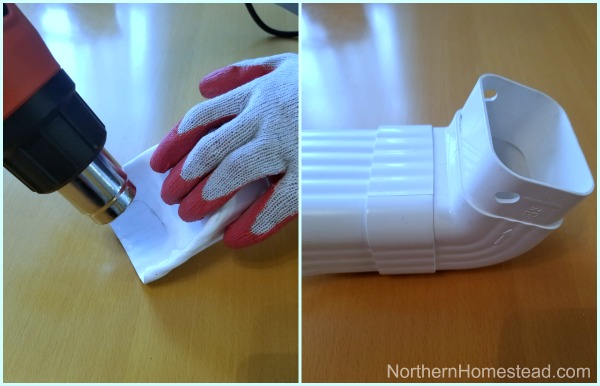
Fasten the downspout to the support U-hooks using zip ties. Drill a small hole on the top side of the higher end of the downspout for the barbed elbow fitting. Connect it with the tube to the pump in the reservoir. You can plug off that end with an Amerimax white vinyl A-elbow pointing up. The other possibility is heating up with a heat gun about 2″ of the underside of the downspout and pushing it up to close the pipe’s opening, as shown in the left picture below. The right picture shows the pipe closing with an A-elbow. In addition, it is crucial to seal all pipe connections with food-grade silicone to prevent leakage.
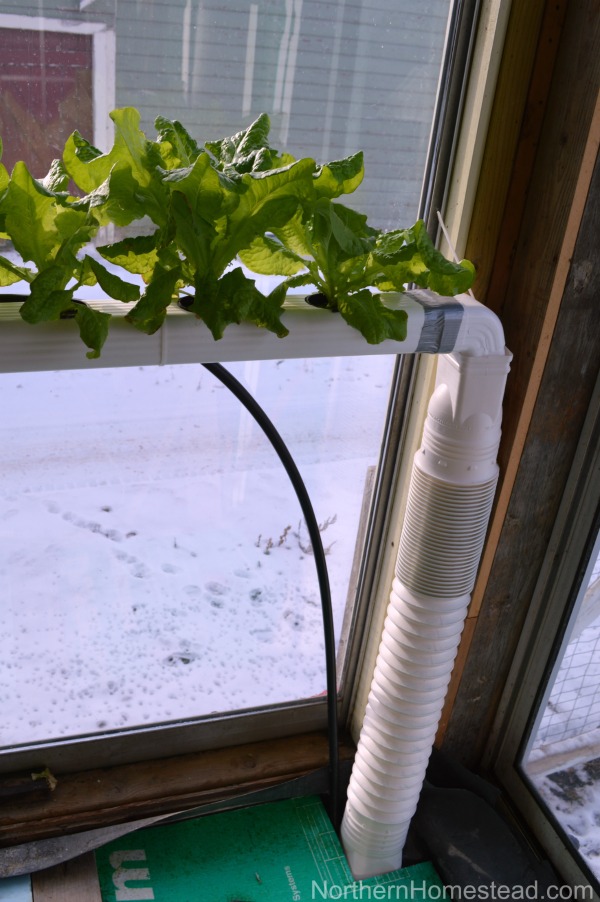
Install an Amerimax downspout A-elbow at the other end of the downspout, and connect it to the tank using a flex elbow for drainage.
We use a black tote bin from the hardware store as the drainage tank. We made a lid out of styrofoam to fit all the pipes. To prevent algae growth, keeping the receiver in the dark when using hydroponic nutrients is important. To ensure nutrient flow through the system, keeping the water level above the submersion pump is essential. If temperatures are cold, a heating element can be added to the main reserve as needed. For a small system, you might use a bucket.
The nutrient film technique system is an inexpensive setup for home growers allowing us to grow our lettuce year-round, here are 3 reasons to grow your own salad greens. Leafy greens work especially well in this type of hydroponic system.
Find an upgrade in this NFT system with bigger pipes for larger plants here.
Maintenance of the NFT downspout Hydroponics system
The NFT downspout Hydroponics system shines in maintenance. All the nutrient solution is in one container that is easily accessible, cleaned, and refilled.
Read more about planting, growing medium, what nutrition to use, and more in the blog articles: Planting a Hydroponic Garden and Fertilizer for Hydroponics.
Top up the solution as needed, depending on the number of plants in the system and the weather. About twice a year, or as needed, we empty the container completely and clean the water pump.
Once a year, the whole system gets a deep cleaning. We do that in the middle of summer when the indoor garden gets a fresh start for the winter season. For us, it works best when we disassemble the pipe system, thoroughly scrub the inside and outside, and rinse it off. Then the shiny pipes go back to their place in the system, and the next season can begin.
Replanting is also simple. Remove the old plant with all the roots, and put a clean net cup with a new seedling in. Net pots can be cleaned and reused. Again, read more about all this in the blog post Planting a hydroponic garden.
We invite you to subscribe to Northern Homestead and follow us on Instagram, Facebook, or Pinterest for more DIY projects.


That N.F.T. downspout hydroponics setup is cool!
Thank you, we like it a lot. a simple and inexpensive way to grow lots of lettuce even in the winter.
Definitely something to consider- we’re not as cold as you, but in 5a our seasons are also drastically short. What is your ambient temp for the grow room on average?
We try to stay above 13C (55F) in the room and have a heater in the water. On sunny days it gets much warmer than this but on cold overcast days, we hardly go above 15C. Lettuce seems to be fine with it.
Good to know, as I am living close by (20 km West of Red Deer) and seem to have about the same weather as you have. Love the idea that it looks clean and organized too.
How many sunlight hours are needed for lettuce? I have a large south-facing window I’d like to try this on, in 4b Wisconsin.
Lettuce is a short-day plant, meaning 10-12 hours are good for it. Being so far north, we do not get that many hours. In Wisconsin, you are quite a bit south of us, you have longer days in the winter. You should be able to grow at least as good as we do.
You did not list the air pump in your material list or what you add for nutrients.
Could you expand on this?
We do not use an air pump, our big system has worked great so far without. But a small system could use one if the water is not circulating enough. For nutrients we like General Hydroponics MaxiGro, it is inexpensive and works great.
What did you use for the green plate to restrict the water flow?
I used a thin HDPE cutting board.
I would like to make one oouf these but don’t understand the heating and pushing up one end to seal it. Could you show more pictures please? Is this a heat gun? how do you make it watertight? What about the A-connector facing up? Is that left open? You show it facing down into the flex pipe to go into the water container on the floor. Please share more pictures of the ends and how to link top and bottom rows.
This is a great how-to article! I have added a link to the “Hydroponics Gardening” file in the Alberta Gardening group on Facebook, as it may inspire a few members. Thanks!
Thank you, Sheryl, appreciated it. It works so well in our sunny climate, but of course, san also be used without a window with grow lights.
Do you know if all the downspouts and other plastics are certified food grade or food safe?
No, we do not. Personally, we do not stress about it, since plastic seed starting containers and such are also not necessarily food grade. Just do best you can.