
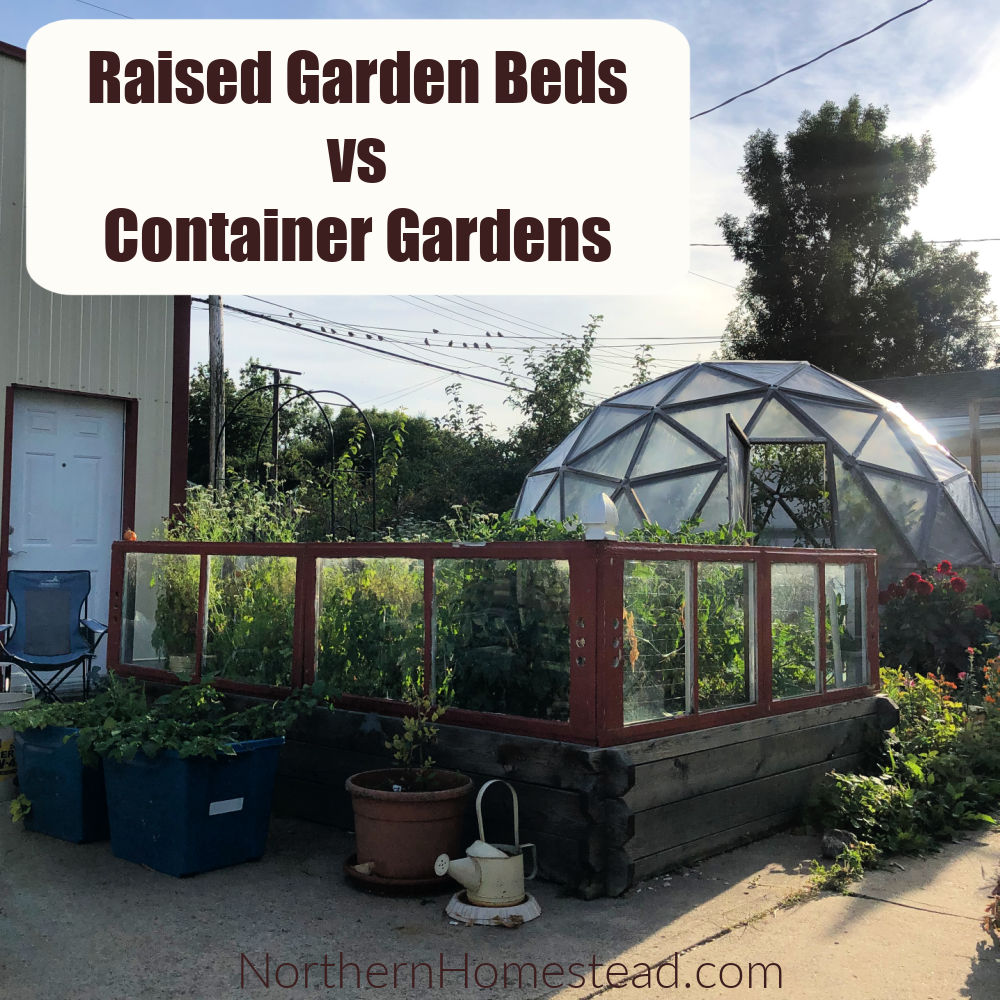
The raised window protected garden started out of desperation to get all the spring seedlings out of the house a few years ago. It was our first spring in this house, and I was super busy so Anna put together a simple temporary greenhouse that worked surprisingly well.
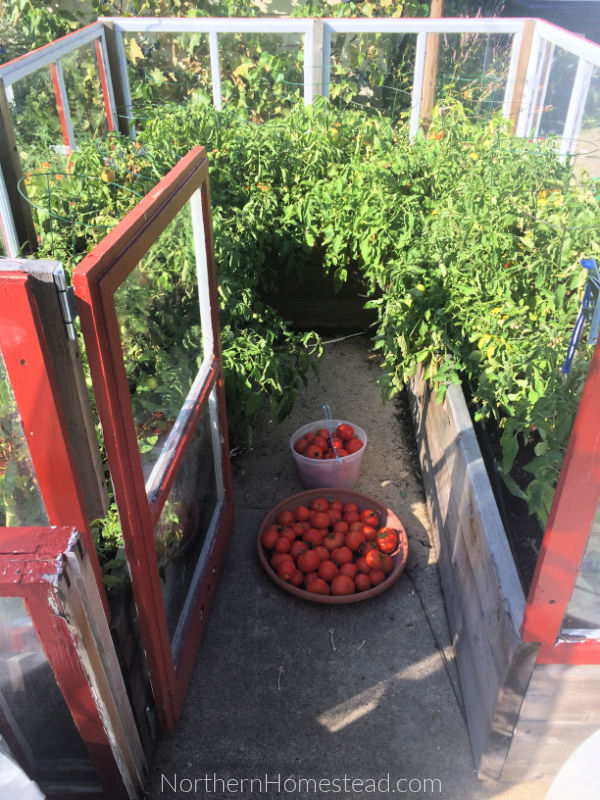
Next spring I built a bigger structure for the same purpose, and we also tried to grow some tomatoes in there over the summer. We were blown away by the results. You can read all about it here.
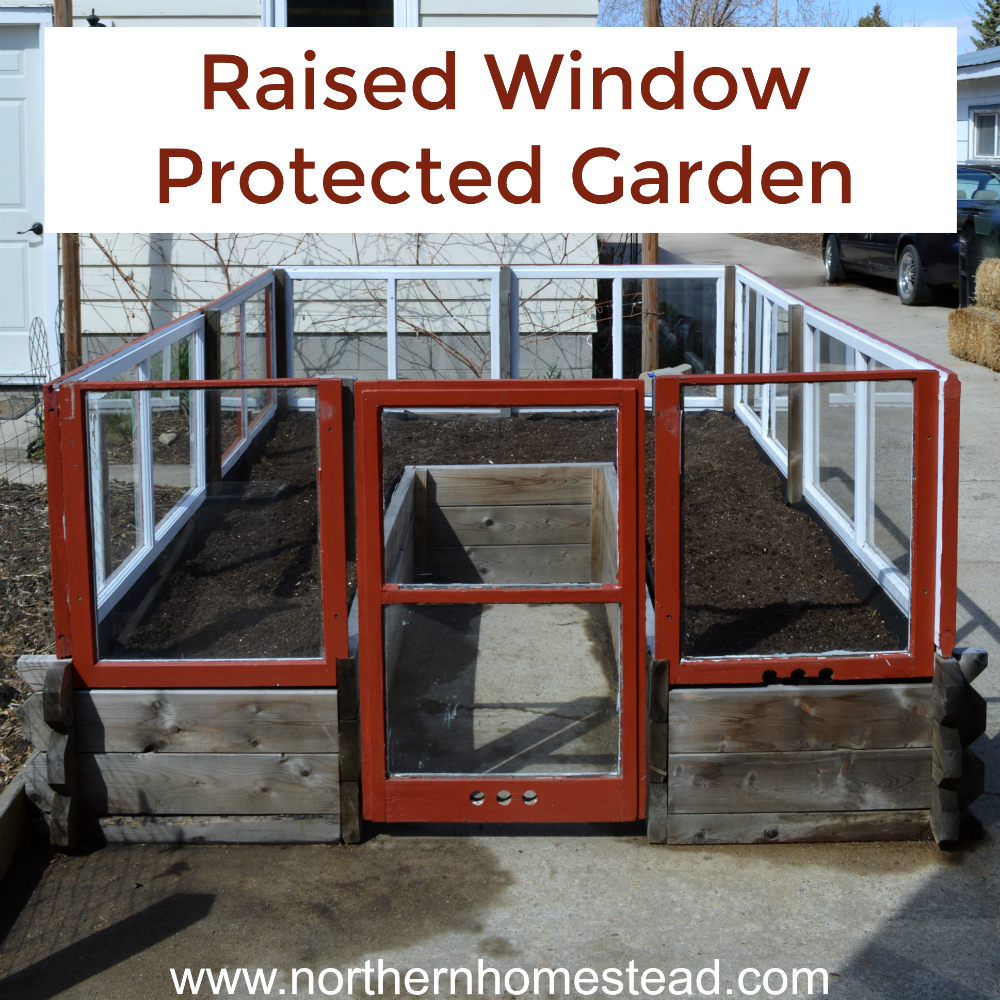
Last spring I resolved to build a real raised window protected garden. We already knew that this is a great way to grow tomatoes in a cold climate. It creates a microclimate for heat-loving plants. The outcome is beautiful and very practical. And here is how I did it.
Why a raised window protected garden
Raised garden beds are great if you have no good soil in the garden. In our case, the raised bed is actually in our driveway. Raised beds are also easy to work with if the gardener has health problems. In a cold climate, a raised bed warms up sooner and the soil is usually a bit warmer. Adding protection through the windows creates a real microclimate.
The raised window protected garden is almost a little greenhouse, except it does not have a roof. It is therefore much easier to build. The biggest advantage though is that it never overheats (at least in our climate) and there is direct sunlight for the plants.
The structure is a great solution for cold climate gardening, and in very windy locations to protect the plants from wind. It also protects the garden from predators. If heat is not needed, but you want the protection you can substitute the glass with netting.
Material used
For our raised window protected garden bed, we used recycled storm windows. Those were from our house, so we already had them. However, it is easy to find storm windows on buy and sell listings. Often they are given away since there is not much use for them.
The size of the bed and the number of needed materials will greatly depend on the size of the storm windows that you already have or can get your hands on. The raised bed may be made of cinderblocks, stone, bricks, or wood. I like the look of the wood. The following list reflects what we used on materials:
- 16pcs of 2″x6″x16′ spruce boards
- ca. 30′ chain link fence
- Weed control or landscape fabric
- 8 recycled storm windows
- Eco wood treatment
Size and plan
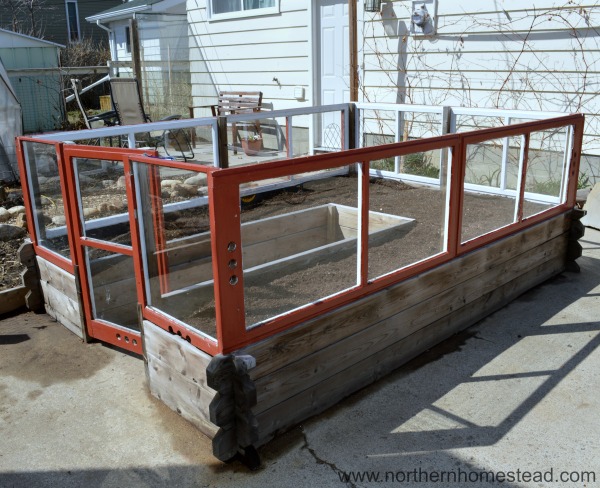
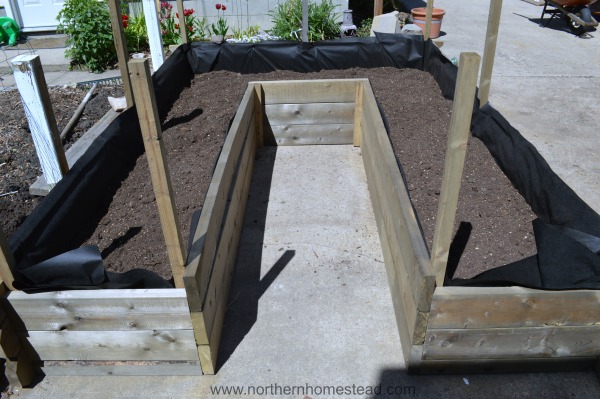
We made a U-shape bed to make it easily accessible. Because of the window external wall, every corner has to be reached from inside.
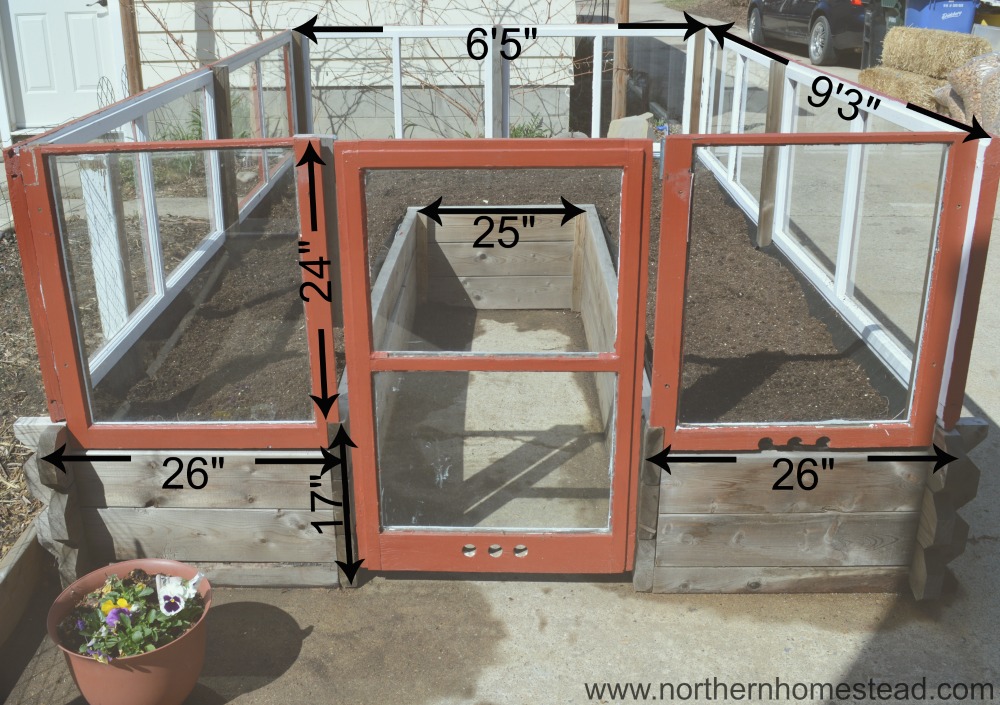
Our bed is 9’3″ (2.82 m) long and 6’5″ (ca. 2 m) wide and 17″ high. The height of the sidewall should be at least 14″ to 16″ tall so that you end up having 12″ of soil in the bed. The height of the windows is 24 inches (0.61 m). We would not recommend using smaller windows because that would decrease the sheltering effect. The beds are 26 inches (0.66 m) wide, this was what it came to with our recycled storm windows. However, it is a good size to grow plants in. The inside of the box turned out to be 2 feet (0.61 m) wide.
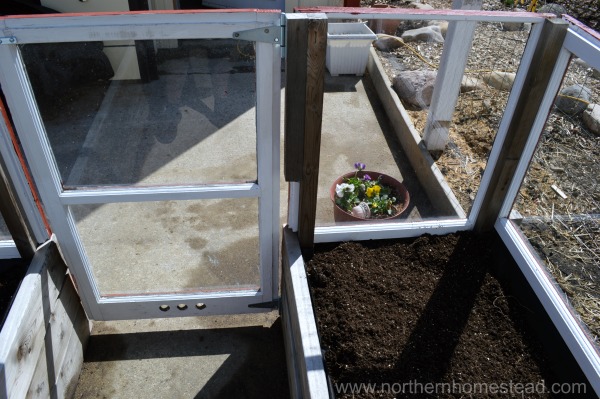
I also made an entrance door from a storm window to enclose the microclimate in the raised bed.
The joints
There are several ways to join the boards, i.e. simple butt joint, mortise, and tenon, or saddle notch joint. I chose a double notch which is often used in log house construction.
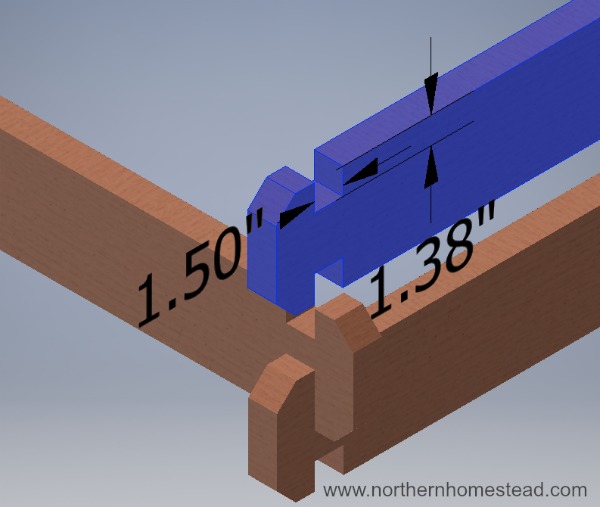
It’s relatively easy to make this type of joint. You start by cutting a 1.38″ deep and 1.5″ wide notch. I used a circular handsaw to cut repeatedly within the notch area to produce a series of thin wafers which I then scraped out with a chisel. You could leave the edge at the end of the boards as is, I simply cut 45° chamfer.
The outcome is a very beautiful joint. As you may have noticed you will need to rip one board in half longways.
Raised bed construction
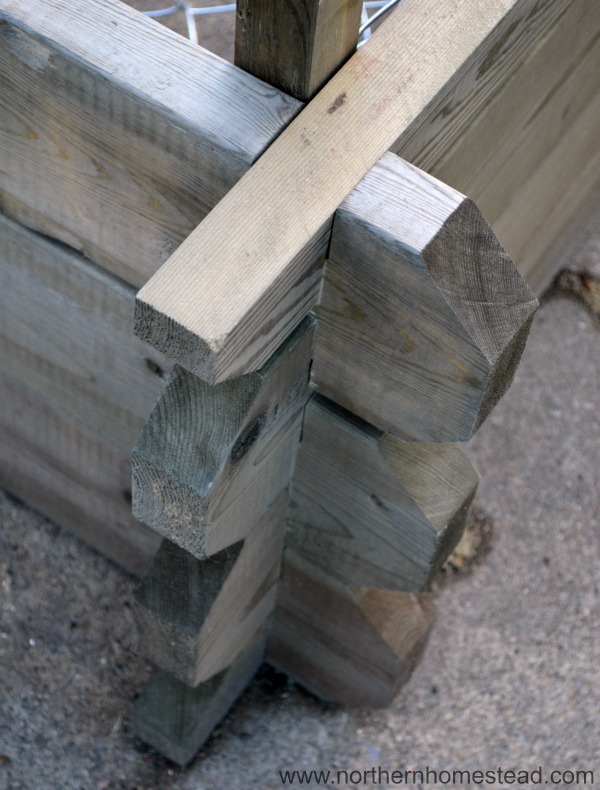
Putting together the bed was as easy as stacking Lego blocks. In the picture, you see the 2×2 posts in each corner and the center of the external wall that screwed to the boards. They will be used for attaching the storm windows to the structure.
If you are using wood for a raised bed garden, then it is advisable to protect the wood from rotting. Instead of purchasing treated lumber with questionable chemicals, we choose to treat the lumber ourselves with an Eco wood treatment.
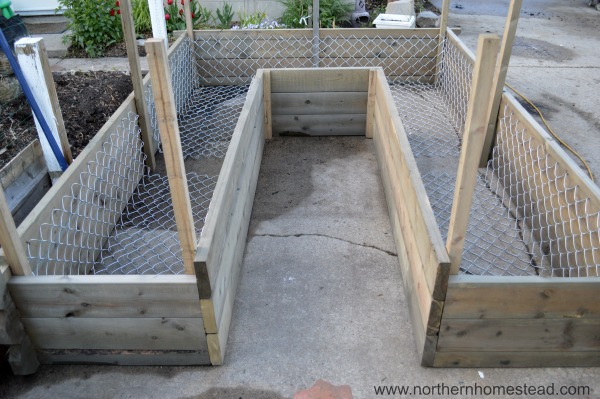
To keep an air gap between the soil and the lumber we lined the bed with chain link fence wire and landscape fabric on top. This way the wood stays dry and you actually have the effect of a grow bag, where the roots split when they get close to the sidewall instead of becoming root-bound.
Note: This would also be a great way to protect the raised bed from burrowing animals such as gophers and moles. For added protection, you might want to put some chicken wire under the whole bed.
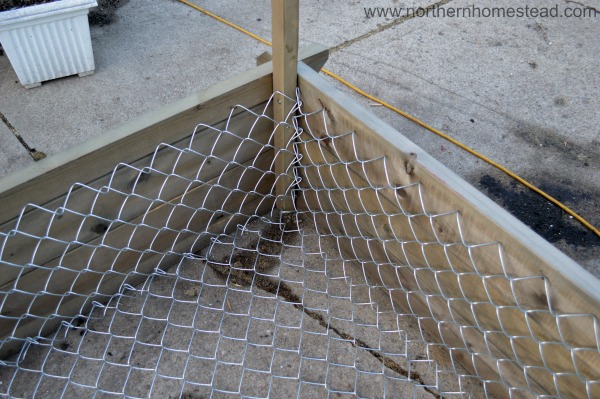
I attached the chain link to the boards using nails.

The next layer was a control or landscape fabric. We lined the raised bed with it, stapled it to the boards and now the bed is ready to be filled with soil.
Note: we do not recommend lining the bottom of a raised bed with landscape fabric if the bed is built on soil. The connection to the earth is very valuable, you want earthworms and other living things to have access to your bed. Landscape fabric would hinder that. In our case, the bed is on our driveway. There is no soil underneath.
Soil preparation
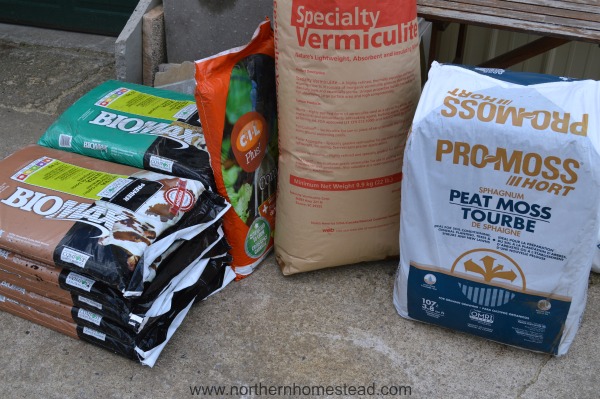
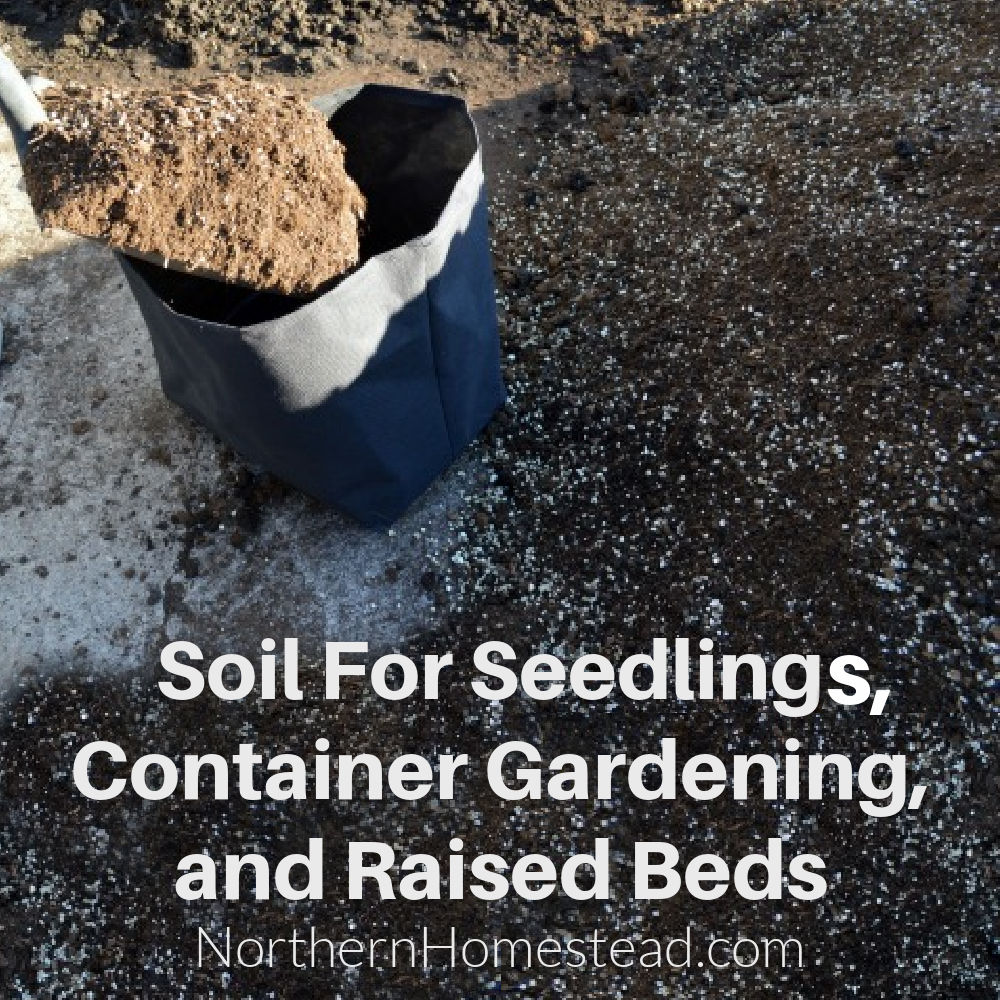
The most important part of a garden bed is the soil. We mixed Mel’s Mix from the All New Square Foot Gardening book. Mixing together: 1/3 compost, 1/3 vermiculite, 1/3 peat moss.
Mel’s Mix is a very light and rich soil. It keeps the moisture and is great to work with. For tomatoes, we also add more compost each year at planting time.

Extra protection for the raised window protected garden
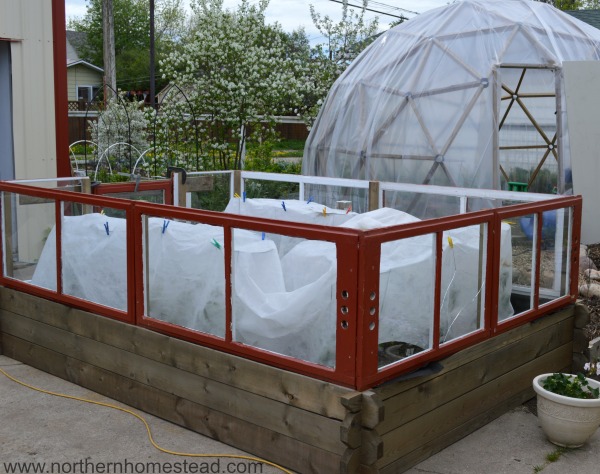
The microclimate in the raised window protected garden is already much warmer than outside. However, in our cold climate sometimes more is needed. It is easy to add a frost blanket to the garden.
All in all, we are very happy with the outcome of our raised window protected garden. If you build one, please let us know how it works for you. We also love seeing pictures on Facebook or Instagram.
We invite you to subscribe to Northern Homestead and follow us on Instagram, Facebook, or Pinterest for the latest update.


Leave a Reply