
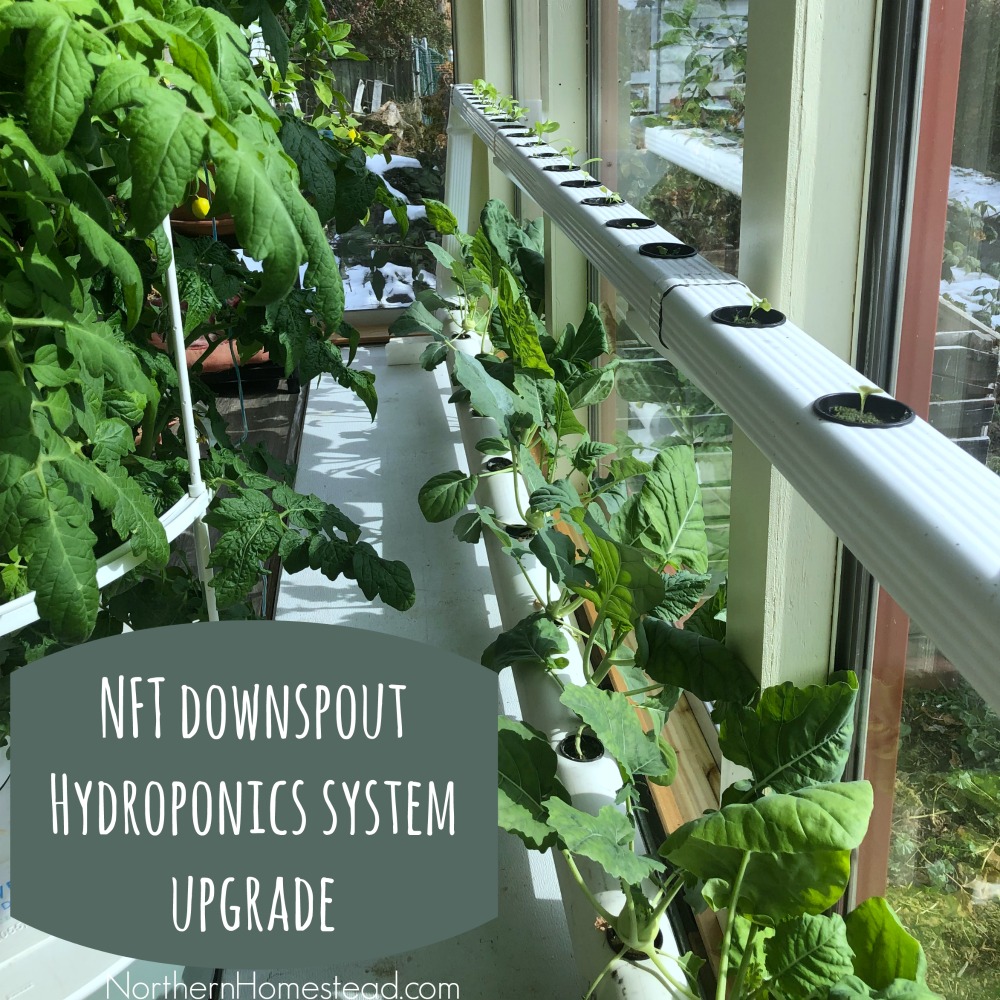
Nutrient Film Technique (N.F.T.) Downspout Hydroponics is an exceptionally simple hydroponics setup. Last winter we built a NFT downspout Hydroponics system to grow lettuce indoors all throughout the winter. We share a how-to here. Read that first if you are new to NFT Hydroponic. We are very pleased with how the system works, of all the other hydroponics we use, it seems to be the easiest setup and also most effective.
Since we like the NFT downspout Hydroponics system so much, we came up with an upgrade to be able to grow more and plants with larger root systems.
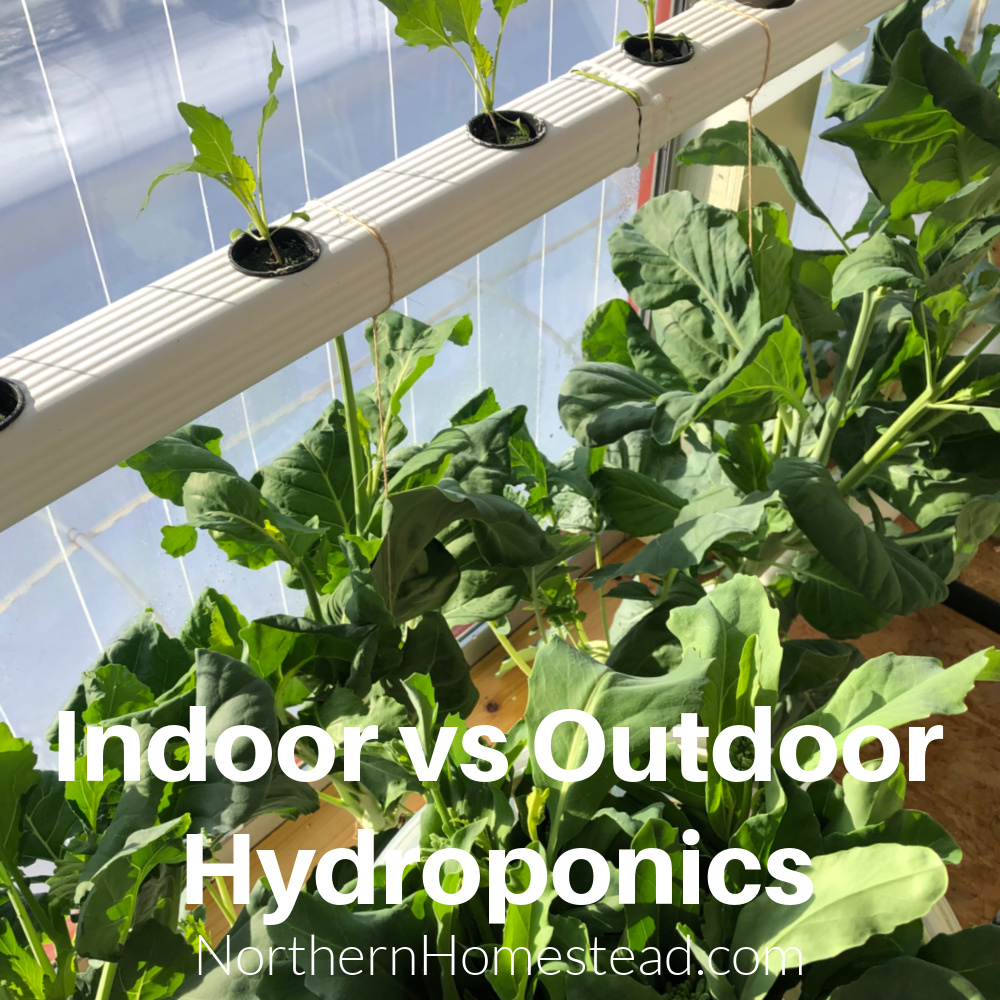
We use the original NFT downspout Hydroponics set up in a downspout for lettuce and young seedlings. Once the seedlings grow, there is little room for the plants and the roots in the small tube.
We came up with an upgrade from the small downspout to a bigger PVC drain pipe. The pipe is 4″ in diameter and can hold more roots.
How does the NFT downspout Hydroponics upgrade work
The NFT downspout Hydroponics in a pipe works just the same as in a downspout.
In this case, the nutrient-enriched water is pumped into a pipe drifts over the exposed roots, and is drained back into the reservoir. We use 15-minute cycles during the day and 30 minutes at night.
The drain pipe can be as long or short as you want it to be. It also can be set up at different levels, as long as water flows through it, it will work.
Every time water flows through the system, the roots of the plant are watered and nourished. It is important though in a bigger pipe to make sure the roots of the plant reach the water level. We keep younger plants with small roots in the downspout system, once the roots have grown, they can be transferred to the pipe.
Materials needed for the setup
- 4″ PVC drain white pipe
- Submersible fountain/pond pump (200-300 gph)
- 1/2 Barbed elbow fitting
- Roll 1/2″ tubing
- U-hook (4-pack)
- Electric drill with a 2” hole saw
- 2” round net pots (pot should have a rim that makes it slightly larger than 2”)
- A large clean plastic tub with a lid (25-30 gal size works well)
- Zip ties
How to set up an NFT downspout Hydroponics system
The setup of the pipe is similar to the setup of the downspout. We would recommend starting with a downspout for smaller plants and upgrading to the pipe once you see a need for it. Read more about planting plants for hydroponics here.
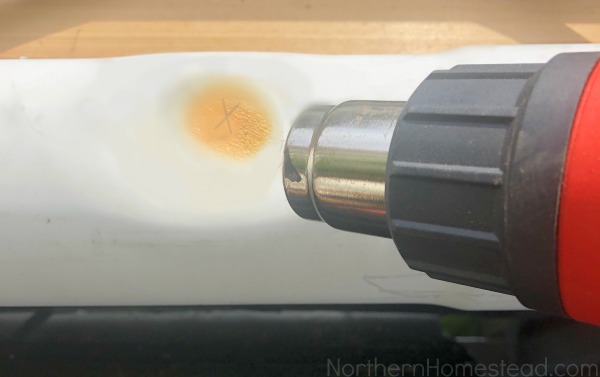
The pipe is round, so for more stability for the net pots, I flattened the area by heating it up with a heat gun…
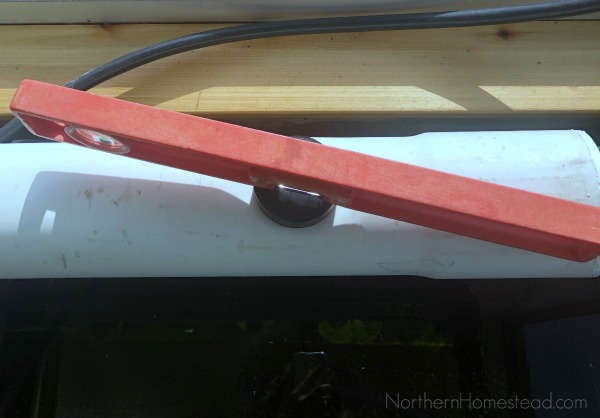
…and then pressing a round rubber pad onto the heated area of the pipe making sure it is level.
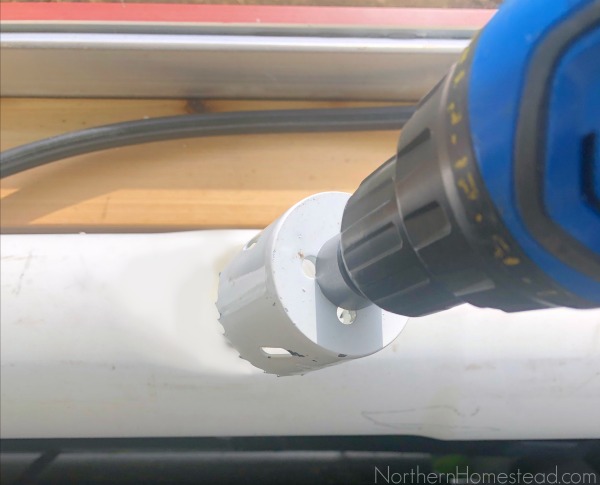
To drill I used a 2-inch hole saw. Since the pipe will be used for bigger plants, leave about 12-inch space between the holes.
TIP: To get a smoother cut you can drill the pilot hole and then grind through the surface in REVERSE. No chipping and a beautiful clean hole.
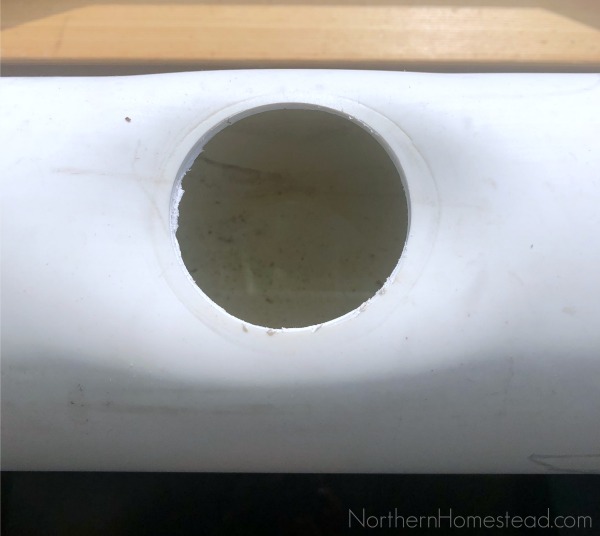
TIP: Before drilling ALL the holes insert the 2” net pot in the first hole to make sure it sits well and doesn’t fall through.
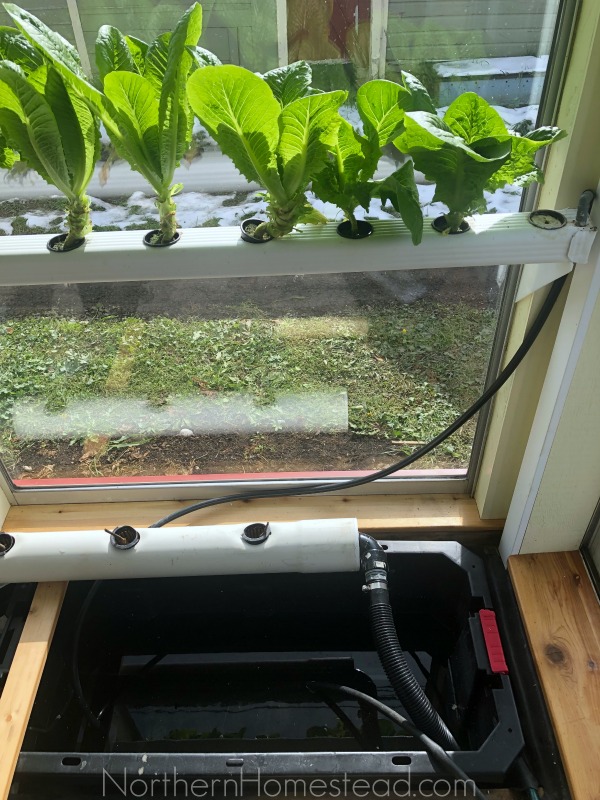
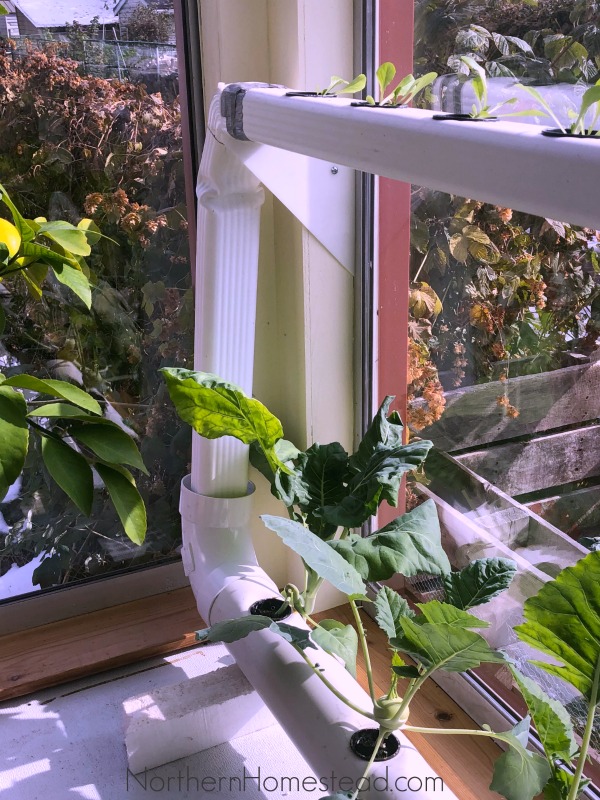
I placed the pipe system below the downspout system and just connected them, so the water is being pumped up, flows through the downspout first, then through the pipe, and then gets drained back into the reservoir.

To drain the nutrient solution back into the reservoir but also to restrict the flow I used a 4-inch to 1.5-inch reducer.
The pipe from the upper downspout tube is loosely fitted into the elbow of the lower pipe as you can see in the picture.
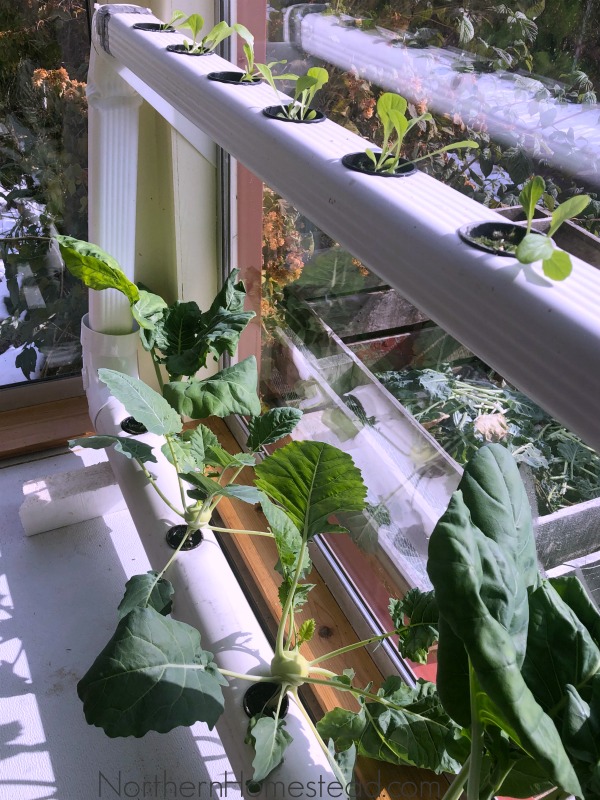
The Chinese kale and kohlrabi plants seem to like their new growing spot. These plants were started on July 30th, and are 2 months old now.
The 3 weeks old seedlings in the downspout will be ready in a month to go down into the pipe, by then we will be harvesting the first plants. The upgrade allows us to succession plant our NFT downspout Hydroponics system.
For hydroponics, we use the products from General Hydroponics dry concentrated nutrients. We have since upgraded, read more here: Fertilizer for hydroponics.
We invite you to subscribe to Northern Homestead and follow us on Instagram, Facebook, or Pinterest for the latest updates.


I understand more about the set up after looking at this upgrade. I still don’t understand the sealing off the end part where you press the bottom up. Wondering if that is because there is no way to cap the end off, so you have to squash it together to make a “seal”? Then you have to use silicone caulk to finish off the seal? Hope I understand this right. I have metal downspouts which may not work the same. Also I have a very large 8 inch plastic pipe but no idea on how to seal off the ends to hold water or to put the drain tube in. Any creative suggestions appreciated!
Hi . You can buy end caps for this in the builders yard or store . Use silicone around the the end cap before inserting.