
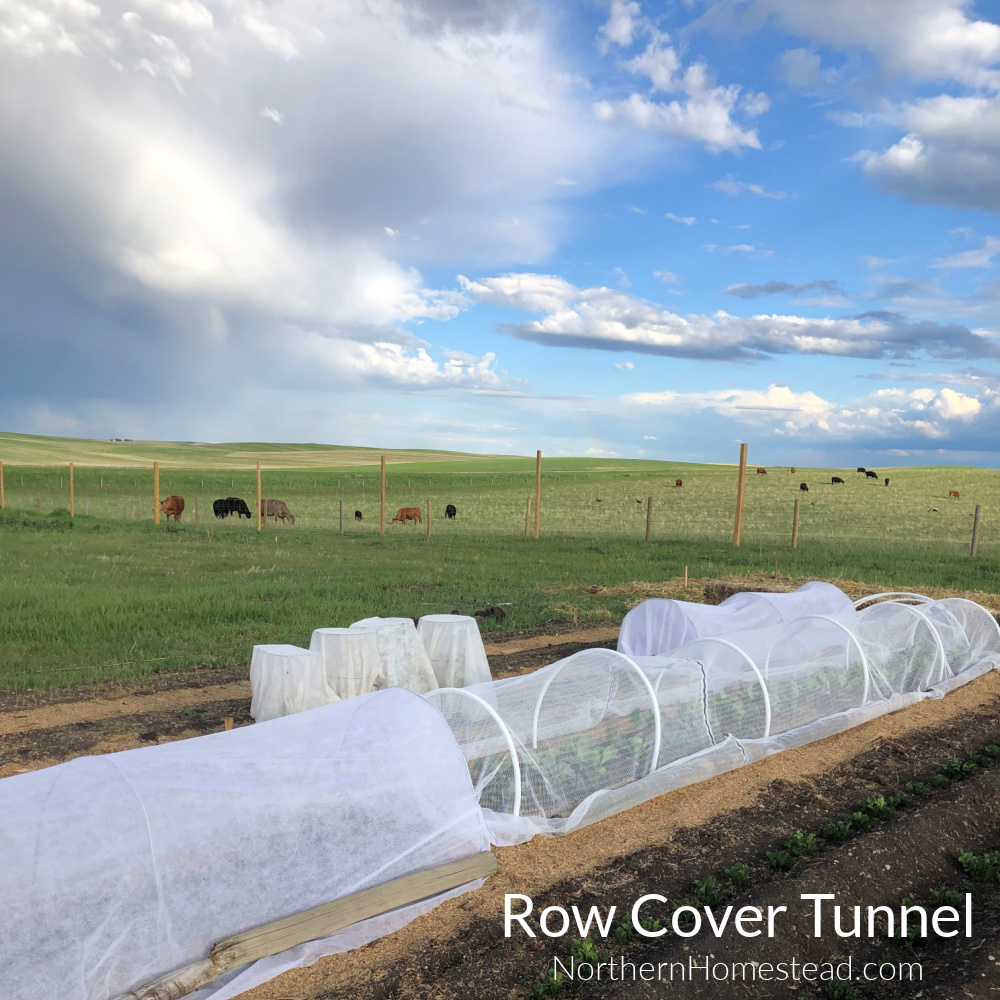
A hope bed or row cover tunnel is a simple way to extend the growing season and protect plants from cold, wind, hail, insects, wildlife, and more. Here is how to make a hoop bed (row cover tunnel).
Since there are many uses for a row cover tunnel in the garden, there are also many different materials and ways to do it. In this blog article, we share the ones we use. They are all DIY projects using readily available materials. We will also list some sources where to get the material needed; those change constantly but give you an idea of where to look.
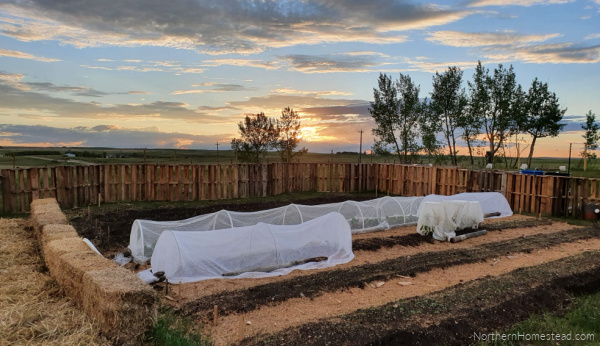
To make a hoop bed, aka a row cover tunnel, you need a row/bed, a cover, and a tunnel. Sounds simple, right? So, let us take it step by step.
What to protect and why?
First, let’s look at the plants we want to protect. It can be a single row, garden bed, raised bed, or even a vegetable patch. Any area that grows plants and needs protection.
We might want to protect a row of early lettuce from frost in spring. Then, we might want to protect a bed of strawberries from birds. As soon as cabbage butterflies are flying, we want to protect cabbage plants from them. If carrot flies are bugging our carrots, we want to keep them out. We live in a hail area, so protection from hail is a priority.
As you see, there are so many reasons for protection. We haven’t even mentioned deer, squirrels, cats, and dogs.
And yes, a simple row cover tunnel will do most of it. Adding protective netting is a much better solution than using pesticides, which can harm all insects and the bird population.
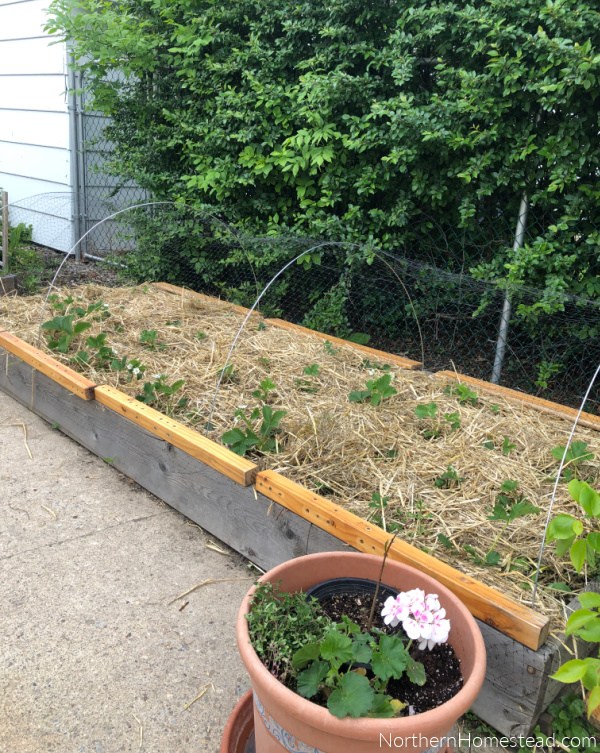
One tunnel can cover two or three rows. Ideally, you want to be able to access the plants from both sides of the row cover tunnel.
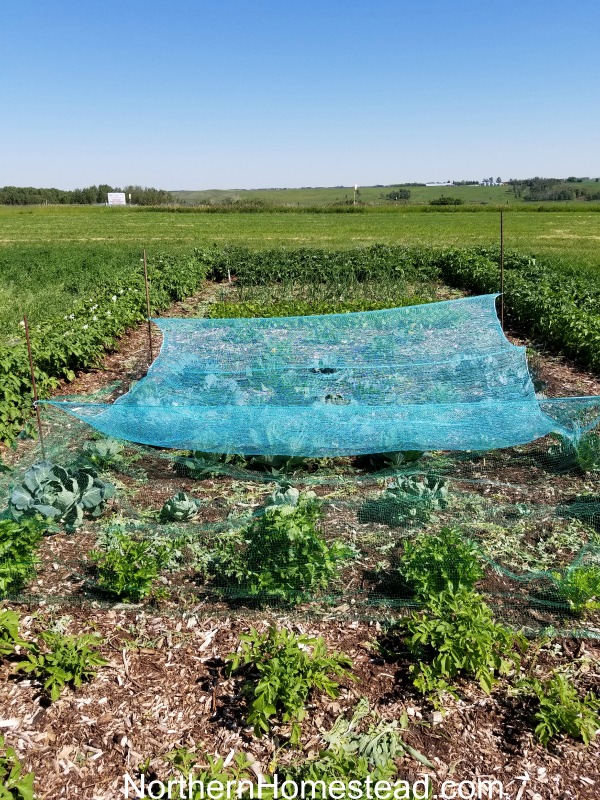
Covering a whole patch with one cover is an option, but after having the experience, we would not recommend it. We thought it would work since our main reason for that particular cover was to keep deer and moose out. It kept them out, but we were not able to weed under the cover. After that experience, we became more interested in hoop beds.
It is a better idea to cover at most 4 feet at a time. Also, using hoops for the cover is easier and more effective.
What covering to use

The covering material depends very much on its function. Even though a protective blanket can be used for almost everything, it is not the ideal cover for everything.
Frost protection blankets come in different densities. For frost and wind protection, we want to use thicker fabric. The dense ones give more protection but also make more shade. In our garden, we usually have different frost-protective blankets. Thin row covers are available at Dollarama; they provide shade and can be used double and triple in a greenhouse. Hardware stores or garden centers usually carry a slightly thicker version, but they are not durable. Lee Valley offers a more durable and reusable quality. William Dam Seeds sells covers in different sizes, and it is said that it can even be repaired. Compare sizes and prices to find what works for you.
We use frost protective blankest as a row cover but also in the row cover as an additional protection layer.
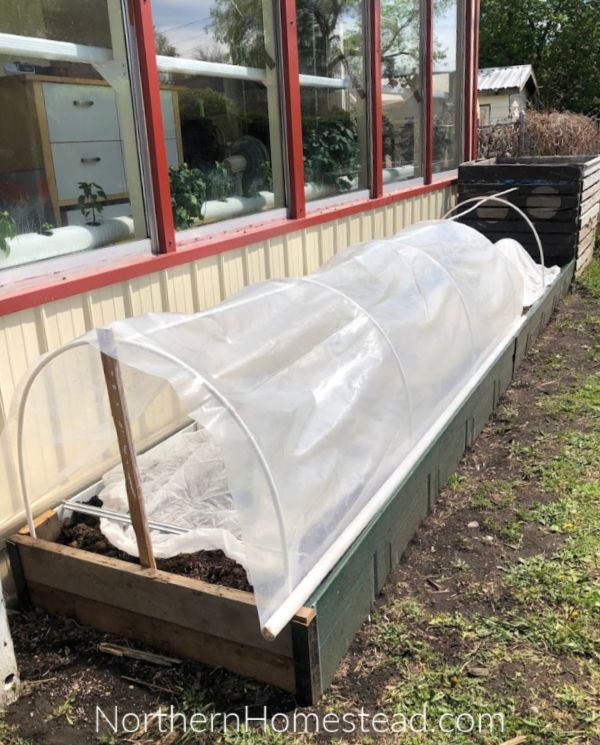
When considering frost protection, plastic often comes to mind. While it’s true that plastic can provide airtight protection, this also poses a significant risk of overheating when the sun shines. For this reason, we rarely use plastic and only do so with open ends to allow for ventilation. Additionally, since there is no wind inside, we add a protective blanket for extra safeguard if needed.
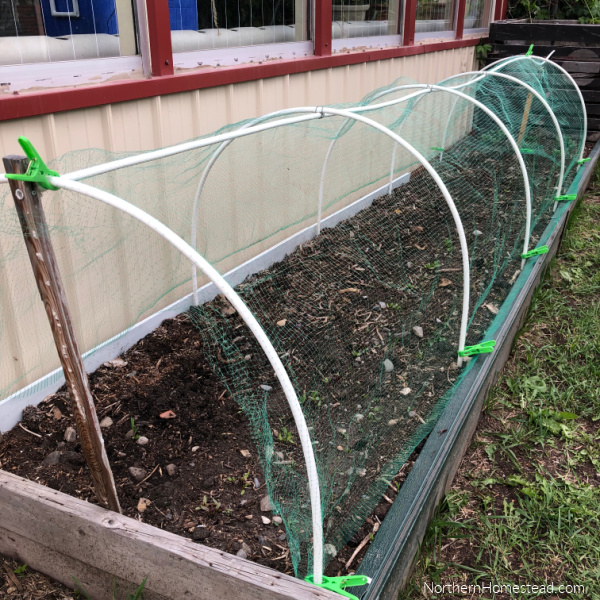
Netting or mesh is a great option for protection against insects. The density depends on the insect you want to keep out. For carrot flies, the netting needs to be very fine.

Here, I used IKEA lace curtains that are lightweight and inexpensive. The protection, however, was not perfect. Maybe adding hoops would have brought better results.
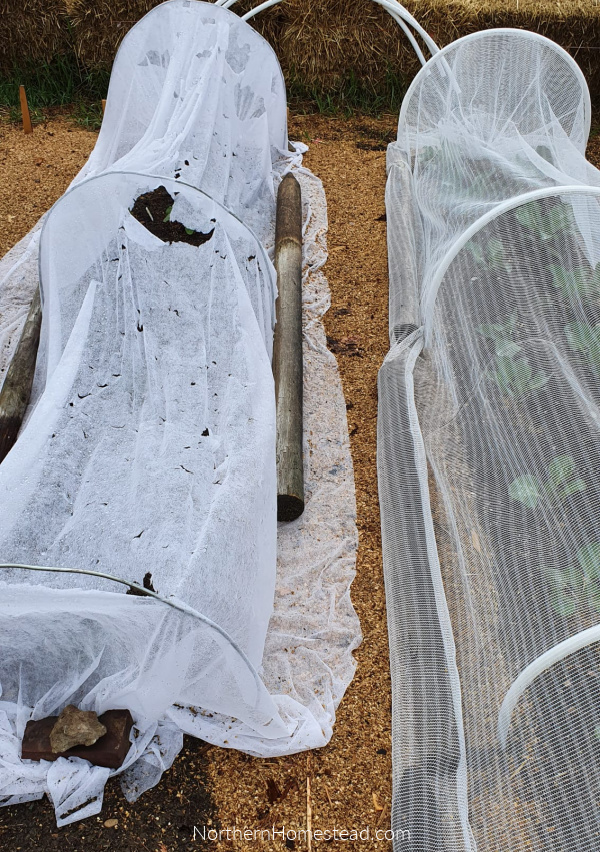
Since we also garden in the hailstorm alley, we have started using hail protection netting. It is much stronger and protects from hail, wind, and insects. Here is a side-by-side comparison picture. The floating row cover did not hold up in a hailstorm.
Any dense netting will give some wind and intense sun protection.
For plants that need protection and pollination, use netting that allows pollinators to pass through. Bird protection netting is a great option for keeping birds and most predators out. Bird netting is available in different sizes and densities at about any hardware or garden store. In our experience, it is not very durable, so choose the best price you can find. For some reason, deer do not like flattering netting. Even though they could easily get into it, they usually don’t.
Size: The size of the netting depends on your garden bed and plant. Many nettings come 7 feet wide; it works great for a 4-foot bed. The length needs to be as long as the bed, plus the height of the tunnel and some extra material to be able to enclose the bed if that’s what you are going for.
How to Make a Hoop Bed
Different materials can be used to make the tunnel hoops. The strength of the material will depend on where it is used and what cover it is for.
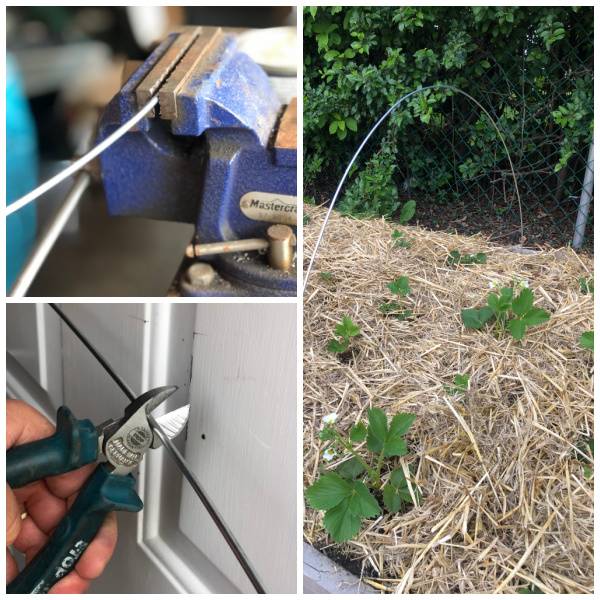
For bird netting or lightweight covers, galvanized vire 9-gauge works great. To straighten it and cut it, we fastened it in a bench vise and cut it with side cutters, aka diagonal cutting pliers.
In a very windy area and for heavy cover, you want stronger material. If you have access to 4—or 6-gauge galvanized wire, that’s a great option.
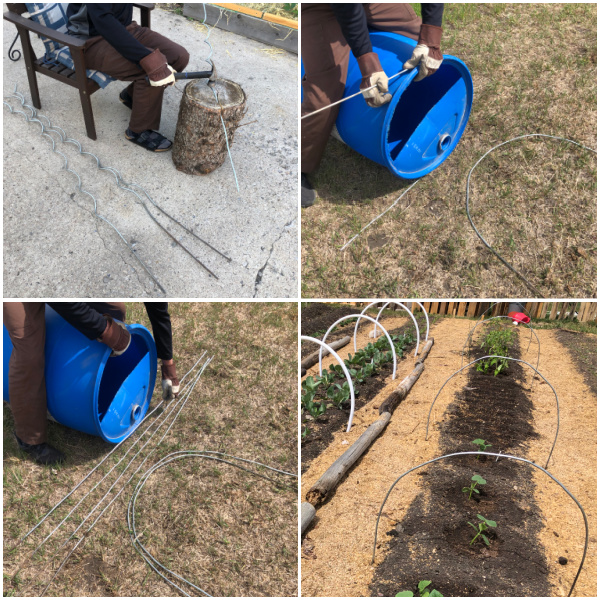
We have repurposed Spiral Tomato Cages since they aren’t the best option for tomato support. Straightening them with a hammer and bending them to a U-shape around a plastic barrel make good hoops for a row cover.
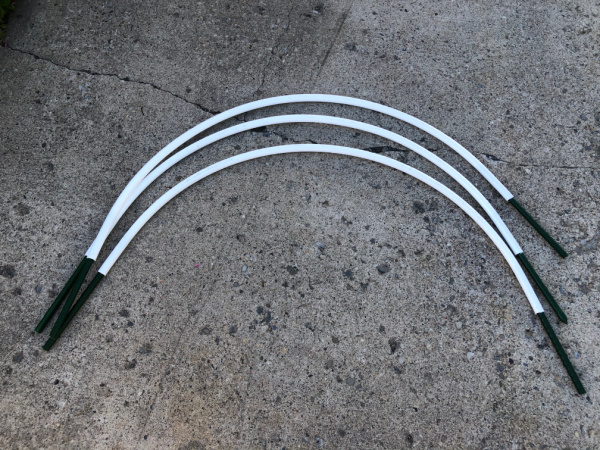
1/2 or 3/4-inch PEX pipes are probably the most commonly used. To fasten the hoops, you can place metal stakes into the ground and slide the pipe ends over them or push them into the ground.
We have used rebar stakes with good results.
Fastening the pipes to a garden bed board is an option, in most cases for a small hoop, it is not needed.
Running a ridge pipe or rope is a good idea if you plan to use heavy cover material or if the hoop is higher or bigger. For most netting covers, it is not needed.
The length of the material for the hoop depends on the width of the bed and also how high you want the hoop to be. Keep in mind that some of it will go into the ground for stability.
For example, for a 7ft cover, use a 7ft pipe. That way, you can push about 6 inches at each end into the ground and also have an overhang of the netting to secure to the ground.
Securing the row cover tunnel
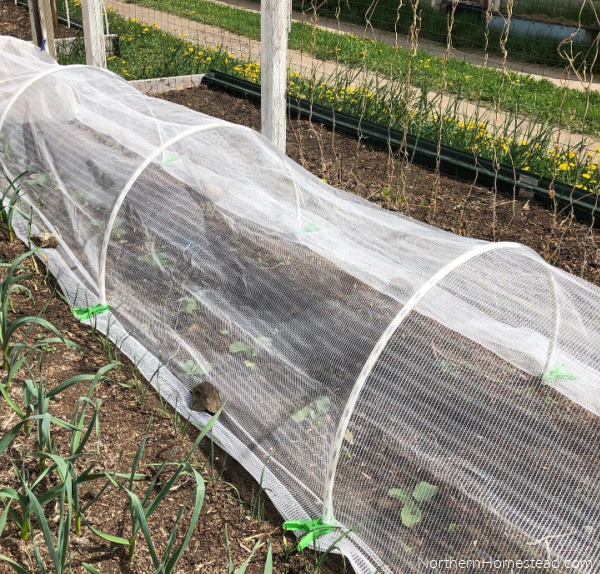
Securing the cover tight is important. A cover that moves in the wind can bring more damage to the plant than no cover. Also, you don’t want loose netting flattering around to be a trap for birds and small animals.
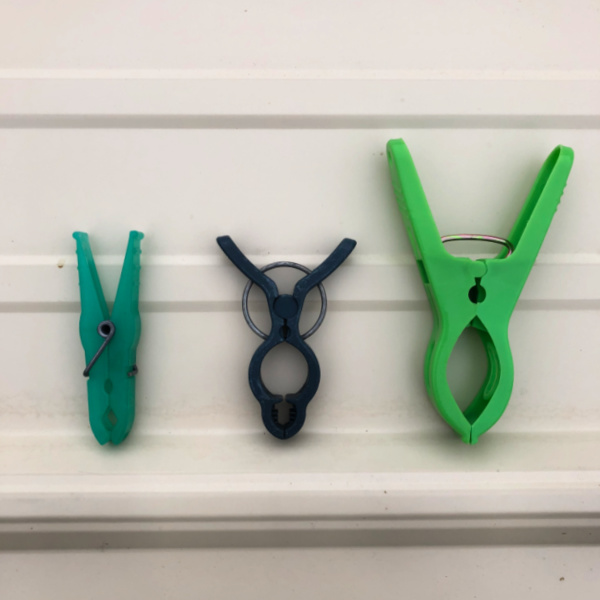
The cover can be clipped to the pipes and or fastened to the ground. From simple clothespins to special garden and heavy-duty pins, all are useful in one way or another.
We often use boards. In a windy area, the material can be rolled up to the board, so the wind has no way to grab onto it.
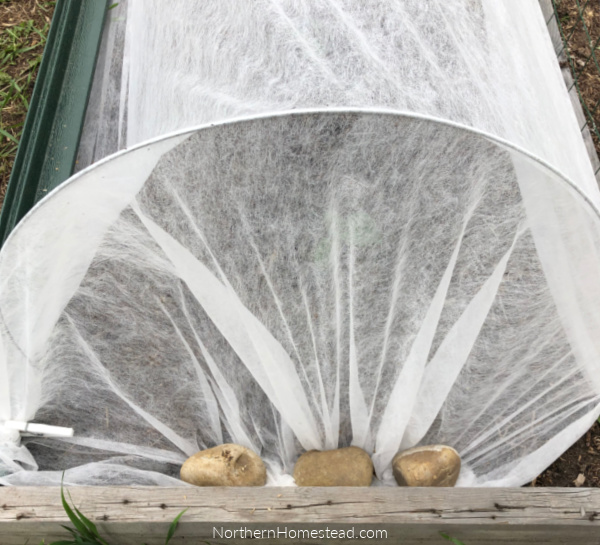
Rocks are another simple option. Since we use covers so much, our garden has rocks everywhere.
Personally, we do not use ground pegs or stakes. They cost extra, and wind can easily rip the material off of them.
In commercial settings, sandbags are often used. Making sandbags is a great idea if you have no boards or rocks available.
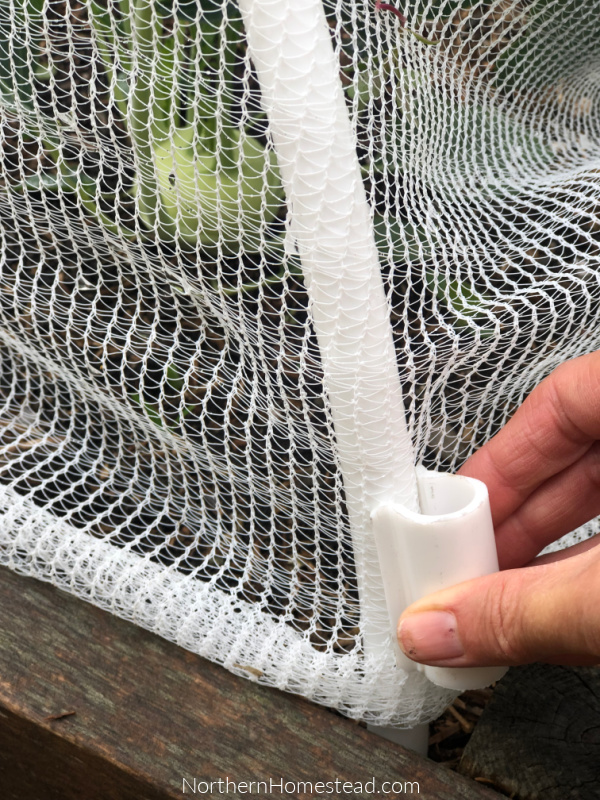
For hail netting, hand-made clips work well. They can be made in two versions.
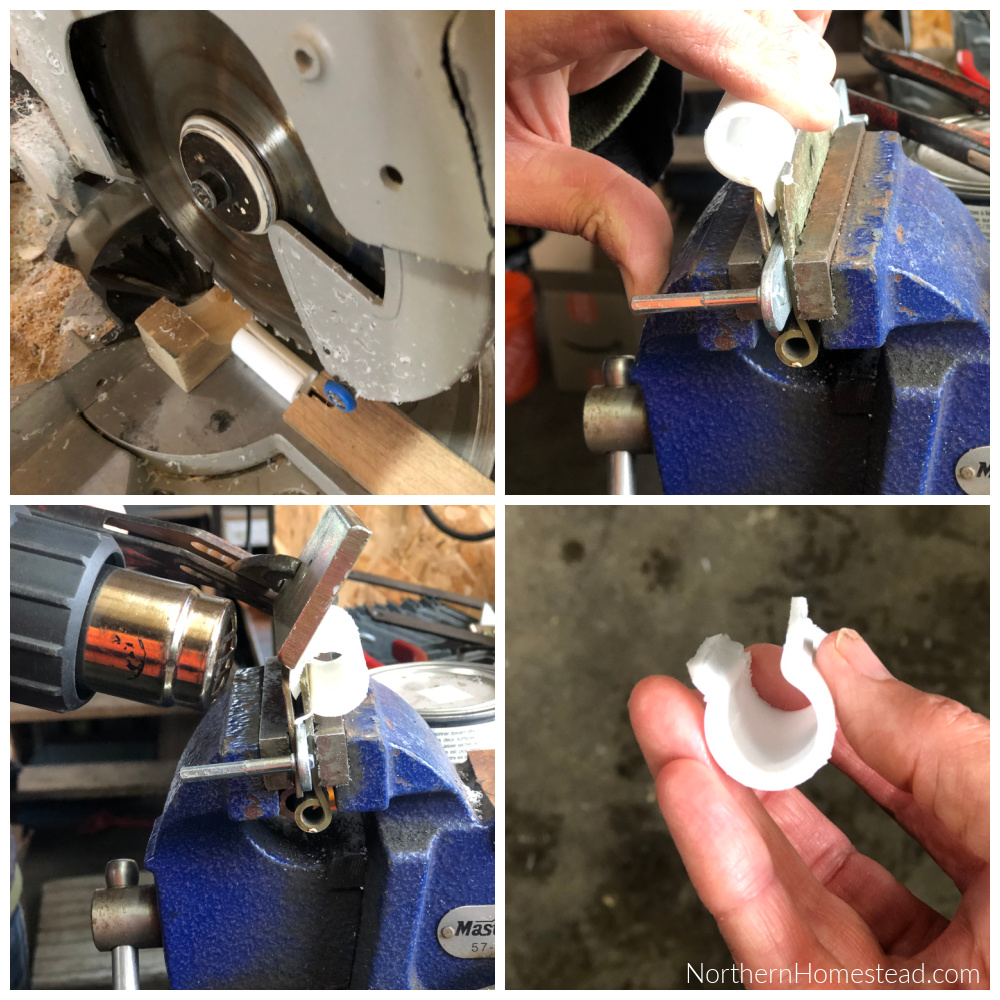
Start by cutting a pipe one size larger in diameter than the hoop’s pipe into about two-inch pieces. Make one cut lengthwise. Now, by holding one side of the cut between two metal plates, heat up the material with a heat gun. As soon as the plastic has been heated, form it to make an opening, as shown in the picture above, so that the clip can be easily secured on the hoop.

Another option is to do two cuts, removing about a quarter of an inch. Round the corner with a knife so it does not rip the cover material.
Both versions work, and there might be more options, like cutting up a short piece of a garden hose.
Just use what is available and what works best for you.
Tell us about your row cover tunnel or hoop bed experience. Maybe you have already upgraded to a caterpillar tunnel, the same idea, just bigger and stronger.
We invite you to subscribe to Northern Homestead and follow us on Instagram, Facebook, or Pinterest for the latest updates.

Thanks for this post. We live in a wind alley. We’ve tried the floating row cover, but it ripped just like your picture showed.
I have bird netting on my strawberries (also protects against ground squirrels). This year I put unused tomato cages in the middle of the strawberry row and draped the bird netting over it. I also have boards and rocks holding it down on both sides – whatever is around and not being used for something else! To pick the strawberries, I fold one side of the netting up and over the tomato cages, pick, and put it back. Then pick the other side in the same way.
Last year, I tried the bird netting on our raspberries. That was a mistake because the netting got all tangled up in the raspberry canes and thorns. I could only get it out by ripping it.
One other big problem we have is flea beetles, especially on broccoli and cabbage. Last year I used nylon produce bags and tied them over the broccoli heads and cabbages, not including the outer leaves. This sort of worked. I should have paid closer attention. I will try something similar on grape clusters. Then I won’t have to cover the whole grape vine, just the clusters. Credit Lee Reich for the idea except I think he uses paper bags.
Thank you for sharing your experiences. I love your creativity to find what works for you and what does not.