
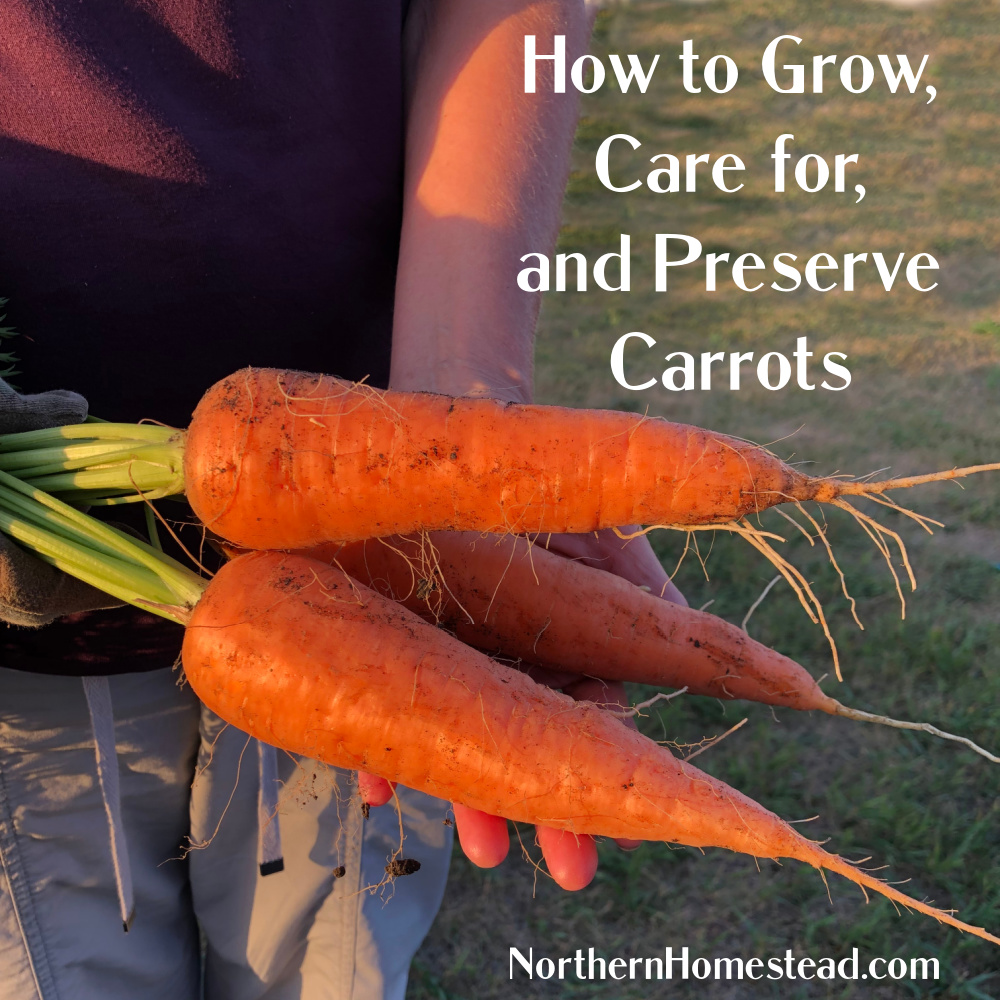
Beautiful, tasty, crunchy, and healthy—these are just a few words that describe the humble carrot. Whether you enjoy them raw or cooked, sweet or spicy, juiced, fermented, pickled, or baked, carrots offer endless culinary possibilities. If you’re an aspiring gardener or simply someone who loves to grow some food, carrots are a must-have in your garden and kitchen.
In this comprehensive guide on how to grow, care for, and preserve carrots, we delve into carrot varieties, share tips for planting and caring for them, troubleshoot common issues, and explore ways to preserve the carrot harvest.
Carrot varieties
Carrots come in a vibrant spectrum of colors—black, purple, red, orange, yellow, and white. They can be long, short, round, thick, or thin.
If you’re planting carrots in your home garden, consider selecting a variety that suits your local climate, soil type, and personal taste. Carrots thrive in various soil types but avoid compacted soil. Have heavy soil? Opt for short and thick varieties like Chantenay. For sandy soil, long and thin types like Imperator are your best bet.
We personally love Royal Chantenay for its stout build and winter hardiness, and the Denver variety for its ease of harvest and storage longevity. For fresh eating, salads, and juicing, we prefer Nantes types like Touchon or Little Finger. While we find that the long, straight Imperator-type carrots aren’t well-suited to our soil, experimenting with multi-colored and mini carrots can add a fun twist to the garden.
All carrots are biennial, meaning they go to seed in the second year. That also means that they can be kept in the soil all winter long. More about this in harvesting carrots.
Soil Preparation
In compacted soil, carrots tend to cling to one another to bolster their strength; we humans also reach out to one another when life’s challenges make our circumstances tough. Staying together is valuable. For those root vegetables, however, the key to their growth is not more hugging and clinging, but better soil.
In a tilled garden, carrot roots often reach the hard core (or the not-tilled soil) and split. A layer of mulch—whether it be compost, wood chips, or hay—creates a rich environment for them to thrive. As we mentioned earlier, choose a carrot variety based on your soil.
Planting carrots
Carrots prefer cool weather, making them ideal for our short summers. They can be planted in early spring when temperatures rise above 7°C (45°F). Because carrots dislike warm and dry soil conditions, early spring or late fall planting is key. If you live in a warmer region, consider growing carrots as a winter crop for the best results.
To grow big and delicious carrots, it’s important to plant them correctly. Plus, you’ll avoid having to thin them out, which can attract pesky carrot flies. The small carrot seeds can be tricky to handle. To simplify planting, you can either use pelleted seeds or make your own seed tapes with toilet paper. This can easily be made ahead of time in the winter, eliminating the need for thinning work in the summer. Or carrots can be planted with tweezers, mixed with sand, or by using a Seed Sower.
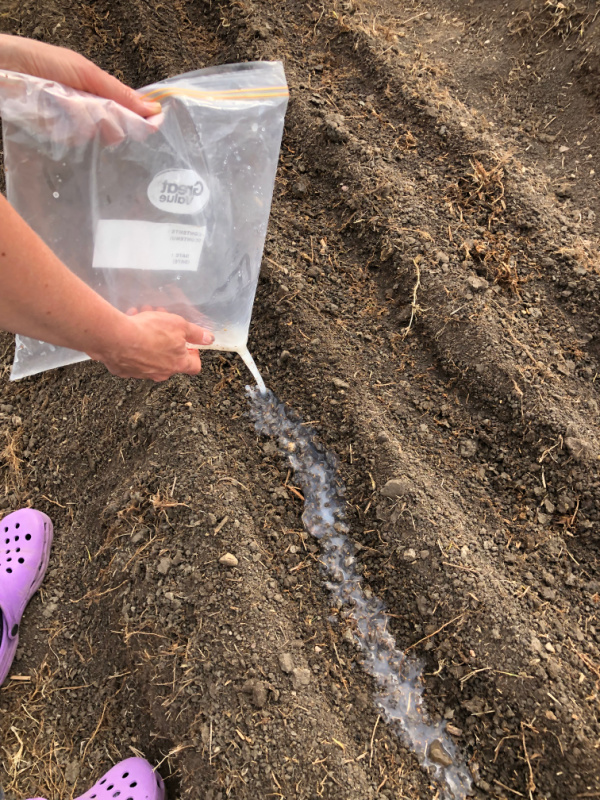
We’ve had great success sowing seeds in cornstarch—a method we cover in a separate blog article.
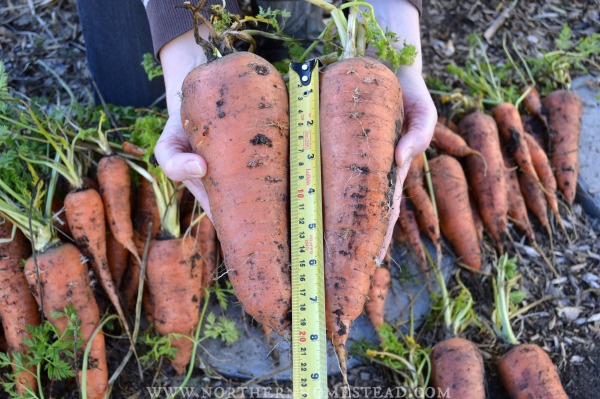
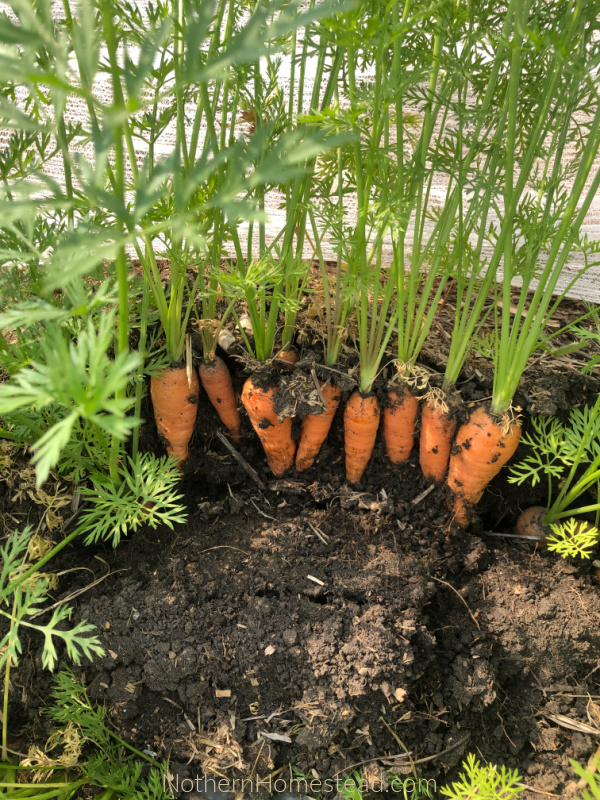
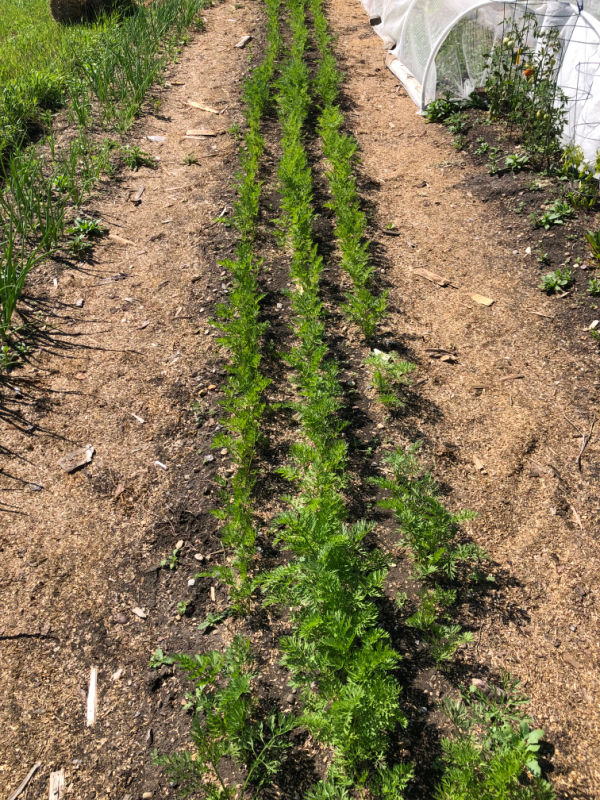
My favorite way to seed carrots, though, is the square foot garden way. The Square Foot Garden Book suggests planting 16 carrots per square foot. Even when grown in rows, it is a good idea to plant a square-foot garden in a row. This way, you can grow lots of carrots in very little space with no need for thinning.
In this video, I show you how. If you can’t see the video below, turn off your ad blocker, and it will show.
As shown in the video, I make 16 holes in one square foot and plant 1-4 seeds into each hole, allowing them to grow together. This method works best in loose, mulched soil.
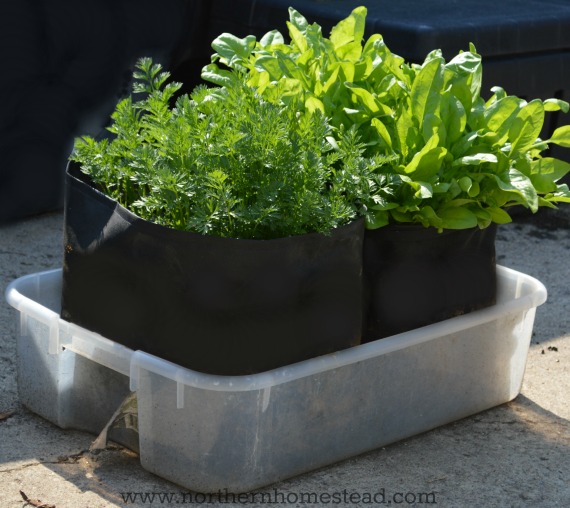
If you’re short on space, no worries! Carrots can be grown in a container, and grow bags are a good choice for your veggie garden. You can fit up to 16 carrots in a single grow bag.
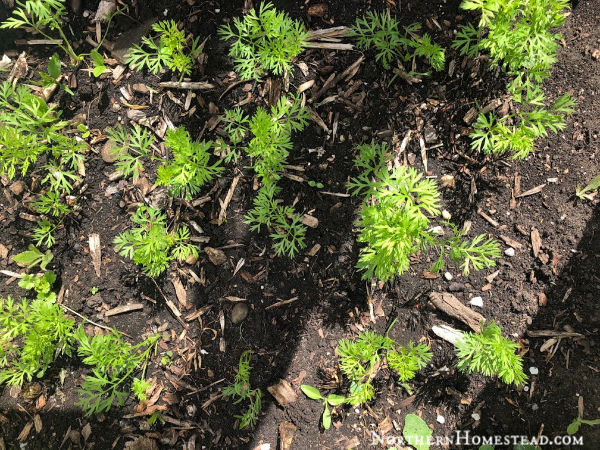
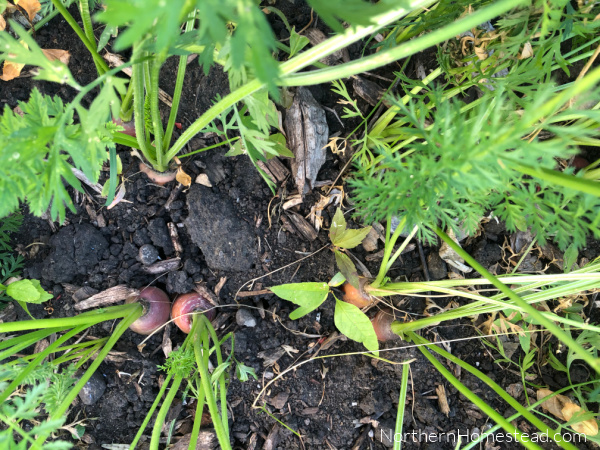
Carrots have a long germination time of 14-21 days. Whenever I start wondering if they will ever come up, they usually do. Covering the freshly seeded carrots with a board is said to help, too. Remove the board as soon as you see any germination. The wooden board will help keep the soil moist and cool, promoting better germination.
If you want winter or spring carrots, plant them a bit later, depending on your climate. Here in Zone 3, we plant them in late May to early June. Choose a location for the carrots, keeping winter cover in mind. One where the snow accumulates naturally is best. If there is a blizzard, carrots need extra protection, and snow is the best insulation in addition to the straw.
Caring for carrots in the garden
When it comes to caring for the carrots in the garden, we can see how important the seeding is. Invest a little extra time here to space your seeds appropriately, and you’ll often find that additional thinning becomes unnecessary. This early attention to detail can save you a lot of effort down the road.
Should you find yourself in a situation where your carrot patch is overcrowded, hold off on thinning until the seedlings have grown a few inches tall. This minimizes root disturbance for the carrots that remain in the soil, helping them to grow strong and robust. And remember, watering after thinning is essential; it helps to settle the soil and aids in the recovery of the plants you’ve chosen to keep.
If your carrots are snug but not squashed, you can actually turn the thinning process into an early harvest. In this case, gently pull out the largest seedlings; not only will you get some young, tender carrots to enjoy, but you’ll also make room for the remaining plants to expand and flourish.
Weeding is important in early summer, to give your carrots space to spread their roots and shoots. However, as the season progresses, the carrots will typically outgrow any competition. Their deep-reaching roots seek moisture far beneath the surface, while their leafy tops form a natural canopy that usually shades out would-be weeds.
As for watering, less is often more. Early-season watering is critical to help the carrots establish themselves, but once those roots reach deeper into the soil, they become remarkably self-sufficient, drawing moisture from deep within the soil. Be cautious not to overwater, as doing so can split the roots, affecting the quality of your harvest.
By giving your carrots the right care at the right time, you’ll cultivate a garden where this nutritious root vegetable can truly flourish.
Troubleshooting
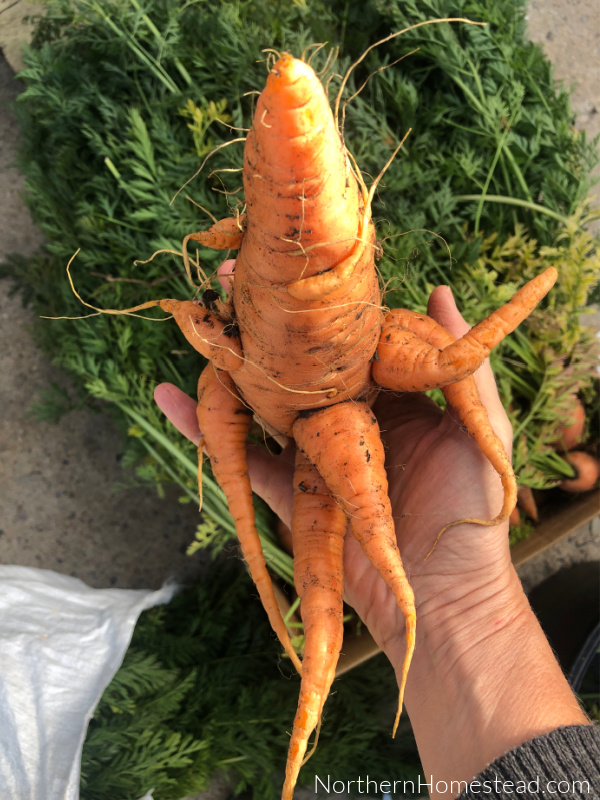
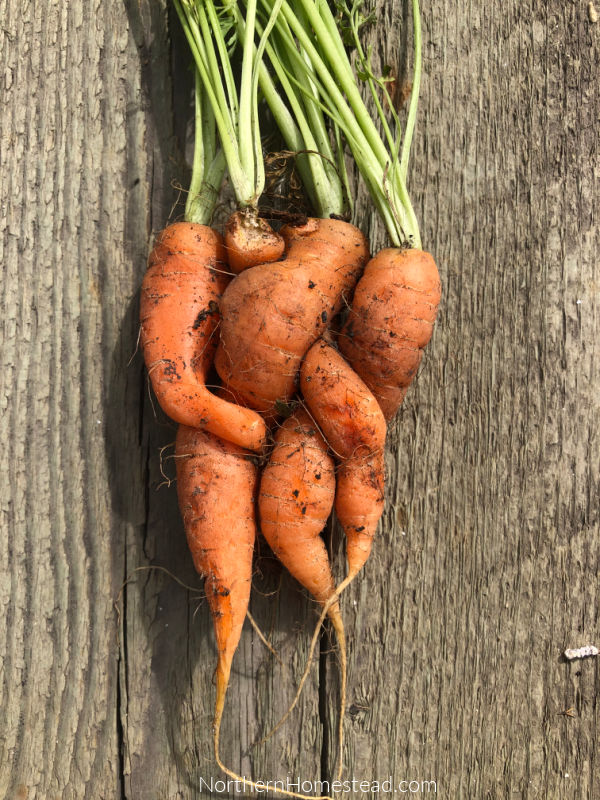
Ever pull a carrot out of the ground and laugh at how much it resembles an octopus? You’re not alone. Deformed carrots are often amusing, but they’re also a signal that something’s up in your garden. One common reason for these odd shapes is that the carrots are simply planted too close together. When that happens, they can merge, creating a spectacle—multiple roots shooting out in all directions from a single top. To sidestep the deformity drama, thin your carrots. Also, don’t skip early-season weeding. Your carrots need clear paths to stretch out their roots and form properly.
If your carrots look like they’ve been topped, this usually occurs when the carrot encounters something hard it can’t push through. In tilled gardens, the topsoil might be loose and inviting, but the layer beneath is often compact and impenetrable. To tackle this, consider switching to a no-dig garden and laying down mulch. Double-digging can help if your topsoil is insufficient. Another workaround? Plant a short-rooted carrot variety like Danvers.
Split carrots are the garden’s way of telling you there’s been some inconsistency in the watering department. They’re still tasty, but their shelf life is drastically reduced. This happens when a carrot gets too much water too quickly after a dry spell; it grows faster than its skin can stretch. Aim for a consistent watering schedule. This will help to avoid a split carrot.

The Pesky Carrot Fly. These critters lay eggs near carrot, celeriac, parsnip, and parsley plants, and their larvae munch their way through your precious roots. These uninvited guests usually appear in late spring and early fall. Some years, you won’t even notice them; other years, they’ll come in droves. You can protect your carrots with netting or try companion planting with the onion family, although I’ve still found maggots even when onions were present. So, no guarantees there.
A reader shares: Rotating and never leaving ANY carrots on, or in the ground, or in the compost, seems to keep the carrot flies at bay. Plus, to seed at final spacing, never thin, and have all weeding done by the end of May before the main hatch of flies from overwintering larvae in the neighborhood. Weeding/thinning is reported to attract new flies because the leaves get bruised and have a more intense smell”.
With carrot maggots, don’t just leave infected carrots in the ground—you’re asking for a bigger problem down the line. Harvest early, and you might be able to peel away the damage.
Harvesting Carrots
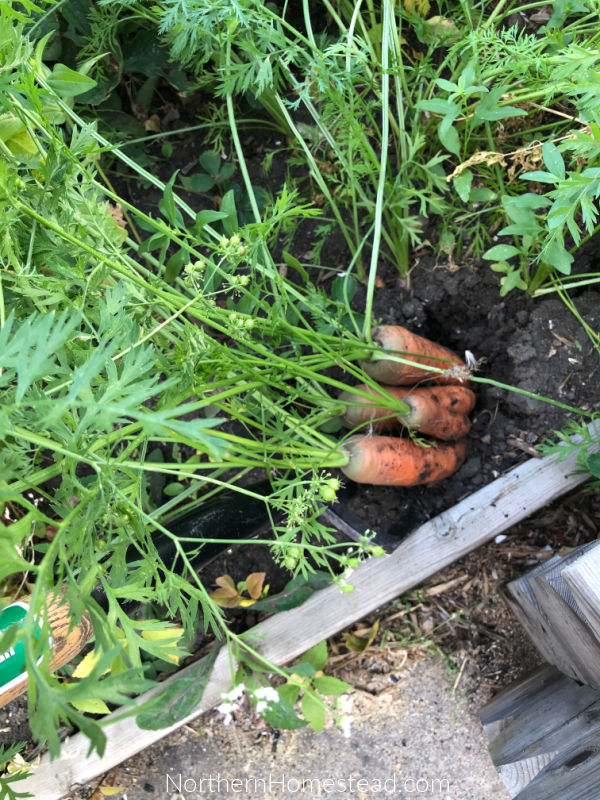
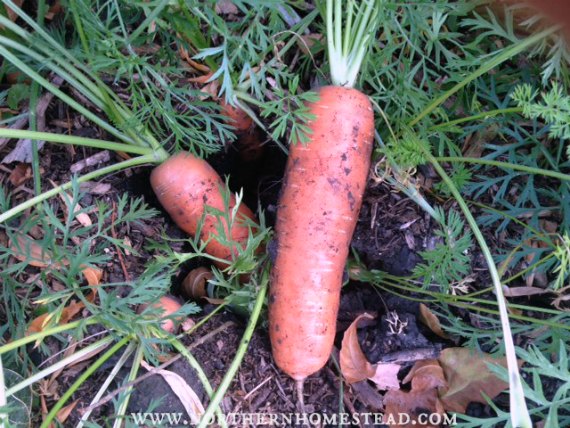
Harvesting carrots does not have to be a one-time event; it can be an ongoing celebration. Whether you’re plucking baby carrots or pulling up fully grown carrots, the harvest timeframe is quite flexible. Baby carrots are tender, while the mature ones pack a more robust flavor. Leaving the carrots in the ground till a good frost sweetens them up.
Use a fork to loosen the soil, not to yank the carrots out. Dig around the carrot to loosen the earth, then gently pull it out by hand. This way, you ensure that the delicate roots come out intact.
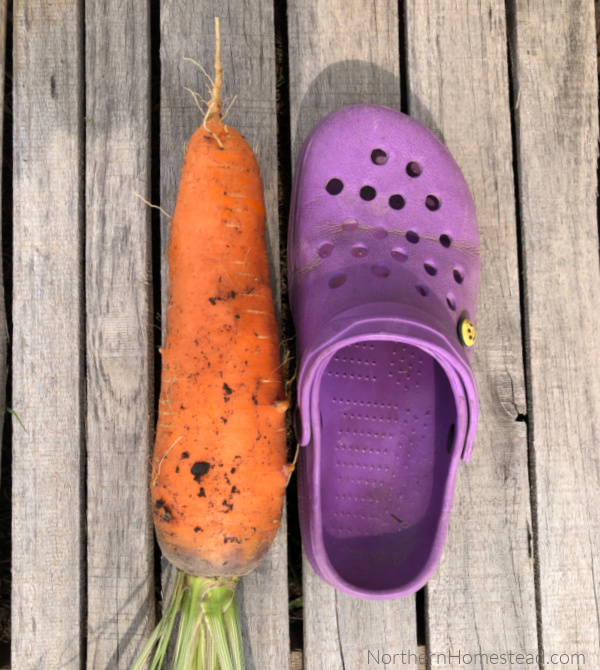
As the weather cools down, the carrots ramp up their sweetness. We’re in Zone 3 here, leaving the carrots in the ground as late as November rewards you with some of the sweetest, most flavorful carrots you’ve ever tasted.
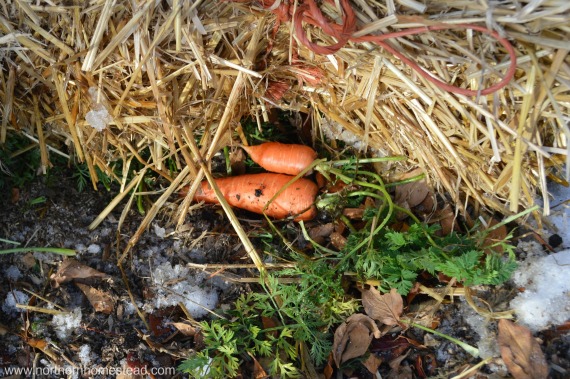
Overwintering Carrots in the Ground
Carrots are hardy survivors; they’ll happily hibernate all winter and continue growing in spring, eventually going to seed in their second year.
But beware: If you have a carrot maggot problem, leaving infected carrots in the ground through winter is like setting a welcome mat for more maggots. Only healthy carrots should be considered for overwintering. Also, if you have naggers, the overwintering carrots in the ground might not be a good option.
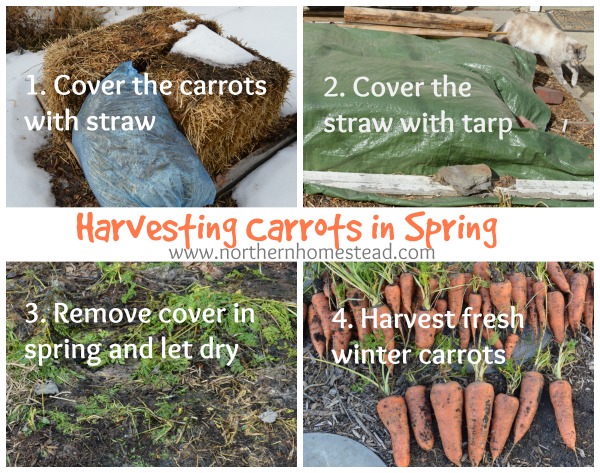
If you’re blessed with abundant snowfall, that should suffice as insulation in warmer zones. For those in Zone 3, you’ll want to layer your carrot bed with straw or leaves, then top it off with a tarp to keep moisture out.
- Before the first hard frost, cover your carrots with either straw or bags filled with leaves.
- Drape a tarp over the straw layer and let it be, occasionally checking to ensure a generous layer of snow piles up during extreme cold or blizzards.
- Once spring rolls around, remove the covers and let your carrots air out a bit.
- Harvest your winter carrots, still as crisp as the day they were buried.
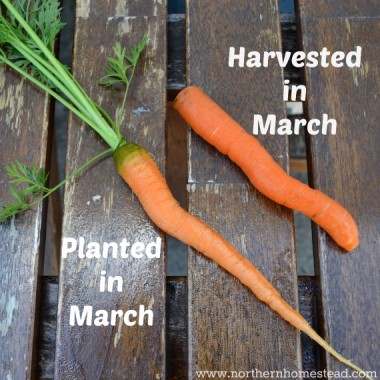
Just to share a personal milestone—in March, we ate the last of our winter carrots on the same day we enjoyed our first greenhouse-grown carrot of the season. Both were, in a word, delectable.
Preserving carrots
We have a separate blog article on a dozen ways to preserve carrots with many pictures and tips. Head over to read it next. Here are just the basics.
Long-Term Storage: You can either leave them in the ground (you’ve read my harvesting guide, right?), keep them in the fridge in plastic or Freshness-Preserving Food/Flower Storage Bags, or store them in a cellar. The ideal storage conditions hinge on a couple of factors: temperature and humidity. So it’s about experimenting a bit to find out what works for you.
Fermentation: If you’ve never tasted fermented carrots, you’re missing out. They offer a distinct flavor profile that deepens over time. Baby carrots work exceptionally well for fermenting, and they’ll keep for months if stored in a cool spot. If you’re new to fermenting, I have a guide that’ll make you a pro in no time.
Canning: You can pressure-can them, pickle them, or use them in a range of canning recipes. Just to tantalize your taste buds, here are a few of our household staples:
Freezing: We typically chop or grate them and freeze without blanching. Having them on hand is a real time-saver come winter. But if you prefer, you can also freeze them in larger pieces or even whole baby carrots—just make sure you blanch them first.
So, whether you’re a long-term planner or someone who just ended up with more carrots than you know what to do with, these methods have something for everyone. And remember, the best storage method for you is the one that matches your kitchen’s temperament and your personal taste! Happy preserving!
I hope this article on how to grow, care for, and preserve carrots encourages you to grow and preserve more yummy carrots.
We invite you to subscribe to Northern Homestead and follow us on Instagram, Facebook, or Pinterest for the latest updates.


I grown scarlet nantes in my raised garden bed. I like them because the are short and fat since my soil depth is limited. We don’t get really cold winters on the southern BC coast, so I just mound up dirt around the tops and leave them in the soil. I can go out and pick a carrot as needed all the way until early spring when it’s time to start all over again. – Margy
Oh how nice, I would love to be able to go harvest any time of the year. Love your floating garden!
I was just thinning my carrots yesterday so this post was quite timely. I’m hoping to get a nice harvest this year with carrots that look like the ones in your pictures! Last year I got a lot of small carrots (combination of not thinning enough and a dry late summer) so to preserve them I cut them and pressure canned them with onions and kale for a soup base.
Your onion, kale, carrot soup base sounds yummy. I like it when carrots get big, less washing for more carrots ;). Hope yours grow well for you!
Thanks for the excellent information, you always inspire!
Thank you Tina for your kind words 🙂
I grew my first batch of carrots this year. They are all hidden under my squash plants, hopefully growing well. We shall see! I’ve never grown them before, we have rocky dirt that makes it hard to grow them. Thanks for sharing on the Homestead Blog Hop!
Hope your carrots grow well. If they are covered with the squash leaves, you might want to cut some leaves back, to give them some sunshine. Carrots like it sunny ;).
I am so thrilled to read your blog!! I garden in Northern Alberta. I believe my zone is technically 2, but I can grown zone 3 perennials in my yard. I love all your tips and advice, and am so enjoying back reading your posts. I have done a bit of experimenting with preserving carrots. The very best carrots were the ones that I buried in the ground in the Fall. I received a huge amount of carrots from a friend and didn’t have room to store them in my cold room (I had already filled my cold room with my own carrots). I dug a hole in my garden and put all the carrots in, covered with dirt and straw. In December I was nervous that they were going to freeze if I left them much longer so I dug them up. I think I could have left them as the straw and snow were doing a great job at not letting the frost get down. Those were the best tasting carrots I’ve ever had. The ones in my cold room did okay – but the ones from the ground were still in perfect condition, and very sweet. This last Winter I stored my carrots in my cold room again. The ones that were in rubbermaid tubs with the lids on did the best. I did lose a few to rot, but not that many. We were eating carrots all Winter long even until the beginning of May! Everyone that tried them were so amazed at how great they tasted. I would like to try leaving them in the ground all Winter long like you do – that sounds much easier than digging them out of the snow.
Miranda, thank you so much for sharing! Those are great tips, to bury in the fall seems to be a great way to store carrots that do not grow close to the house, but can be stored there. The Rubbermaid tub sounds good to, question, did you wash them before storage?
I’m so glad this came back around in 2026. I never knew I would forget so much after turning 68. Such a help! Be well!
Thank you, happy to hear it is helpful. Glad you are still gardening!