
Here at Northern Homestead, we love fermented foods. We love them because they are delicious, healthy, and simple to make. It is a great way to preserve the harvest. Learn the basics of fermenting fruit and vegetables at home.
There is a whole science to how fruit and vegetables get lacto-fermented using just salt, and, if needed, water. The book Fermented Vegetables covers a lot of it, along with some interesting stories. If you are into that, we would highly recommend the book. However, in our home kitchen, we just need to know how to ferment food safely and deliciously. That’s what this article is about.
What you will need to ferment fruit and vegetables
Fermenting is simple! You do not require any special equipment. Start with using whatever you have in your kitchen and add special equipment as you see a need for it.
You will need:
1. A container big enough to hold all the vegetables or fruit you want to ferment. A crockpot, glass jars or containers, or even an ice cream bucket all make great fermenting containers. Since we use quite a lot of salt, we avoid metal, even though high-quality stainless steel would be fine. But if you aren’t sure, just stay away from metal containers.
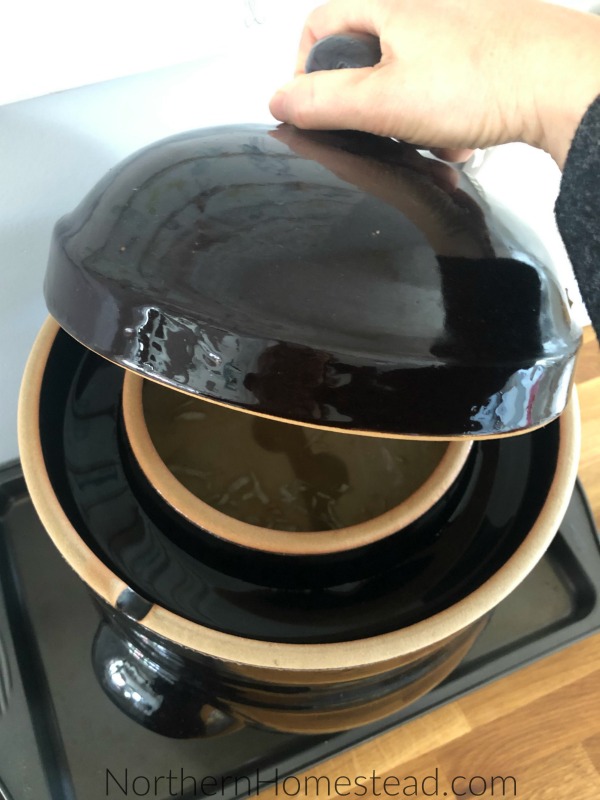
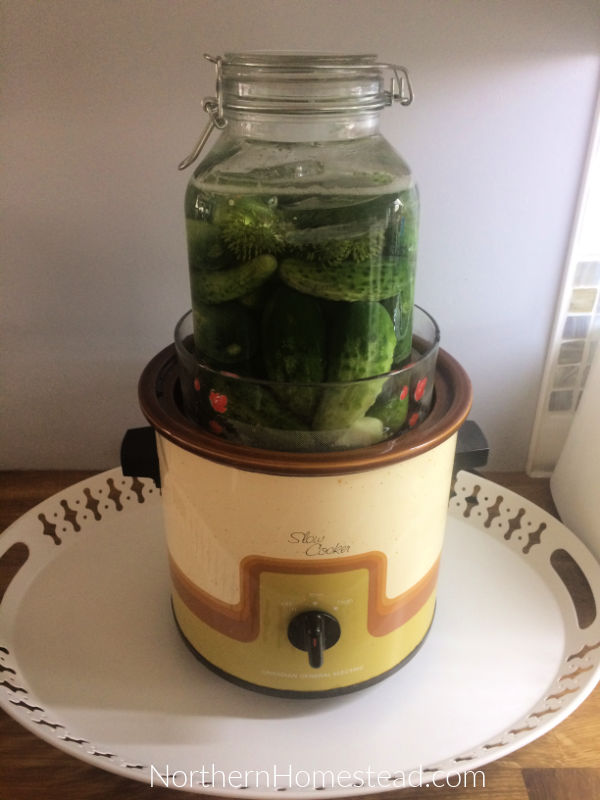
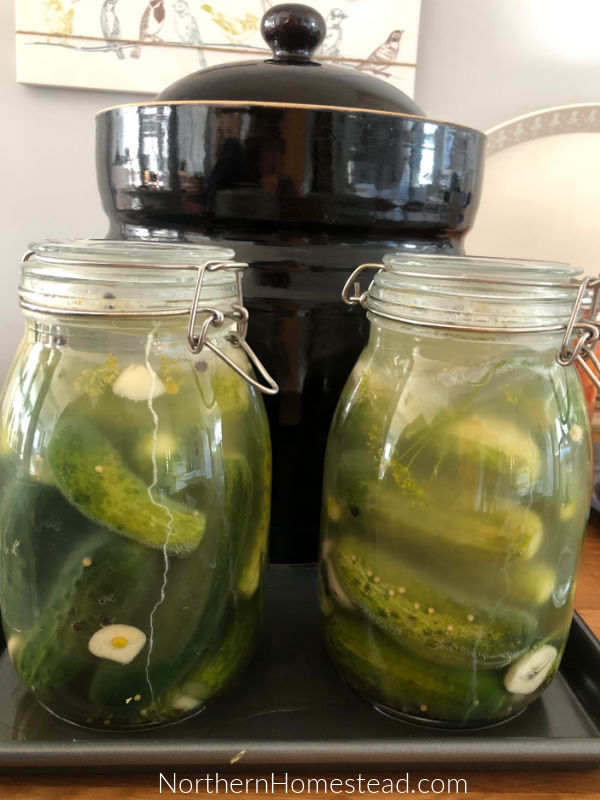
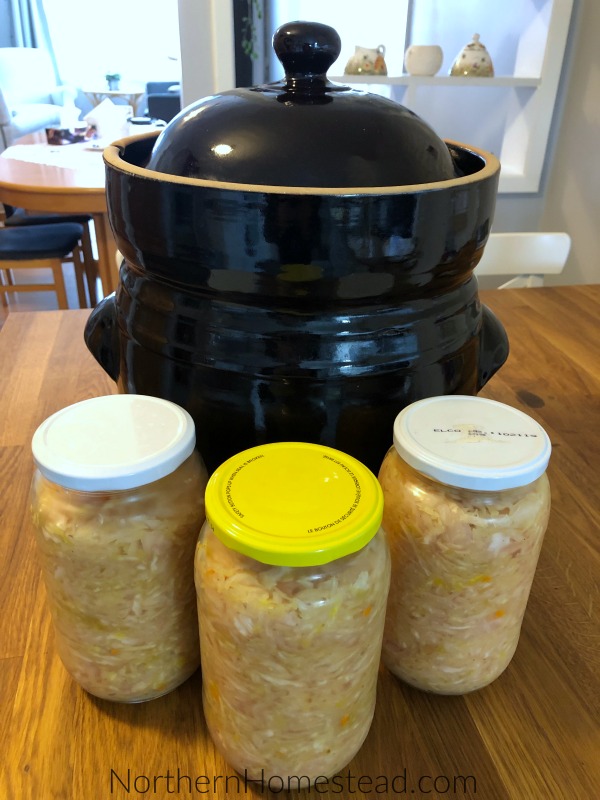
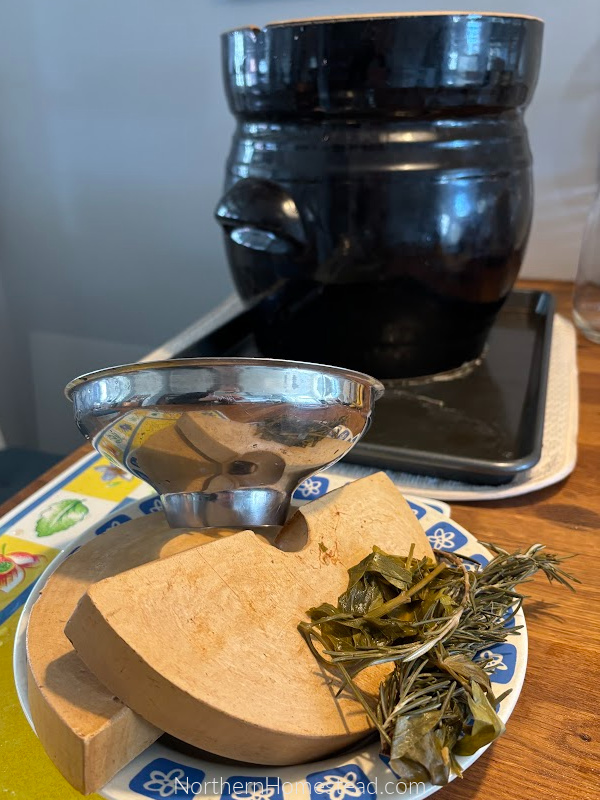
A fermenting, water-sealed crock is great for sauerkraut and for larger batches of vegetables. If you are serious about fermenting, we would recommend it. But as you see in the picture below, I use an old crockpot to make sauerkraut and weigh it down with a salad bowl and a jar with pickling cucumbers. There are two fermentations running simultaneously.
The container needs to be clean, but it doesn’t have to be sterilized since the natural bacteria necessary for fermenting fruits or vegetables are readily available. However, if you are transferring the fermented product into new jars or containers, it’s wise to sterilize those jars. I often pour boiling water into them and rinse them out to ensure that no other bacteria are present, especially for long-term storage.
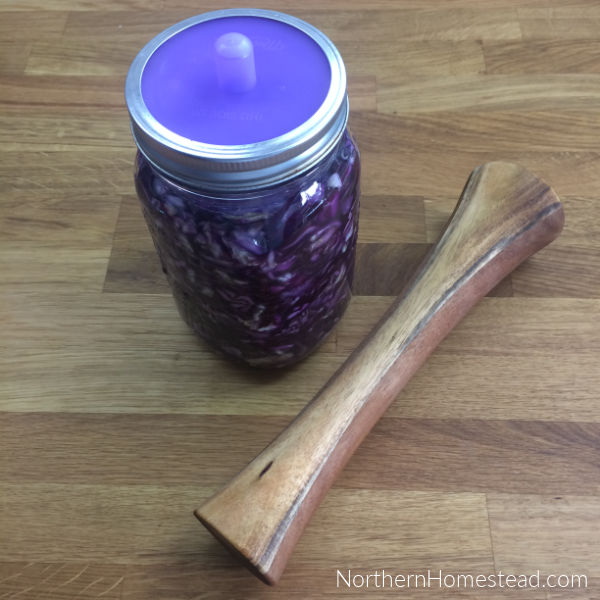
2. A weighing stone or a plate with some weight on it to keep the fermentation covered with brine. The Tupperware shaker insert fits well into my jars to hold the veggies down, also small cups can be used as well. A plastic bag filled with water works well for fermenting in jars.
3. A lid to prevent dust or fruit flies from entering the fermentation. Having an airtight lid that only allows air to escape, which naturally builds up during fermentation, does result in a more consistent end product, since no bacteria from outside can enter. But in our experience, in a home environment, a Lid and Econolock is not needed. If you choose to close the fermented container airtight, make sure to vent it daily.
That said, the fermentation kit is a great addition, and we would recommend it. As you read above, you can start with whatever you have in your kitchen, but this kit includes lids, weighing stones, and a tamper — very handy.

Brine and salt
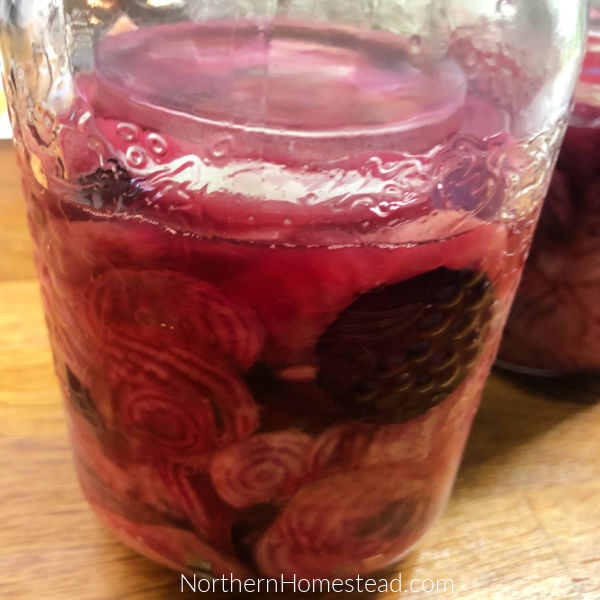
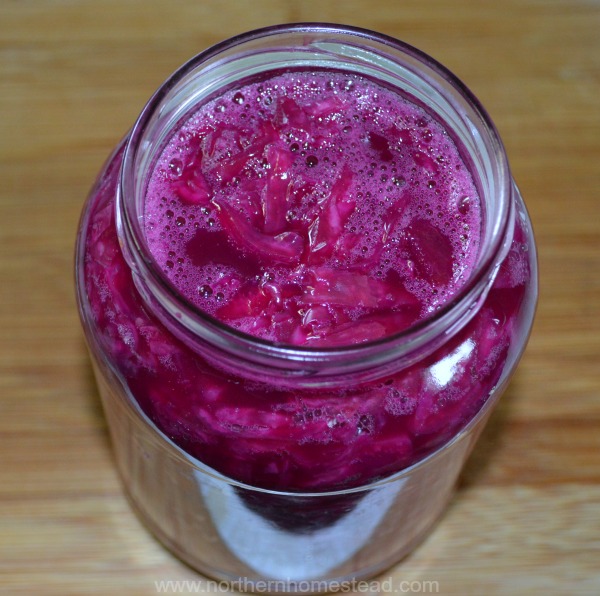
There are two primary methods of fermentation: using the vegetable’s own brine or using a water brine. Sauerkraut is the most famous example of fermentation in its own brine, and many other vegetables can also be fermented that way and can taste delicious. In this case, we thinly sliced beets and added salt.
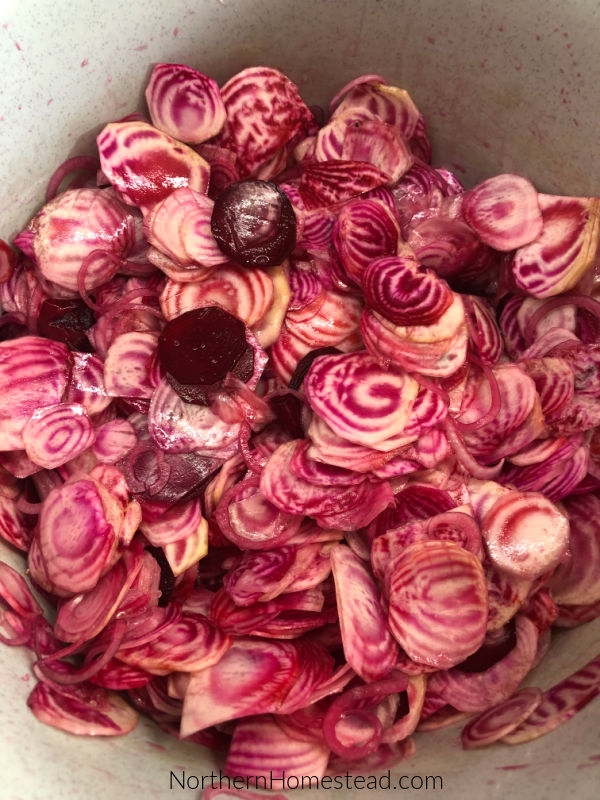
The salt draws out the vegetables’ juices, so no water is needed for fermentation. Make sure to weigh the veggies down, and the fermentation can begin.
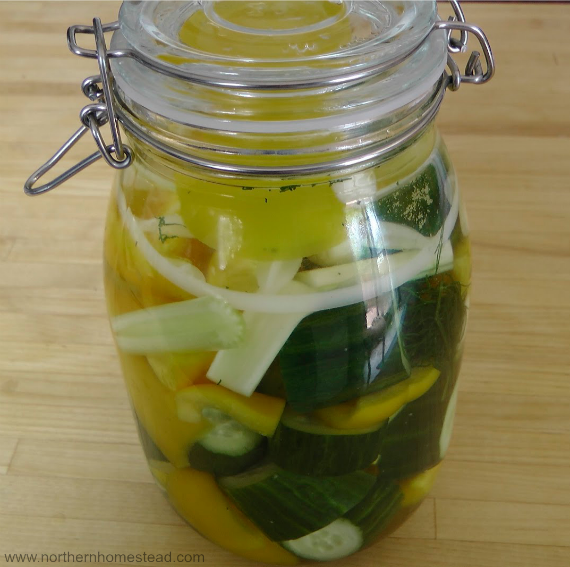
If you want to ferment bigger chunks of vegetables or fruit, you will need a water brine. Use clean, unchlorinated water. If tap water is all you have, I’d recommend boiling it before making brine.
Salt is the most crucial ingredient for fermentation, alongside the vegetables. It prevents the growth of harmful bacteria while allowing beneficial bacteria to thrive.
What salts to use? Preferably, you want natural, unrefined salt with no additives. I have used Canning and Pickling Salt successfully; however, at least here in Canada, it does not say that the salt is not refined, so it probably is. Also, fine salt dissolves better than coarse salt.
How much salt to use? Ideally, you want to use 1-3% salt to the weight of vegetables or water for brine. More salt slows the fermentation down. Researching it a bit, I have found that northern countries tend to use less salt, but Asian countries, as well as the US, recommend a higher percentage of salt.
If you ferment vegetables without a water brine, just taste the mixture. It should be salty, but not unpleasantly salty. For example, if you have 1 kilogram (2 pounds) of cabbage and use 1 tablespoon (20 grams) of salt, that results in approximately 2% salt. For my taste, it’s quite salty. Use your taste buds; you can use a bit less or a bit more.
Making water brine: According to the book Fermented Vegetables, for a basic brine, use 1 gallon of water and 1/2 cup of salt. 1/2 cup (120g) of salt, which converts to a 3% brine. To be closer to 2% use 1/3 cup (80g) of salt.
Basic small batch brine:
1 liter (1 quart) of water, 1/2 tablespoon (10 grams) salt = 1% brine
1 liter (1 quart) of water, 1 tablespoon (20 grams) salt = 2% brine
1 liter (1 quart) of water, 1 1/2 tablespoons (30 grams) salt = 3% brine
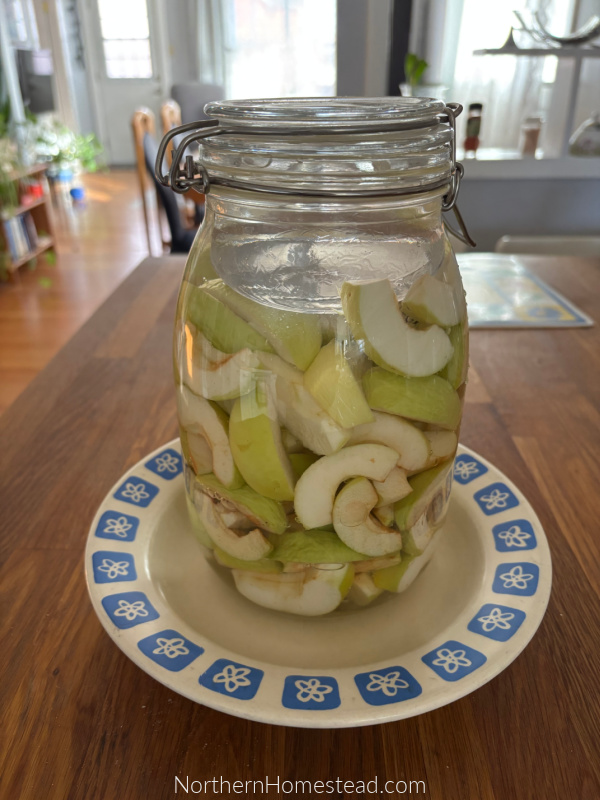
Note: For long-term storage, most vegetables benefit from a 3% brine. To eat and enjoy soon a 2% brine is enough. Apples only need a 1% brine.
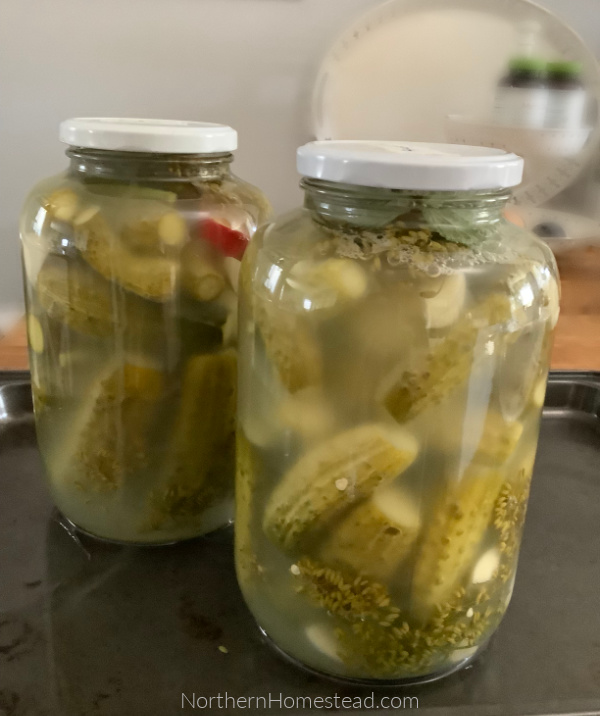
Cucumber brine is always saltier than brine for other vegetables. The Shockey’s in Fermented Vegetables suggest using 3/4 cup of salt (200 g) to 1 gallon of water, resulting in a 5% brine. That is very salty and would keep them crispy for long-term storage. To avoid that much salt, you can make them half-salt and sour to enjoy right away. For long-term storage, you can use our fermented cucumber for a winter recipe.
Make it tasty
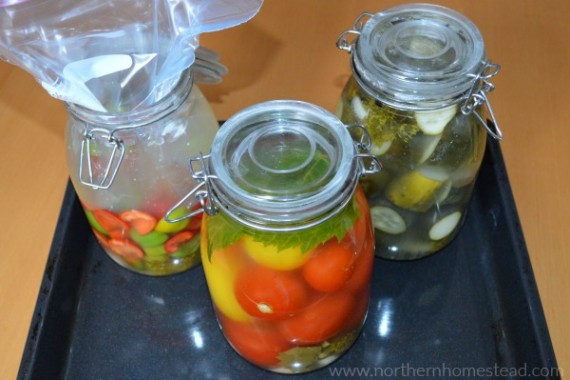
Even though salt and veggies/water are all you need to make a simple fermentation, you might want to add some flavor with dill, rosemary, garlic, ginger, turmeric, master seeds, cinnamon, hot pepper, etc. Follow a recipe or make your own, using your preferred spices and herbs.

Adding leaves from grapes, sour cherries, black currants, or horseradish (you can use just the stem or the root) will keep your ferments crisper. They also add some flavor.
The fermentation process
The simple rule for fermenting is to keep it covered with brine. Here is where the weighing stone or a plate with some weight on it to keep the brine up comes in handy. The Tupperware shaker inserts in this picture fit well into the jar to hold the veggies down.
A plastic bag with water also works great, especially when the veggies you are fermenting are cut or shredded. Get creative — use what you have — but keep the ferment covered.
While fermenting, the jars might overflow; it is normal. To prevent a mess, place your ferments on a plate or baking sheet.
Keep the ferments out of direct sunlight at room temperature (15 -24 °C). Cooler temperatures will slow the process down; warmer temperatures will speed it up.
Fermentation is complete if you see and hear no activity anymore. It usually takes about a week. Now transfer the ferments to a cooler place; a refrigerator is best.
When fermenting in the crock, you may want to transfer the fermented vegetables or kraut into jars for storage in the refrigerator. Ensure that the vegetables remain submerged under the brine.
Troubleshooting
It is important to keep an eye on the fermentation while the natural bacteria work their magic. If you catch a problem on time, it will not become a big issue. Check if everything is under the brine.
Surface scum and even mold can occur during fermentation. Just remove these unwanted elements and enjoy the rest. Additionally, discoloration of parts not submerged in brine can occur. Again, simply remove the discolored portions until you see vibrant color, and then enjoy the rest.
Fermenting, although simple, involves working with bacteria. If you are new to it, some aspects might seem unappealing or off-putting. However, if a fermentation goes wrong, it will smell and feel very unpleasant—essentially rotten. While this can happen, maintaining cleanliness and ensuring that the ferment is covered with salty brine usually prevents it.
As a rule of thumb, as long as it smells pleasantly sour, it’s safe to eat. Fermentation does not involve any hidden bacteria, which can be dangerous, as seen with canning. This is a huge benefit of fermentation. Fermenting is simple!
What to ferment
Finally, let’s explore what can be fermented. Fresh organic fruits and vegetables make excellent ferments, particularly when using freshly harvested produce for long-term storage and preservation.
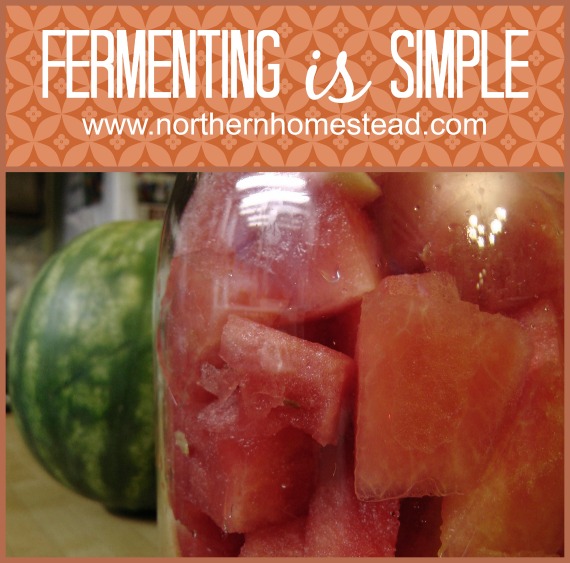
However, I find fermenting also helpful for not-so-great products. Winter cucumbers that are tasteless can become yummy half-sour pickles, and a not-so-sweet watermelon turns into a delicacy when fermented.
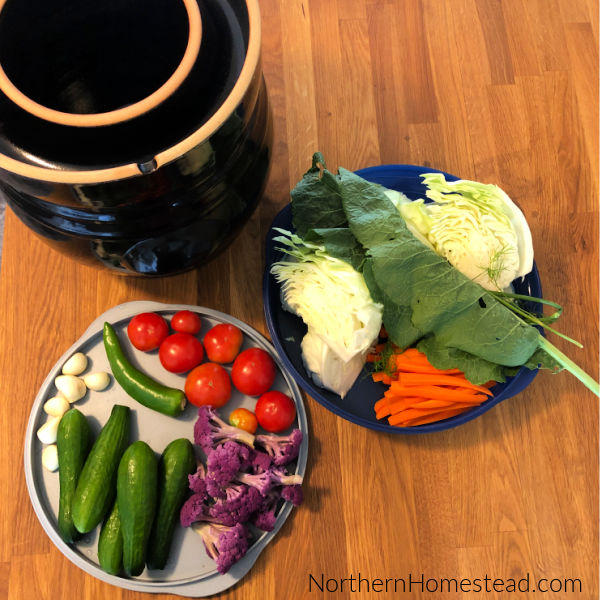
When it comes to what vegetables to ferment, it is easier to list what might not be a good choice (potatoes or broccoli), because almost anything tastes great fermented.
The book Fermented Vegetables: Creative Recipes for Fermenting 64 Vegetables & Herbs in Krauts, Kimchis, Brined Pickles, Chutneys, Relishes & Pastes offers more than 120 recipes, using the same basic methods to ferment 64 different vegetables and herbs. They show how easy it is to make dozens of exciting dishes, including pickled Brussels sprouts, curried golden beets, carrot kraut, and pickled green coriander.

Fermentation examples
The simplest ferment to start with might be half-salt and sour pickles. Here is how.
Fermented pepper paste is a must-have in our house.
Sauerkraut is a staple in our house. We have made it the simple (poor man’s) way for years. See here how to make sauerkraut the simple way.
If you have a water-sealed fermenting crackpot, here is how to use it.
Fermented baby carrots or Carrot Sticks.
Fermented cherry tomatoes are a special treat.
And don’t forget to try fermented watermelon.
In this video, we demonstrate water brine fermentation. We are making dilly carrots. If you can’t see the video, go here.
Fermenting is simple; learn the basics and start fermenting your favorite vegetables using what you already have in your kitchen.
We invite you to subscribe to Northern Homestead and follow us on Instagram, Facebook, or Pinterest for more yummy recipes.


Are you talking about the escape of gas or the air bubbles, that is normal. It should not irritate your tongue though. I usually scrub the bubbles from the side of the fermenting pot off and after it is all clean, I use the sour kraut.Also if your sauerkraut is to strong, try to give it less time. Sometimes in the summer a leave it for as little as 3 days. Hope this helps.
I am going to check that book out. I just finally started fermenting and I’m addicted! I had some trouble with Kahm yeast the first few tries. Then I got some fido jars and they seem to have eliminated my problem. I am doing long fermented sauerkraut and pickles 4 to 6 weeks. And water kefir too.
Oh good for you Amanda! Fermenting is addicting. I love the book, a lot of good information and recipes.
Hi Anna
Today made quark for the first time. I was already familiar with making kefir, but was excited about making the quark.
I was familiar with the name quark, because my grandmother( Anna) in Germany used it. So I was thrilled to re- discover another traditional food. My grandparents also made sauerkraut and many other foods, but I was too young to remember, so I’m re-learning some of these methods. I Love your website.
Thank You for all the great information.
Ingrid
Thank you Ingrid for your kind words. We have lots of German goodies on this blog, hope you find some more things to try and enjoy.
I’m very interested and would love to get started…but how long do you leave it to ferment before you eat it?
Depends what it is what you want for a taste. All ferments are edible form day one. The longer you leave it the more sour it becomes. Half sour pickles are often taste great right the next day, but if we want real sour pickles, I leave them for 6 days. Water melons are done in about 2-3 days, I do not let them go longer, since I do not want them to become to soft. It really is up to you. For beginners I would suggest you start tasting your ferments after 3 days and find out what your favorite is. Most ferments do sour a bit after being transferred into the fridge too, keep that in mind.